• MAIN //
  • HOME DECOR //
  • AMAZON //
  • TIKTOK //
  • SHOP MY INSTAGRAM //
  • ABOUT //
Menu

Me and Mr. Jones

Street Address
City, State, Zip
Phone Number
A FASHION & LIFESTYLE BLOG

Your Custom Text Here

Me and Mr. Jones

  • MAIN //
  • HOME DECOR //
  • AMAZON //
  • TIKTOK //
  • SHOP MY INSTAGRAM //
  • ABOUT //

DIY FOR LESS: EMBROIDERED GRAPHIC BOYFRIEND TEE

April 26, 2016 Haley Jones
Old Navy Boyfriend Pocket Tee with DIY Embroidered Graphic, Fun Fashion DIY!

Graphic tees are so cute, but sometimes a subtle message might be what you're looking for.  Don't get me wrong, I love a good graphic tee but they aren't always work appropriate even on a casual Friday.  This DIY boasts a personalized alternative and will take your casual tee to a new level of chic!  Keep reading to learn how to create one of your own!

Old Navy Boyfriend Pocket Tee with DIY Embroidered Graphic, Fun Fashion DIY! Casual Weekend Outfit.
Old Navy Boyfriend Pocket Tee with DIY Embroidered Graphic, Fun Fashion DIY!

WHAT YOU WILL NEED:

1.  Old Navy Boyfriend Pocket Tee

2. Embroidery Floss

3. Embroidery Needle

4. Disappearing Ink Pen

Old Navy Boyfriend Pocket Tee with DIY Embroidered Graphic, Fun Fashion DIY!

DIRECTIONS:

1. Decide what word or phrase you want to add to the pocket of your boyfriend tee.  You can also download this template for more ideas!

2. Print the phrase on white paper.  

3.  Cut the word/phrase out so it fits into the pocket of your boyfriend tee.

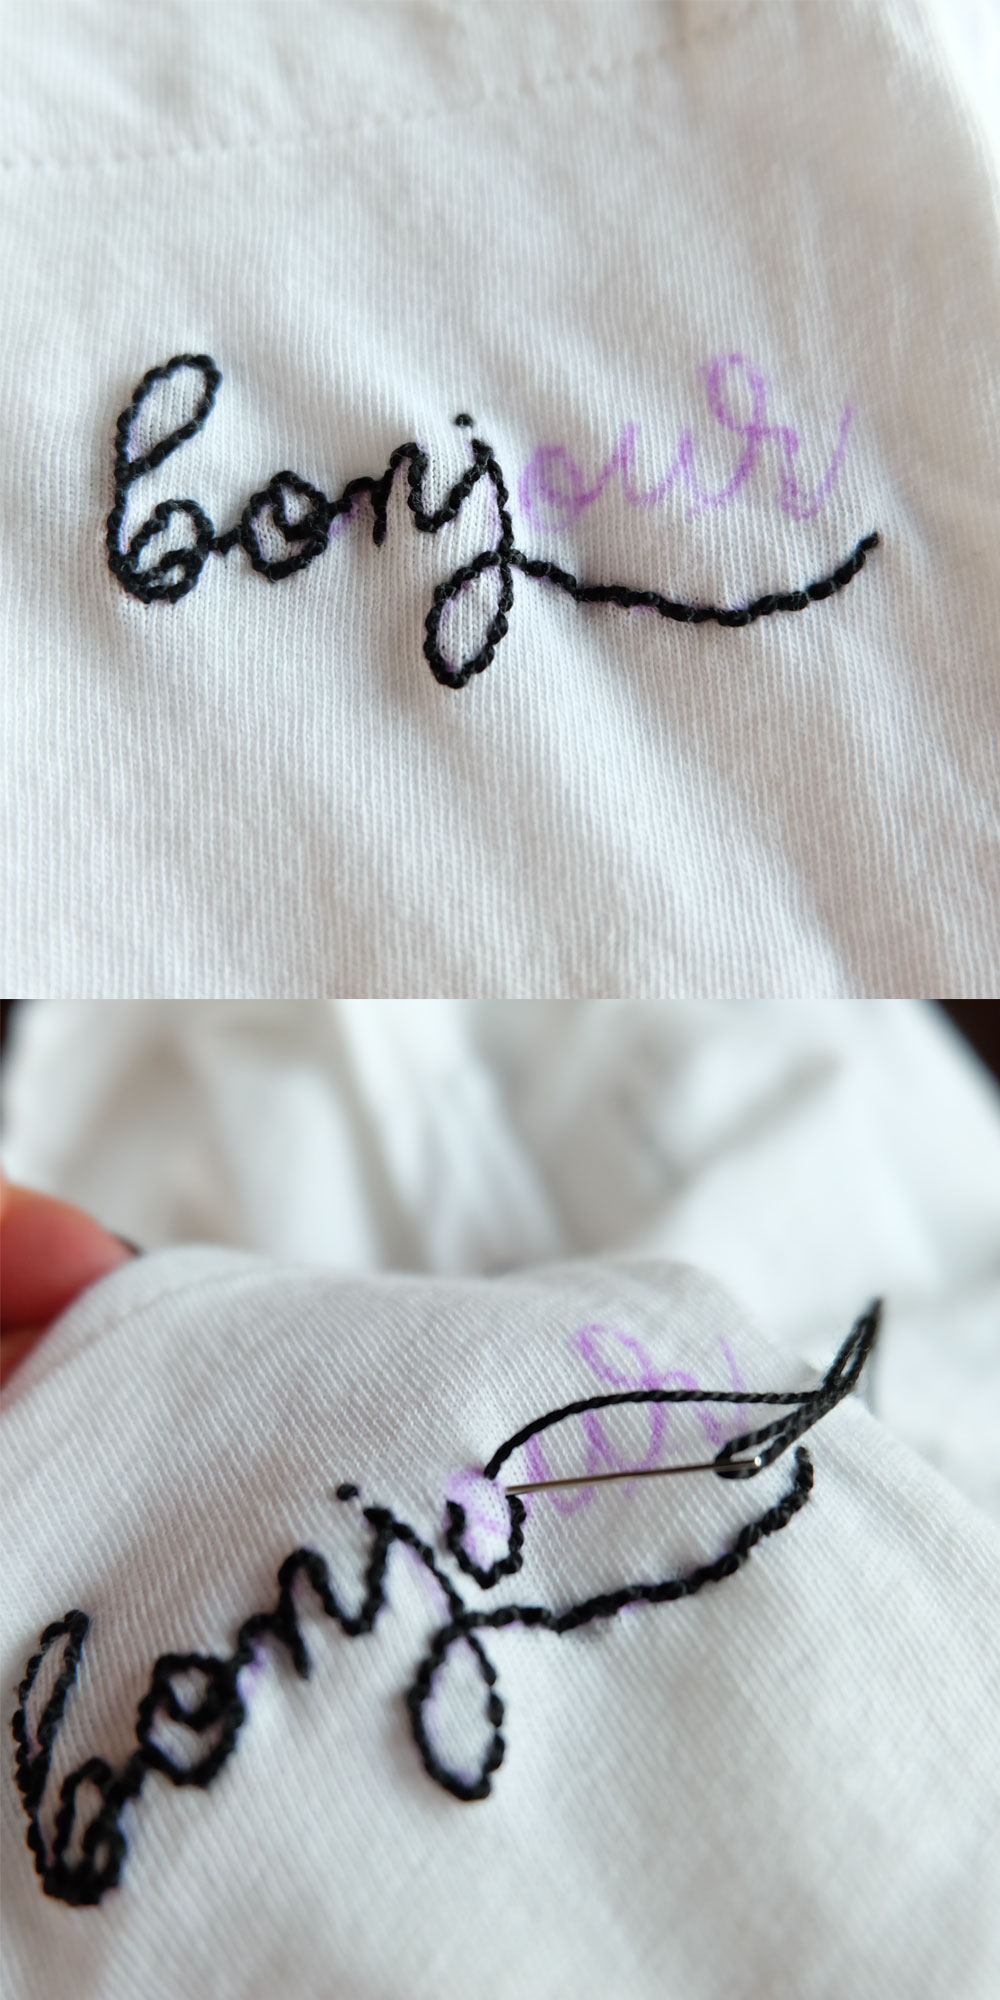
4.  Using the disappearing ink marker, trace the word or phrase.  Make sure the lines are dark so they don't evaporate before you're done embroidering.

5.  Cut a piece of embroidery floss.  For this word I used a 3' piece to make sure I didn't run out mid-word. 

Old Navy Boyfriend Pocket Tee with DIY Embroidered Graphic, Fun Fashion DIY!

6.  Tie two knots at the end (the second knot should tie on top of the first).

7. Start at the beginning of the first letter with the knot on the back side of the pocket.  

8.  Use a backstitch to complete the letter or phrase on your boyfriend tee.  Not familiar with the backstitch?  Not to worry, there is a great YouTube tutorial here!

Old Navy Boyfriend Pocket Tee with DIY Embroidered Graphic, Fun Fashion DIY!

Even if you aren't a big seamstress, don't let this simple DIY project deter you!  Here are some more tips to make sure you get your embroidered word or phrase perfect:

  • The stitches don't have to be evenly spaced, just don't make any too long especially on a section with a curved line.
  • Use smaller stitches on the curved sections to help the lines look more smooth.
  • Thread your needle through one of the loops on the back side of the pocket before knotting off the thread.
  • When knotting the thread at the end of your word, make sure not to pull the thread too tight.  You don't want to pull the thread from the front because it will gather the fabric in between the stitches.  

I hope you are inspired by this DIY and I would love to see what you come up with!  If you post a picture on Instagram, tag me and use #MAMJdiy!  

Have a beautiful day!

Similar Posts:
DIY CHECKERBOARD PLANTER //
DIY CHECKERBOARD ARTWORK //
MAKE YOUR FAUX PLANTS LOOK EXPENSIVE WITH THIS EASY DIY
MODERN SCONCES WITH PUCK LIGHTS //
BLACK AND WHITE ABSTRACT ART DIY //
DIY ABSTRACT ART INSPIRED BY ANDY BLANK //
THE BEST MATTE BLACK SPRAY PAINT AND PAINT(S) //
HOW TO PAINT FURNITURE MATTE BLACK //
DIY DESK FOR A SMALL SPACE OFFICE //
STYLISH SOLUTIONS FOR AWKWARD ENTRYWAY SPACES


In Boyfriend Shirt, DIY, Embroidery
← BURN SERIOUS CALORIES AND GET THINGS DONE SIMULTANEOUSLY!MAKE A STATEMENT IN STRIPES →

Keep Up With The Joneses

Sign up with your email address to receive news and updates!

Thank you!

Powered by Squarespace