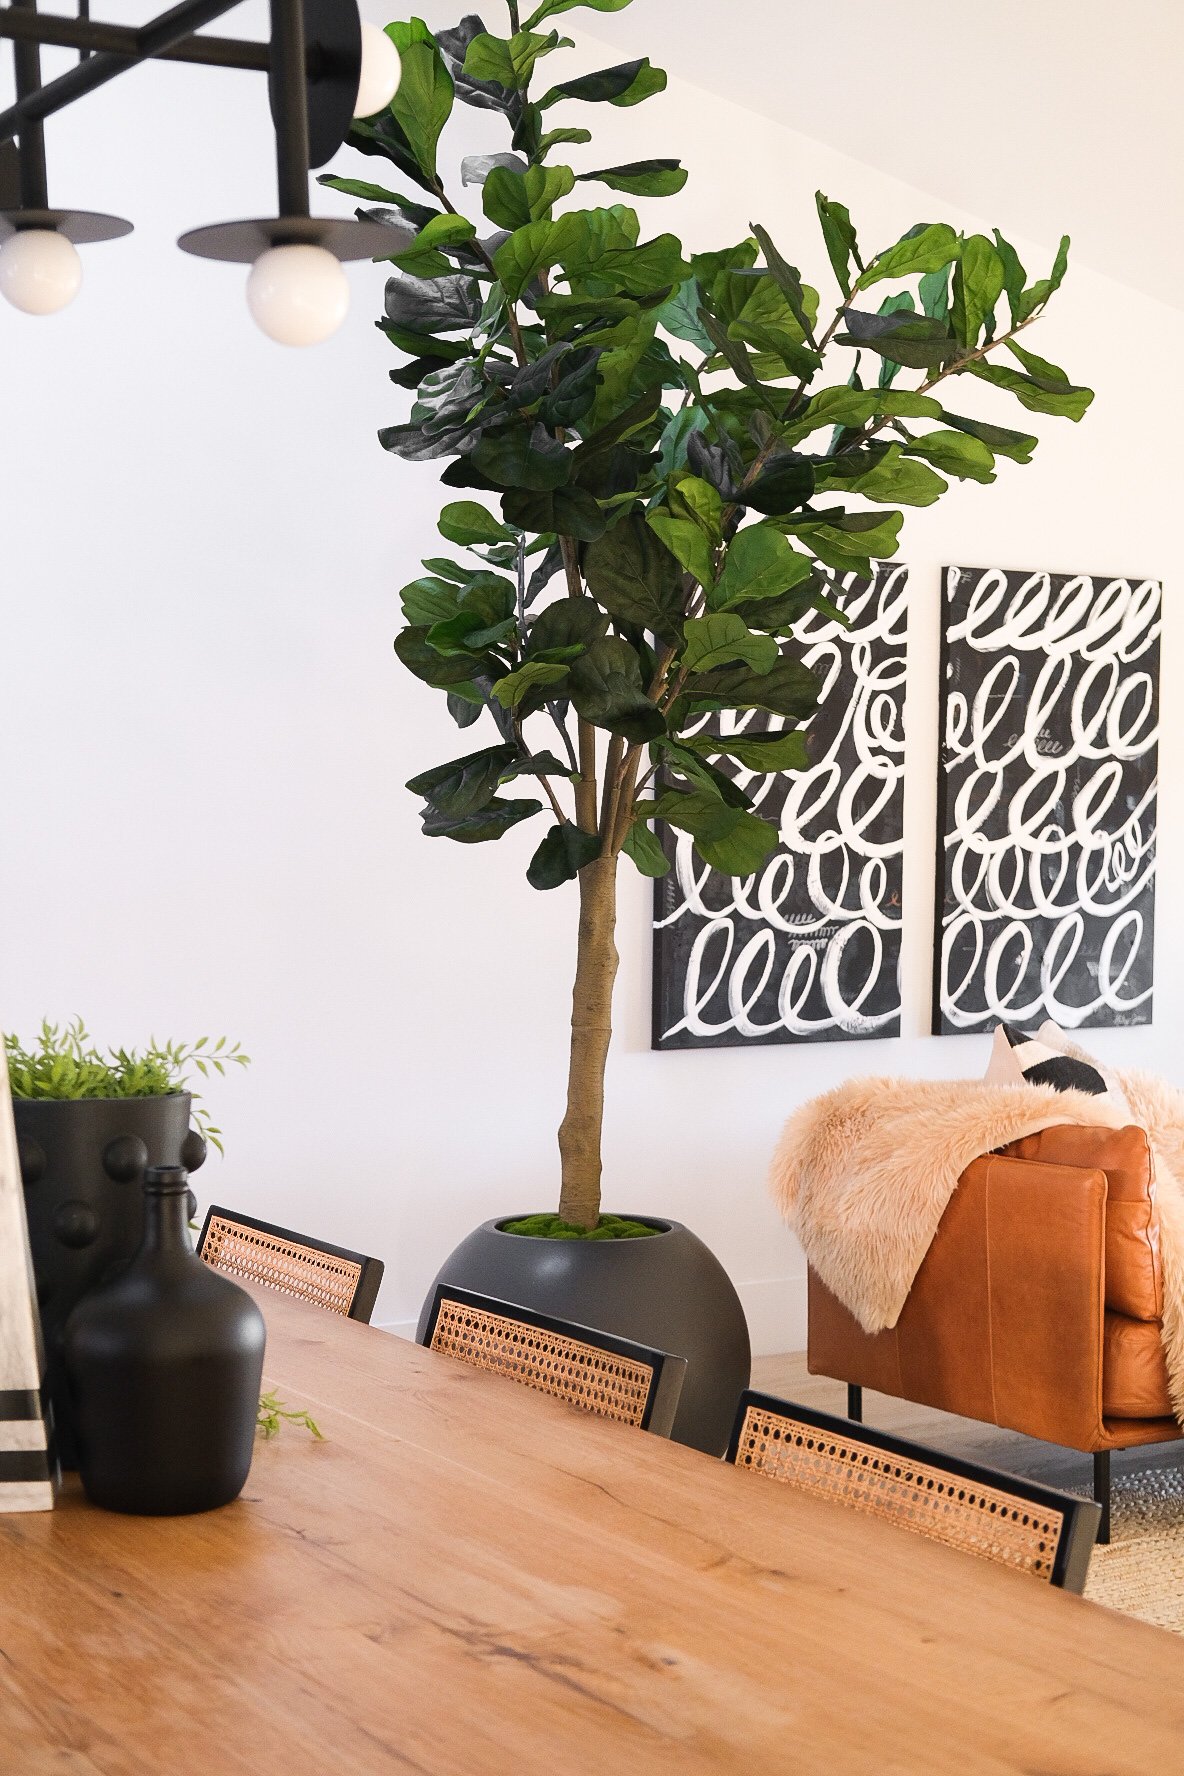
This DIY has been so popular on Tiktok and Instagram, I wanted to share it in more detail here! I added faux moss to several planters in our home and it makes the faux plants look SO MUCH BETTER! It gives them that Restoration Hardware feel without the price tag and the worry of having to spritz real moss every day. Keep reading to see how you can recreate this with your faux plants at home!
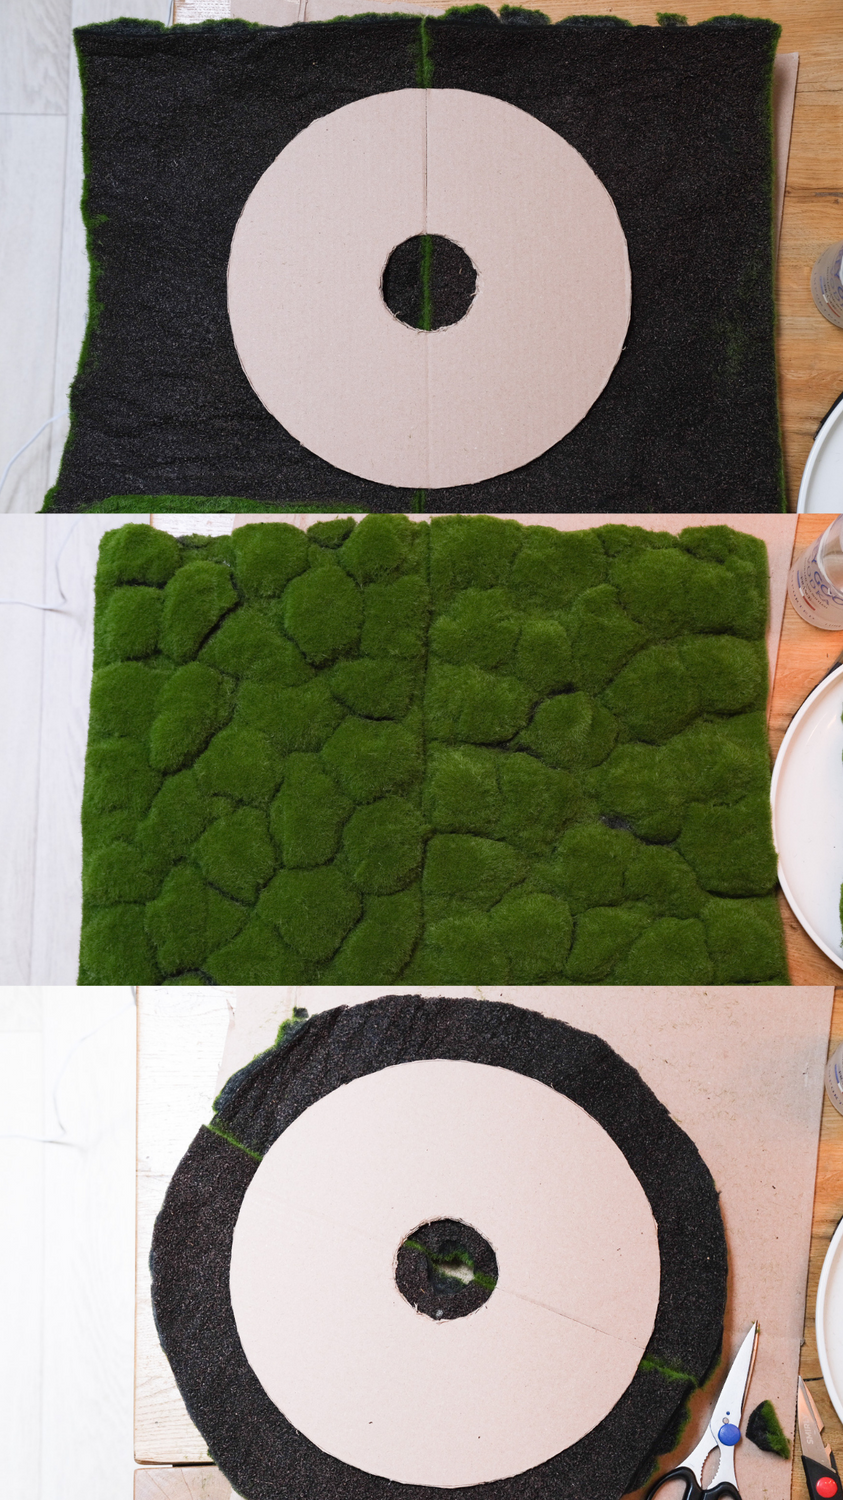
Measure the circumference of your planter at the opening. For the sphere planter, I used a round tray I had that was the perfect size as a template. You could also use a bowl!
Trace your tray or bowl onto the cardboard.
Draw a small circle in the center of your cardboard that’s the same circumference as your faux tree’s base.
Draw a straight line from the exterior of the circle to the center of the circle. This cut allows you to get the entire piece around the faux tree once assembled!
Cut out the cardboard.
Hot glue two pieces of moss mat onto the cardboard. You want the pieces to meet where your straight cut is on the circle.
Trim the excess moss mat, I left a little extra on the edges.
Slide the moss mat piece onto the faux tree and into the planter. You’re done!