
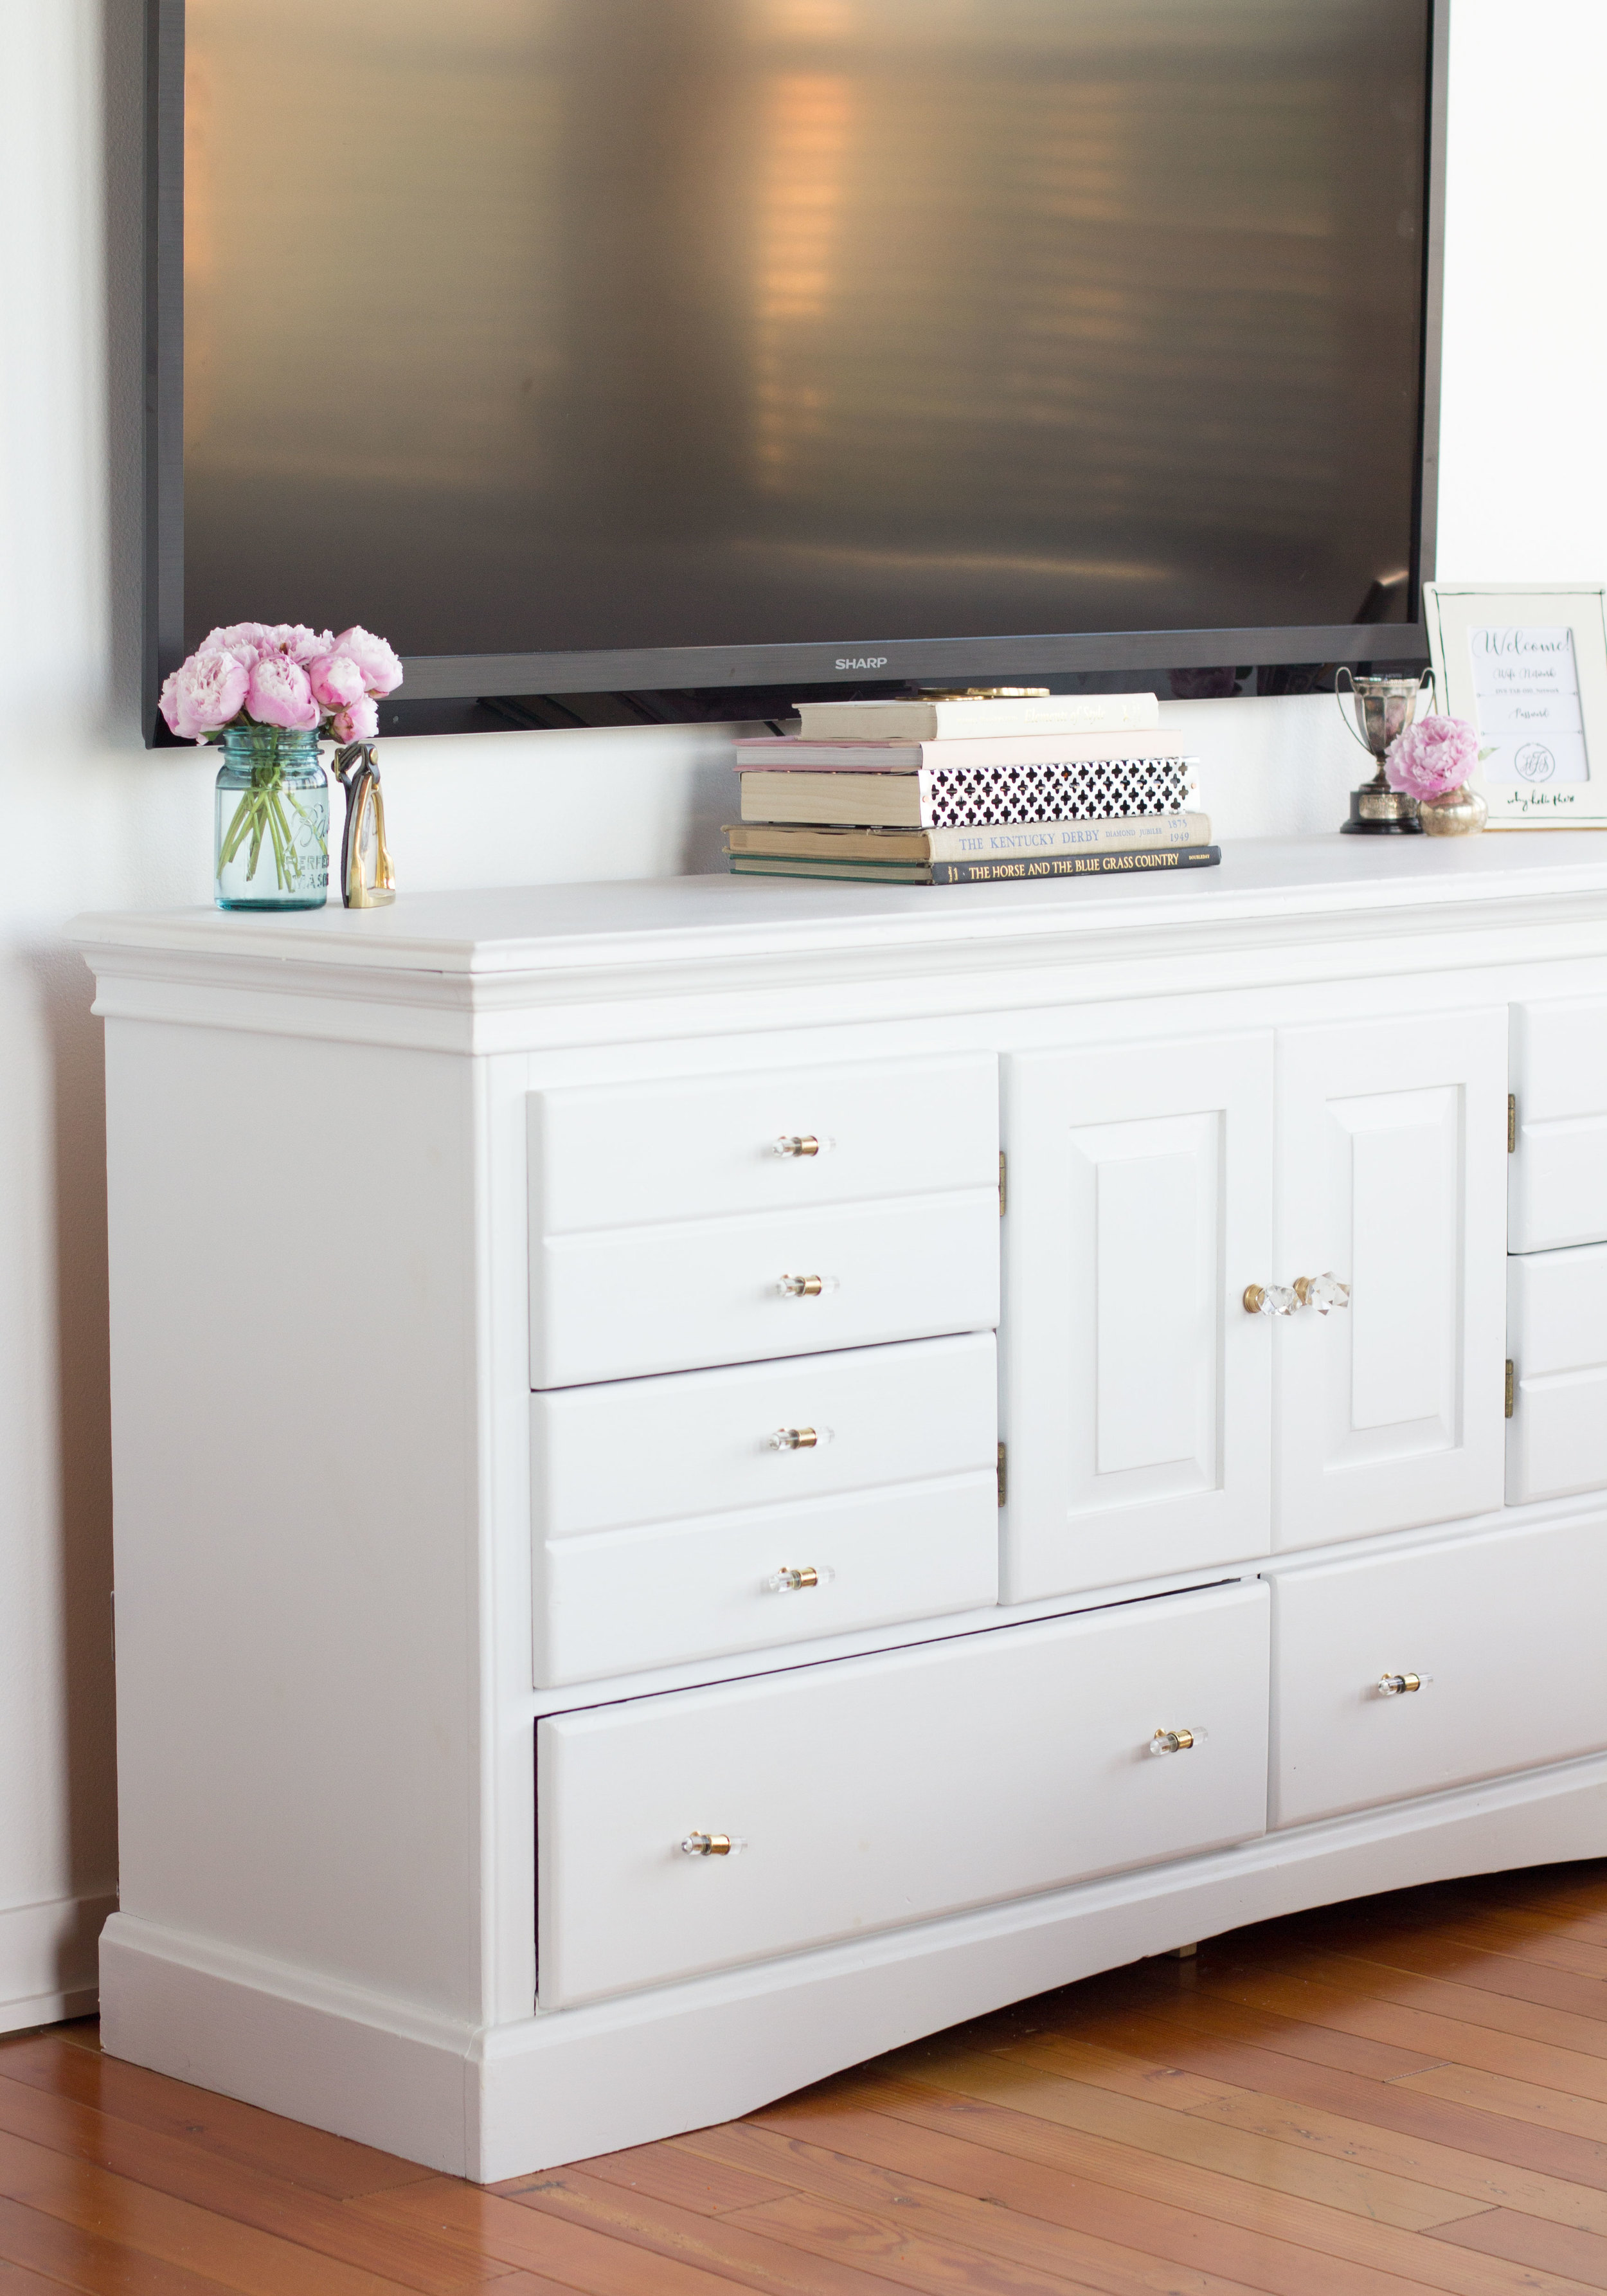
Every time we move, we make small improvements to our space by learning from our mistakes in our previous home. Sometimes we finally come to a breaking point with these little problems and are forced to come up with a creative solution. This was the case when we moved in May- there was absolutely no way I was going to mount the TV without hiding the cords (seriously, why can't everything be wireless?)! Today I'm sharing the simple (and cute!) solution I came up with to hide these pesky cables and a DIY to cover your cable box because lets face it- those are really ugly too!
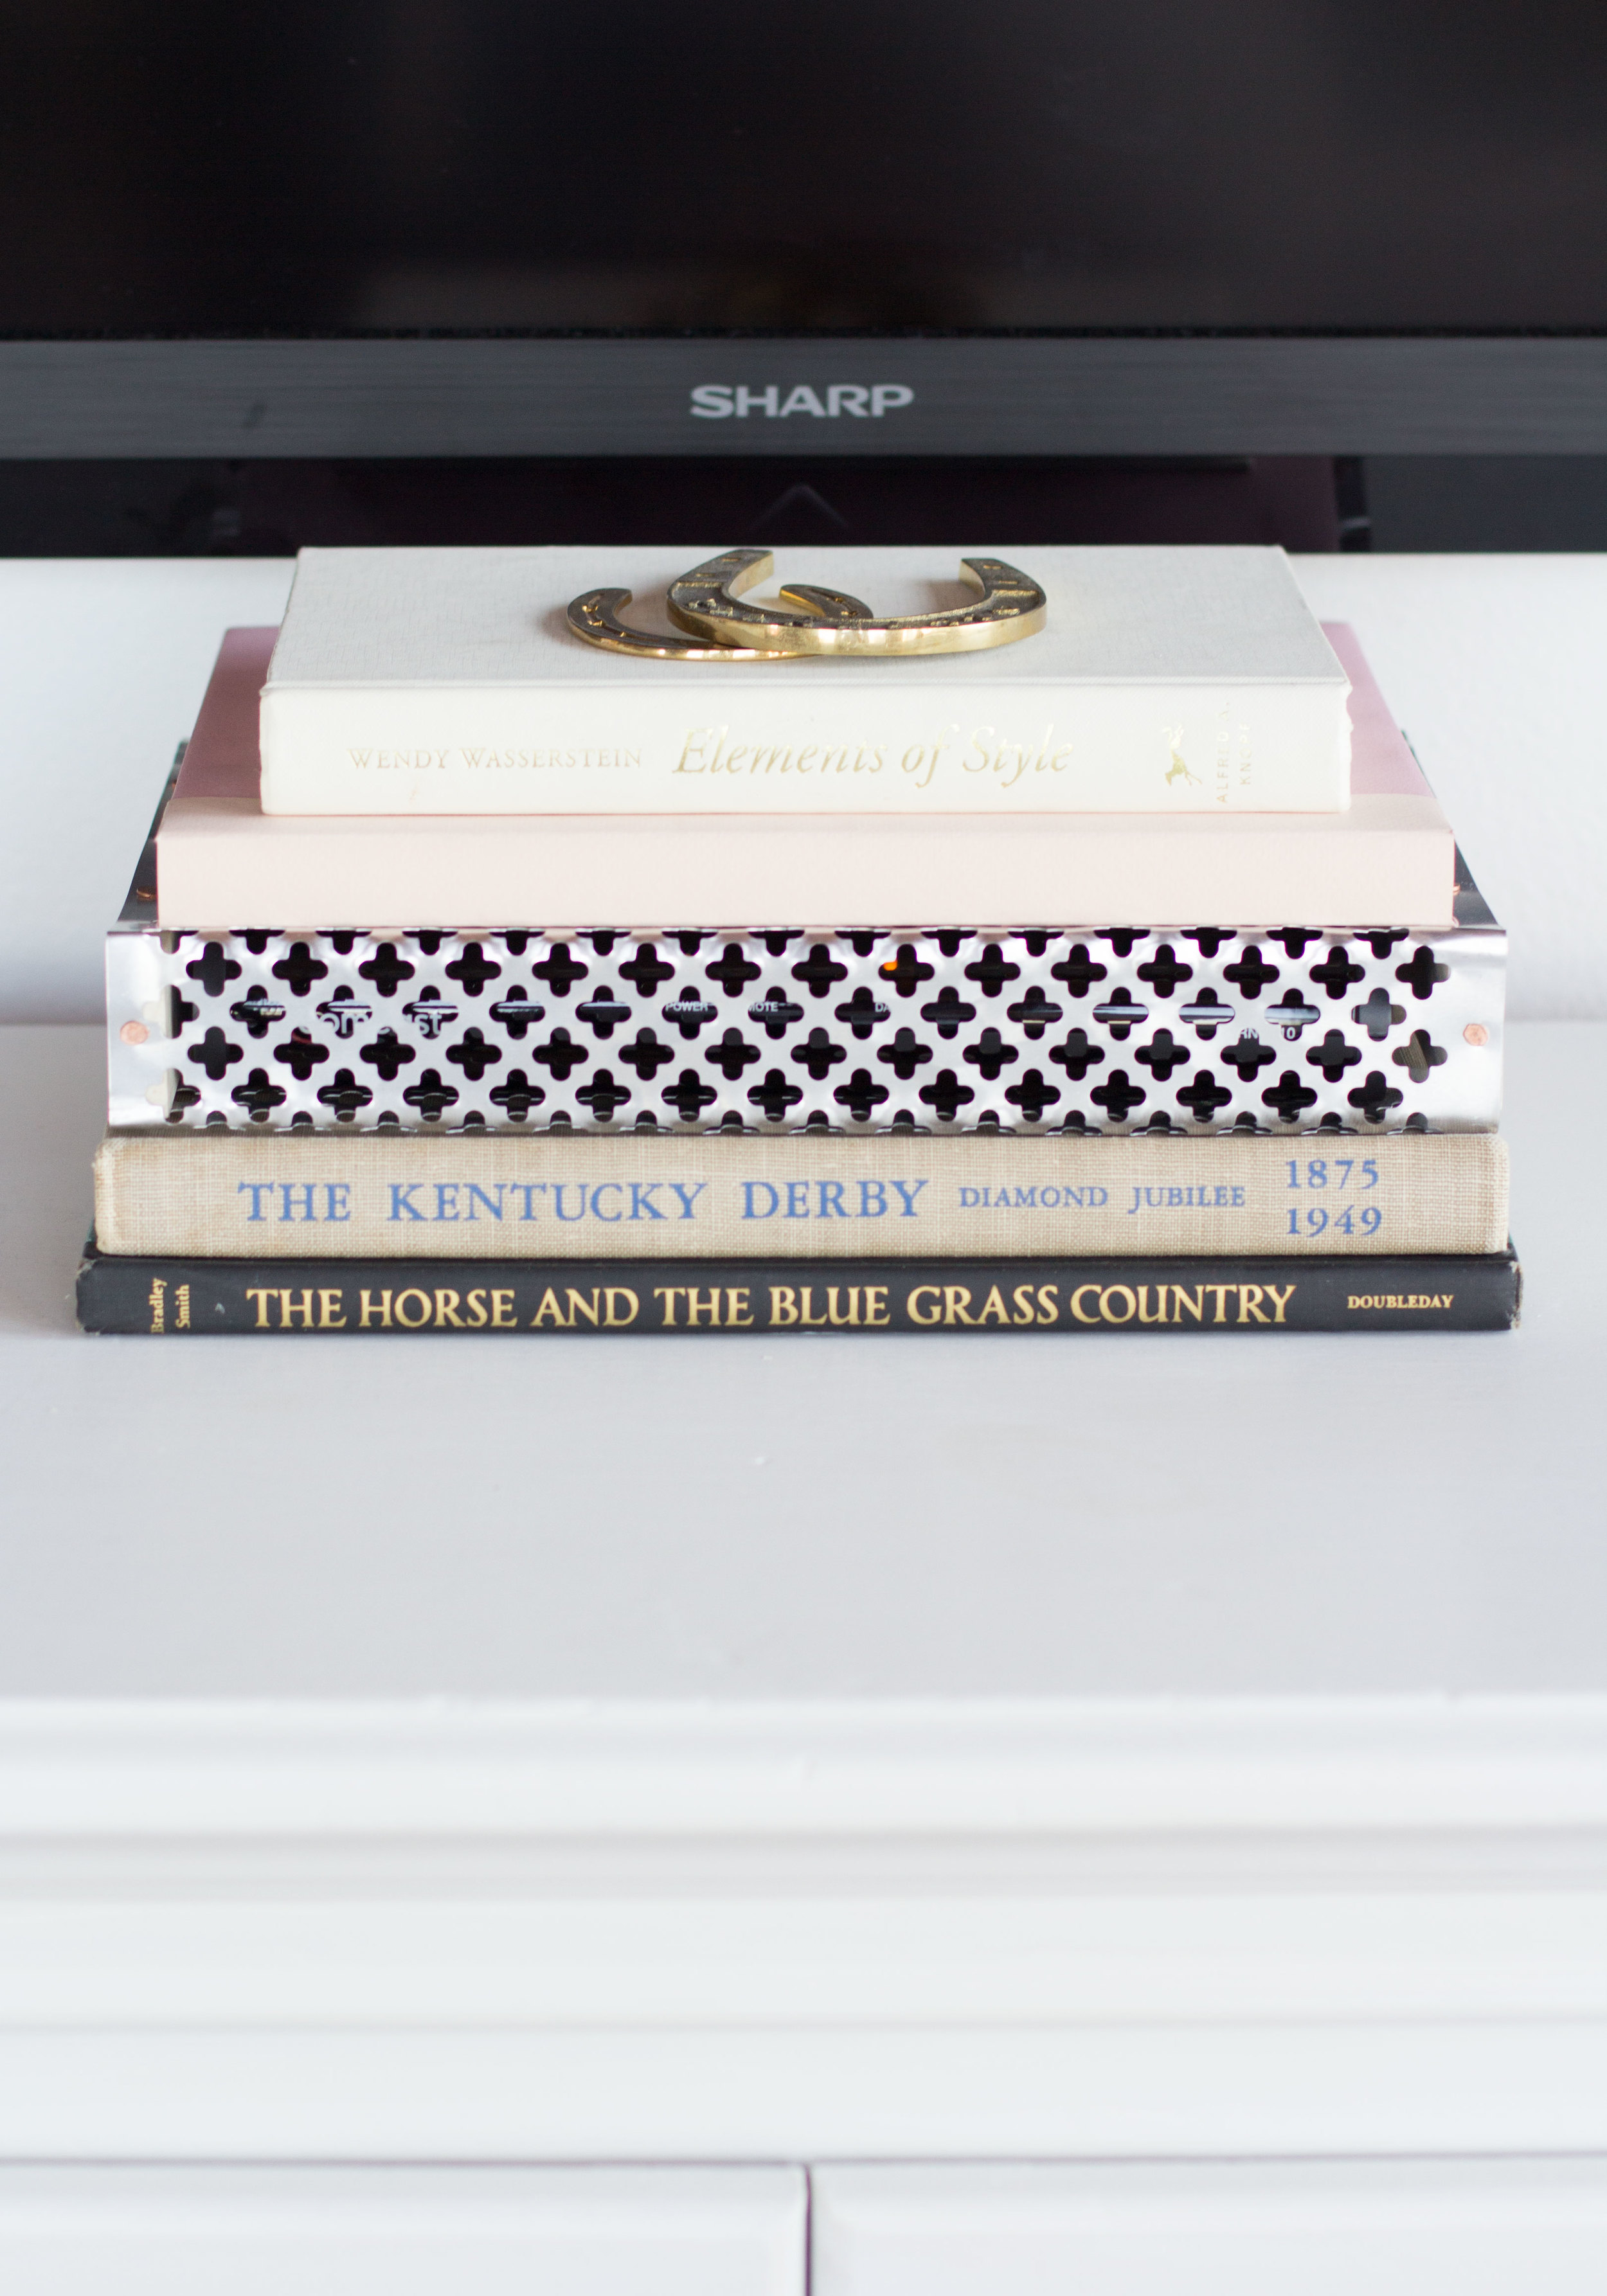


HIDING THE CORDS:
The solution to hiding the cords/cables was an easy one. First, gather all of the cords together and fasten them with a black zip tie. Once the cords are secure, use small wire cutters to snip the tail of the zip tie so that it isn't visible. You can also use scissors to do this, it's just a little bit easier with wire cutters.

Next, sort through your hardback books (most of ours are decorative if I'm being honest) and pick a few that are wider than your cable box, and a few that are more narrow. If you don't have any hardback books or need some more, Goodwill always has an amazing assortment. I always just grab ones with titles I like or colors that fit my decor! Next, stack different books with the cable box until you find the perfect assortment. The goal is to have a stack that hides the cords and doesn't cover any of the TV screen or any controls like the power button.

Our cable box ended up being in the middle of the books and after a few weeks, I couldn't stand how it looked. The cable box was sticking out like a sore thumb and I couldn't help but get creative! Just an FYI: the DIY cable box cover doesn't interfere with the remote! Keep reading for instructions to DIY your own pretty little cable box cover!

WHAT YOU'LL NEED:
1. Decorative Aluminum Sheet. I purchased this pattern, but there are so many to choose from! Take a look at the elliptical, Union Jack, and Mosaic patterns!
2. 1 red oak board. I purchased this one, but you'll have to measure the height of your cable box to make sure this one will work.
3. Copper tacks.
4. Pliers.
5. Really sharp scissors. I used the ones that I keep in my toolbox from the hardware store so I wouldn't ruin my cute gold pair!
6. Pencil.
7. Ruler- I use this transparent one for almost every project I do- it's amazing because you can get a super accurate measurement and see what you're doing- #bingo!
8. Sanding block or sand paper.
9. Optional: Drill bit set and power drill.

DIRECTIONS:
1. Measure the depth of your cable box.
2. Using this measurement, mark and cut your board. Use a sanding block to smooth the edges. The wooden pieces will be the sides of the cable box cover.
3. Using the transparent ruler and a pencil, measure and mark 3" from the edge of the aluminum sheet. Next, use a book or something with a hard edge to bend the aluminum at a 90 degree angle along the line that you marked.
4. Repeat step 3. The measurement you will need for this step is the height of your cable box + the width of the oak board. Our cable box was 1.5" high.
5. Add 1" to the depth of your cable box. Use this measurement to measure and mark from the front edge of the cable box cover. Cut along the line.
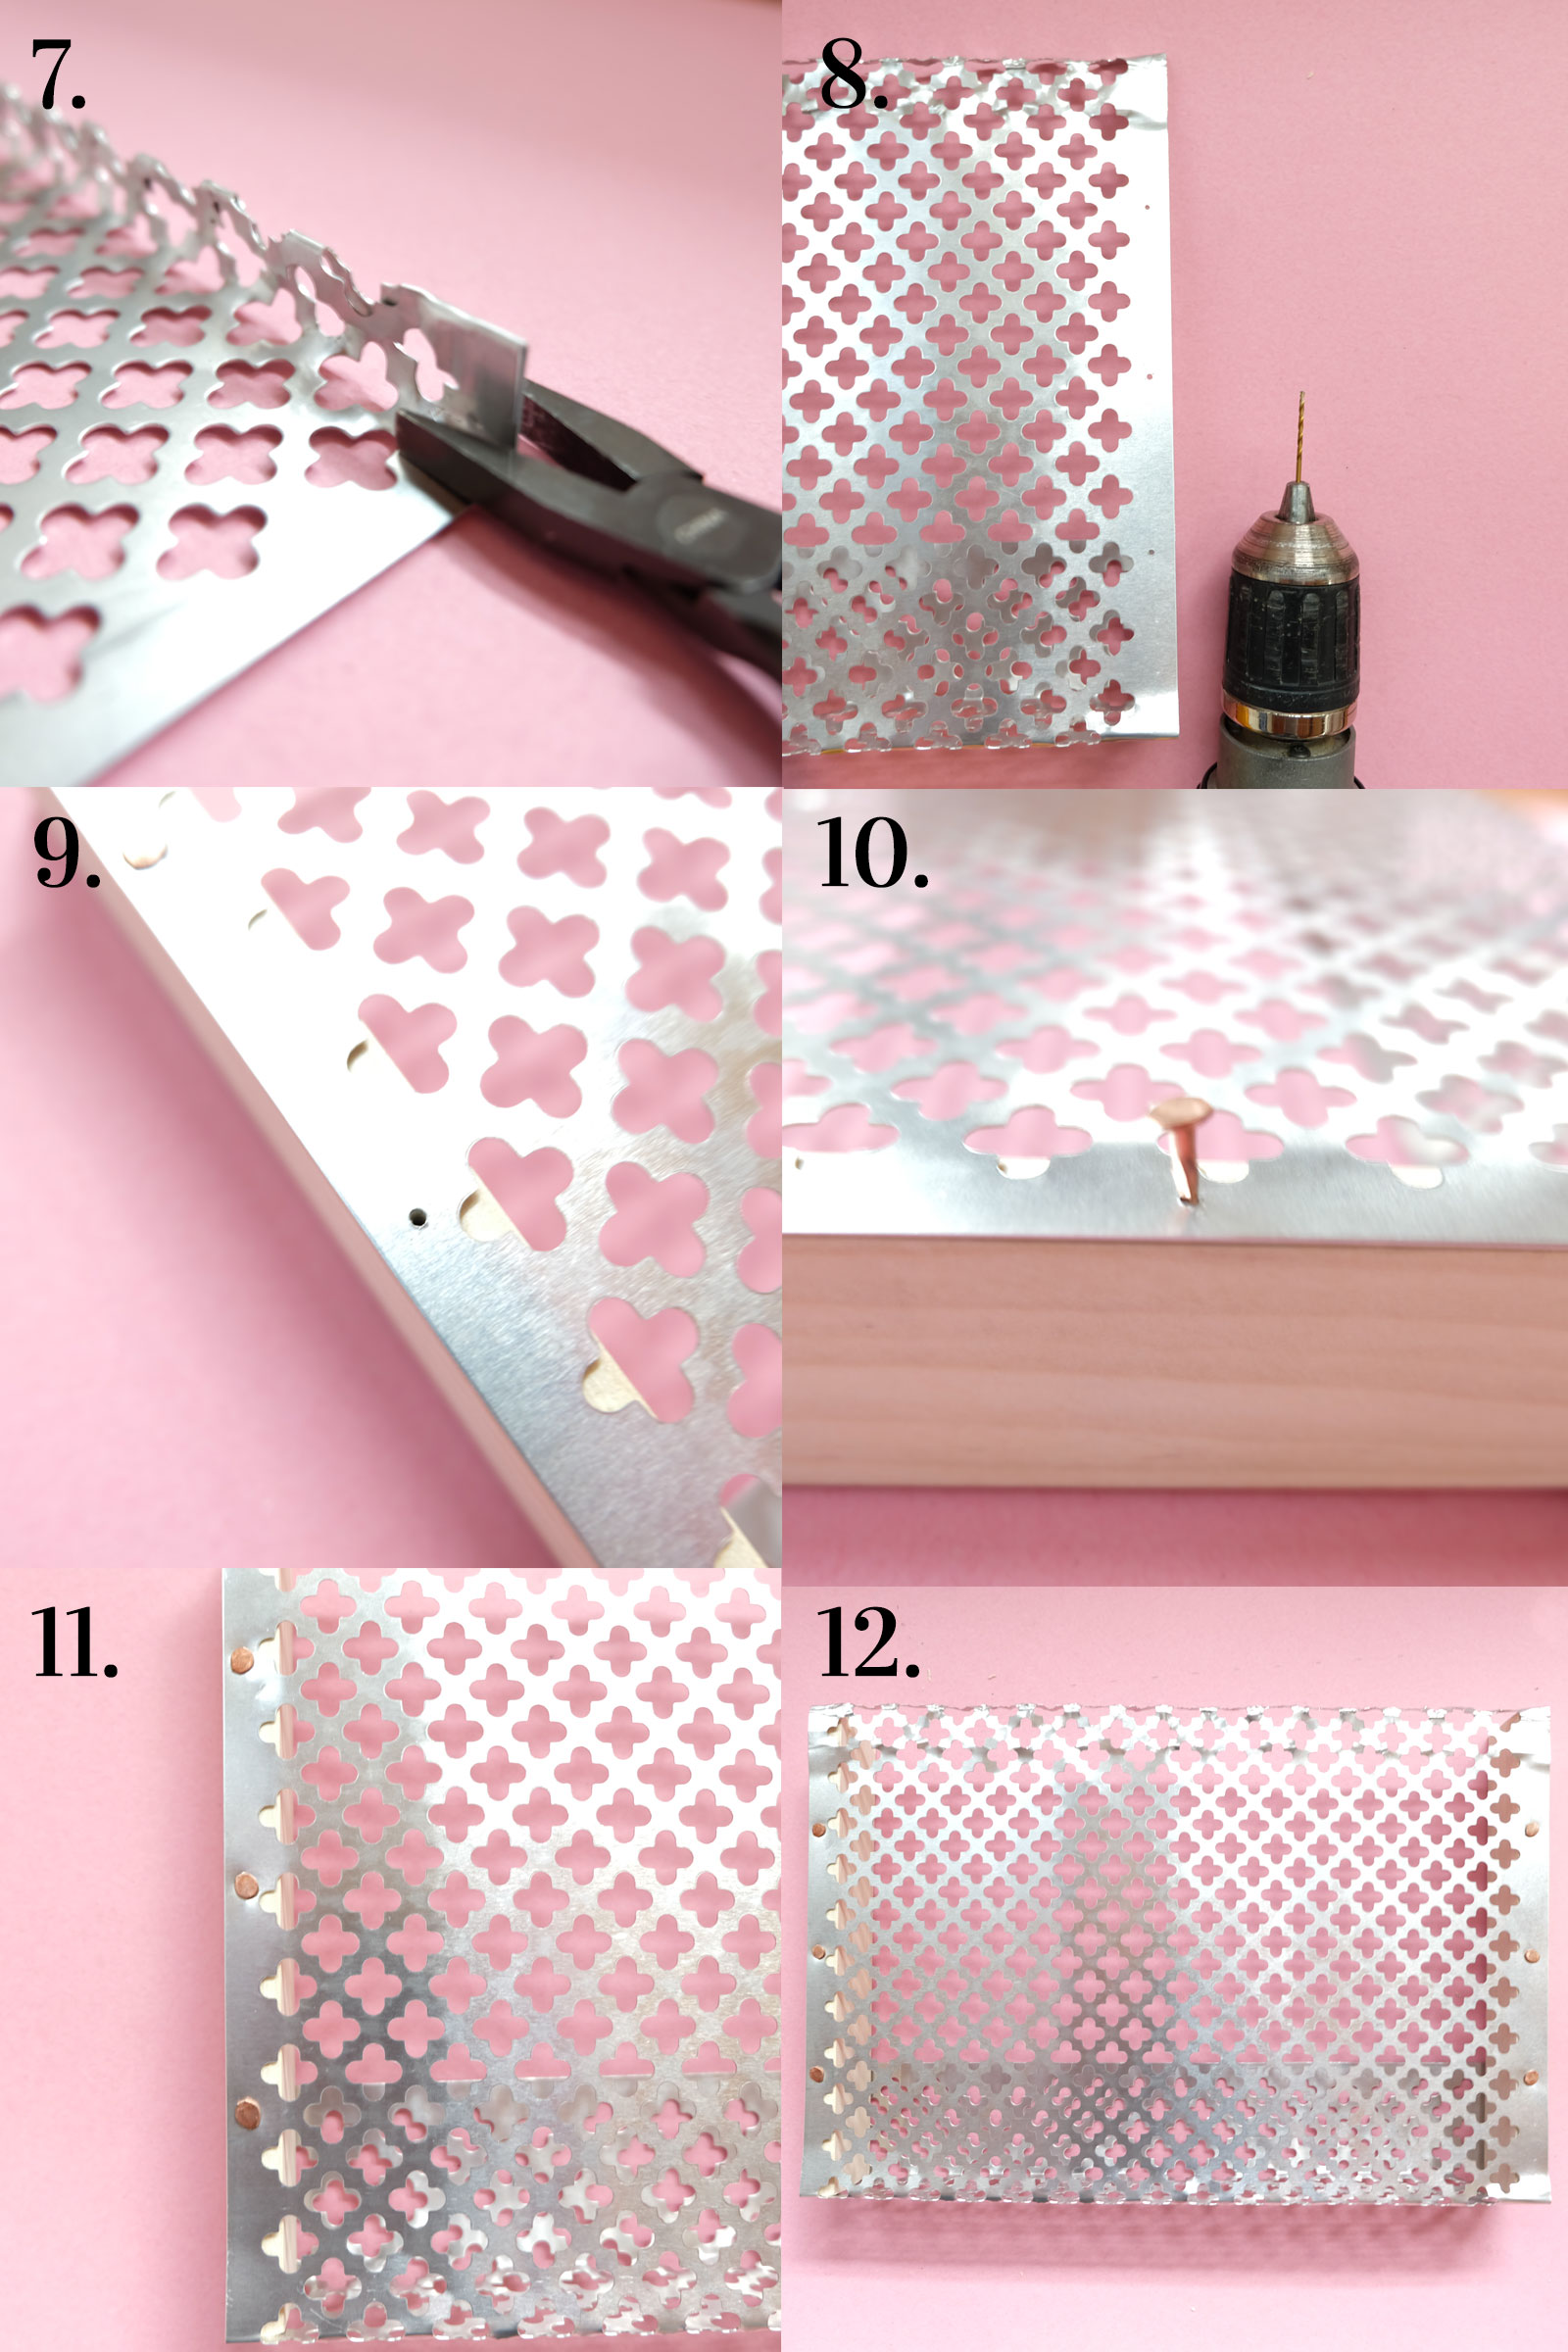
6. Using the pliers, fold the aluminum 1/2" over itself. Bend the aluminum at a 90 degree angle so that the 1/2" piece on the back faces down.

7. Close up of step 6.
8. Optional: Use a power Drill and a very small drill bit to create evenly spaced holes into the aluminum before attaching it to the wood sides using.
9. Optional: Line side board up to the edge of the aluminum. Drill a hole through the wood using the hole in the aluminum as your guide. Step 8 and 9 only make step 10 easier and are not necessary if you don't own a drill or the proper drill bits!
10. Hammer the copper tacks to secure the wood sides to the aluminum cable box cover body.
11. Repeat step 10 until the wooden sides are secure. I didn't use a copper tack on the back side, only one tack on the front (one on each side).
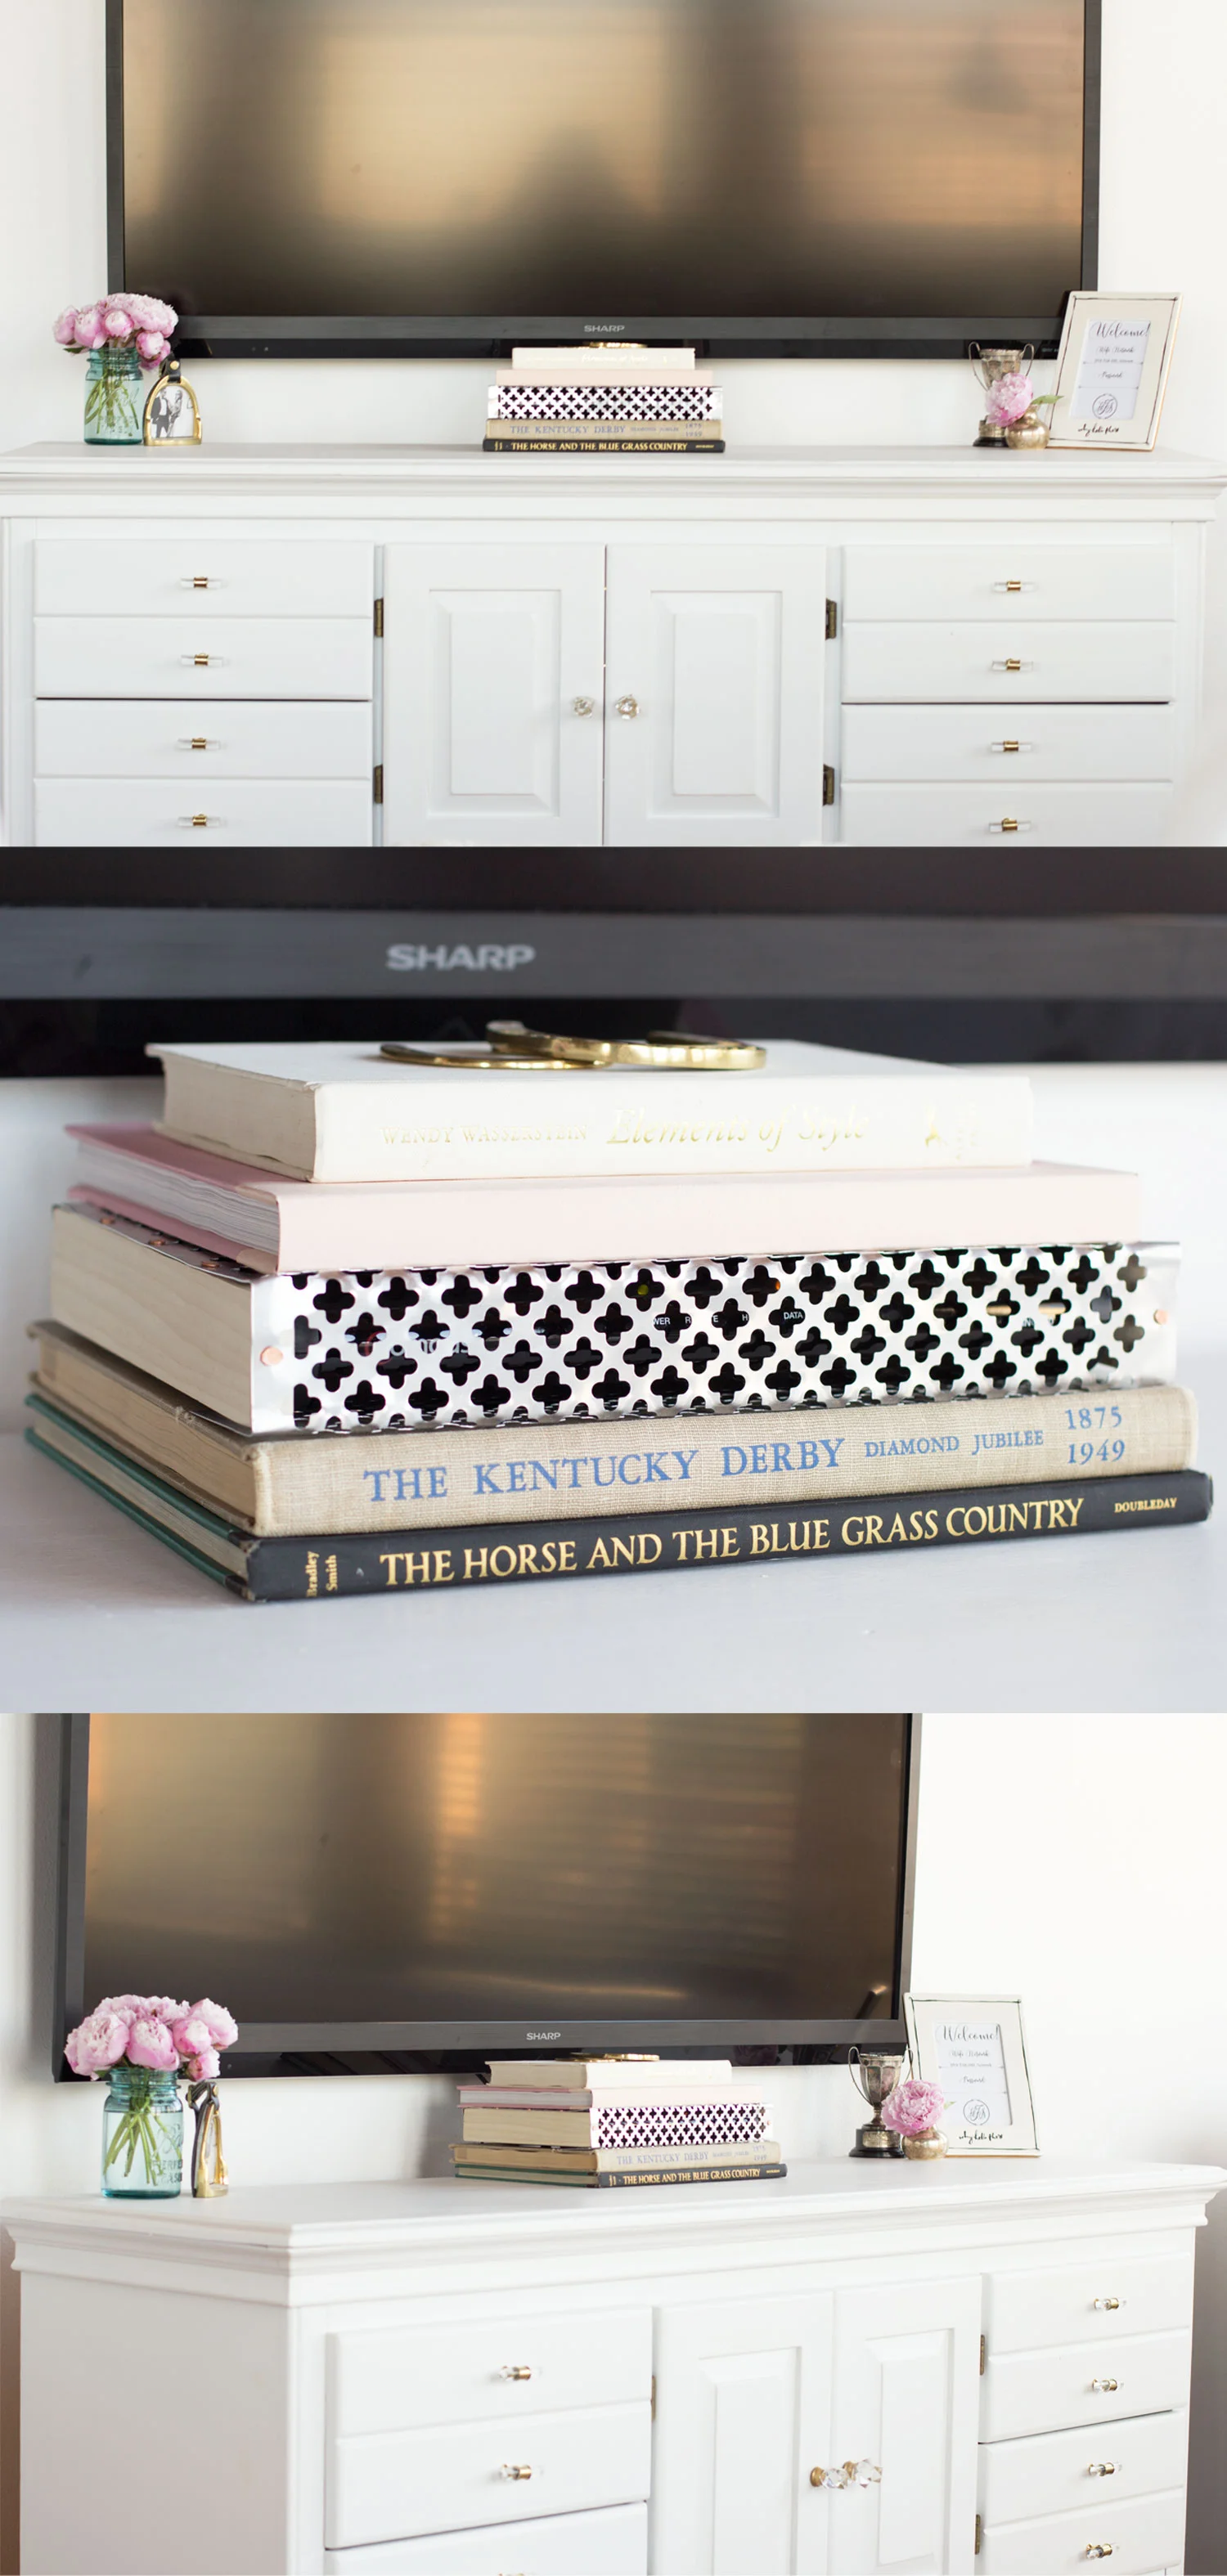
12. Slide the cable box cover over your cable box and style the books below and on top of it!
UPDATE 4/27/2017:
We are still using our cable box cover & it is functioning properly and not overheating! We still have it stacked on top of/below the exact same books and we haven't had any problems! Yay!



It’s that time of year- back to school! I’ll be honest, I get a little sad and nostalgic when it comes to BTS. Another school year means our kids are growing older but it also makes me think of those first day of school jitters and excitement. What it also makes me think of is all of the back to school supplies! I LOVED shopping for school supplies and checking off my list. Filling my desk or locker with all of the goodies- it was so fun! This year I thought- why have I stopped doing this for myself?! I don’t need a whole list of items but it’s a great time to stock up on some home office essentials and re-organize my space to meet the needs of my growing business! So that’s exactly what I did at Walmart!