Messy topknots seem so easy and quick, but that isn’t always the case. The messy ones eventually fall down if you have really long hair, or it just doesn’t look messy enough and a little too polished. I set out on a messy-ish topknot mission about a year ago- I wanted it to stay in/up all day, but not be so ballerina-bun perfect. Friends, I finally figured it out and it only takes 2 minutes or less! Keep reading for all of my must-have products and a video tutorial that will help you achieve the perfect “messy-ish” topknot!

WHAT YOU’LL NEED:
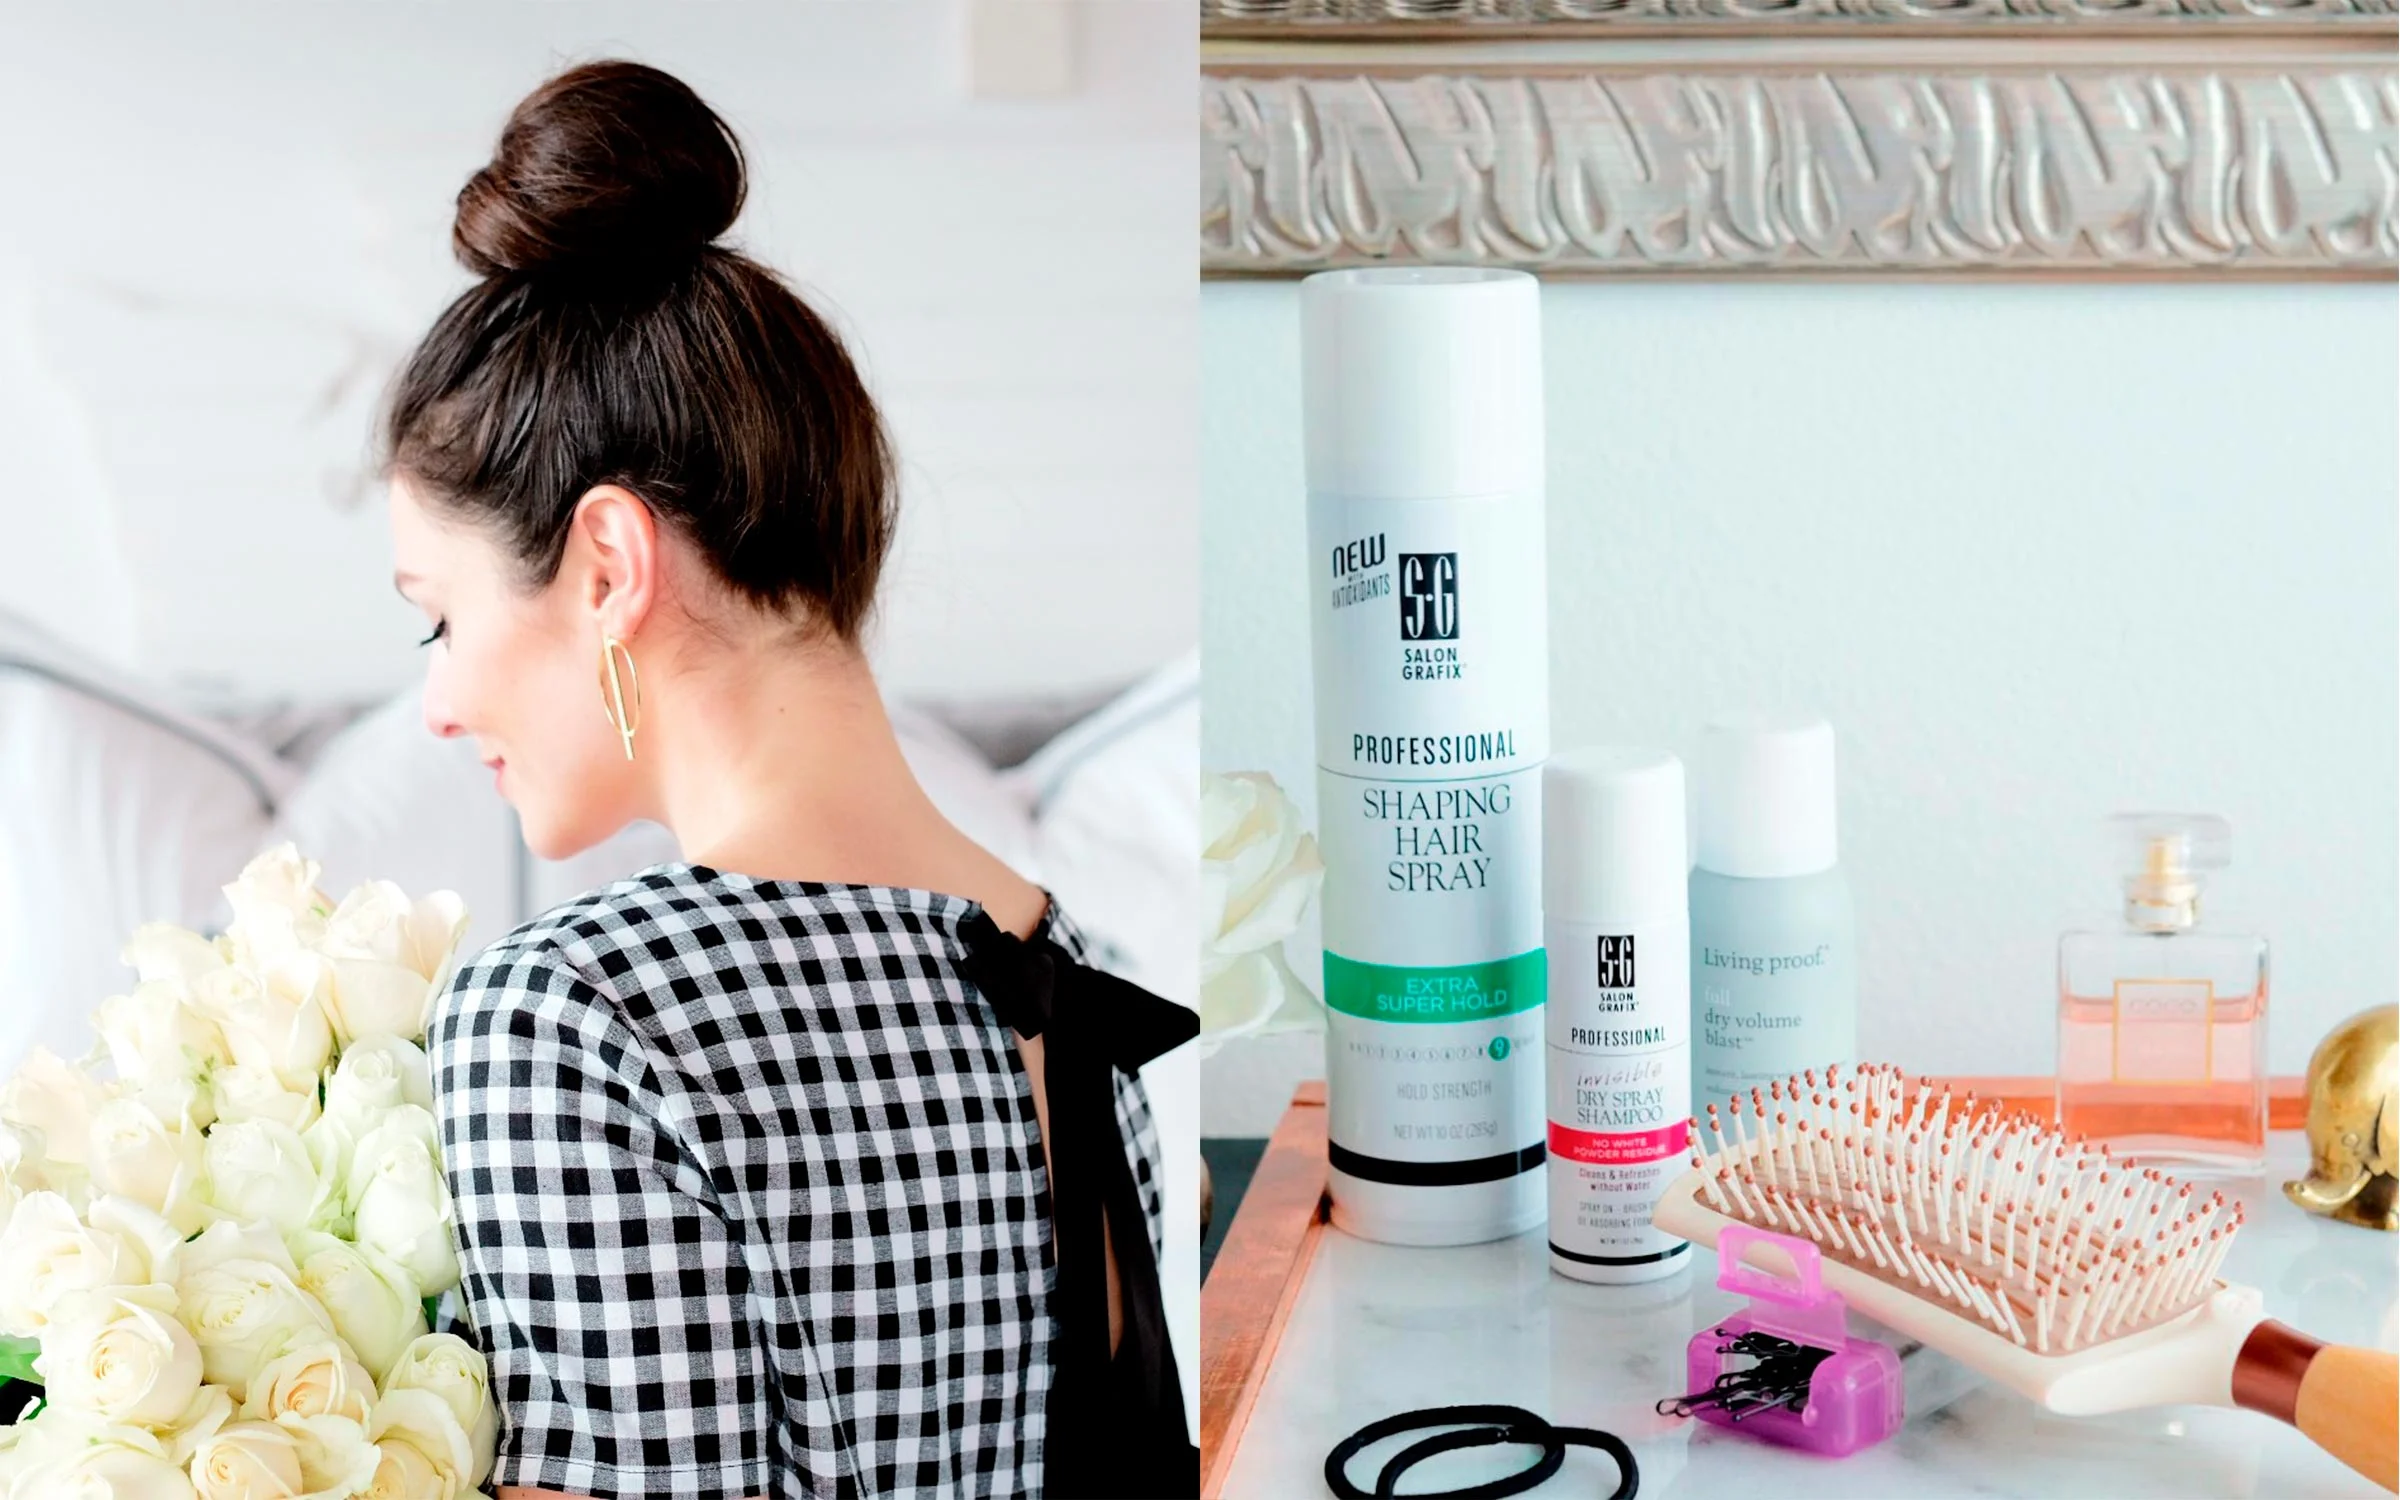
1. Hair Ties. I use two of these hair elastics.
2. Dry Shampoo. This stuff is THE BEST and won’t make you look like a grandma!
3. EcoTools hair brush. This hair brush is so amazing- I love how it brushes out my curls and use it to tease my ponytail before putting it in a bun.
4. Living Proof Full Dry Volume Blast. This stuff is the key to a voluminous ponytail and the perfect topknot!
5. Bobby Pins. You won’t need too many, but I love these that come in a little case.
6. Hair spray for all day hold!

TIPS & TRICKS:
1. Dirty hair? Who cares! This dry shampoo and a topknot will be your best friend on days when you don’t have time to wash your hair or maybe you’re just trying to wash your hair less. Either way, this hair style is perfect!
2. After putting your hair up into a ponytail, first add texture with the Living Proof Full Dry Volume Blast. I section my pony off into 3 parts and spray each piece from top to bottom and then tousle.
3. Next, backcomb your ponytail using the EcoTools paddle brush. You want to have the most volume in the middle section of the ponytail.
4. To create the perfect bun, gently twist your hair while bringing it around the base of your ponytail. This step is crucial! You don’t want to twist it too tight because if you do, your topknot won’t be as big and fluffy.
5. To secure the topknot, first use a hair elastic. You can probably skip this step if your hair isn’t super long or thick!
6. Perfect your messy-ish topknot with bobby pins. I try to use 3-5 bobby pins, when I use more than that the topknot can give me a headache after wearing it all day!
7. Finish your look with hair spray so you can rock your topknot all day!
I hope you enjoyed this topknot hairstyle tutorial! Thank you so much for stopping by and I hope you have the best day!
Xo,
Haley