While Mr. Jones and I plan on replacing the floors in our home at some point, right now we just don't have the budget. The tile floors in both of our bathrooms are SO FUGLY though, so I just couldn't look at it for one more day! That's when I decided to let Jesus take the wheel, bought a tile stencil and just went for it. Keep reading to see the before and after, step by step instructions and a video of the process!


My mom who is the master DIYer and also builds homes even thought I was crazy when I told her that I was going to paint our tile. "YOU'RE GOING TO DO WHAT?!" she said. Well, I'm happy to report that while this process did take about a week to complete, it was totally worth it. We LOVE how it turned out and it hasn't scratched or chipped yet (it's been painted for about 3 weeks now).

The original tile had a yellow tone to it and was killing my black and white interior decor dreams! I love how trendy this tile stencil is, but classic when done in black and white. I read several tutorials online before tackling this project, but decided to post my own since I combined some of the techniques that I read and also made up new ones! Make sure you read through the instructions and tips before starting your own project!


HERE'S WHAT YOU'LL NEED:
2. 409 Multi Surface Cleaner (or something strong enough to get the grime out of your grout).
4. Painter's Tape. I HIGHLY recommend this one, it is more expensive but totally worth it! The paint didn't bleed whatsoever and I kept it on for an entire week before peeling it off.
5. Grout brush
6. Vacuum or broom
7. Tile Stencil
8. Paint Primer. I used the Kilz primer that we already had, but you could even use the white chalk paint because it also soaks into the tile really well!
9. Rustoleum Chalked Paint in Linen White
10. Renaissance Furniture Chalk Paint in Midnight Black
11. Minwax Polycrylic in clear satin or clear matte. I used the clear satin, but had I known there was a matte option I would've bought that one online (it wasn't available at Lowe's or Home Depot).
12. Paint Brush. I used this 2.5" wide angled brush.
13. Sponge Brushes
14. Paper Towels
15. Cutting Mat
16. Tape Measure
17. Rotary Cutter
18. Clean Socks
19. Clean Towel
20. Small Paintbrush
DIRECTIONS:
1. Sweep or vacuum the floor.
2. Clean tile, baseboards, vanity, toilet, and shower with bleach wipes to remove any dust and dirt.
3. Clean grout using 409 and a grout brush.
4. Sand each tile with the sanding block.
5. Wipe floor down once more with bleach wipes and allow it to dry for at least 30 minutes to an hour.
6. Put a damp paper towel in the sink (or bathtub/shower if that is closest to the door) and paint the floor with a thin coat of primer. If you find any dust, dirt, or hair while painting, wipe it off on the damp paper towel (this is really important if you have a dog that sheds)! Close the door and allow the primer to dry. Put a clean towel on the floor outside of the door to block dust, dirt, or hair from getting into the bathroom while the paint dries!
7. Wait 1-2 hours, put on clean socks before entering the bathroom and paint a second coat of primer (making sure there isn't any dust, dirt, or hair in the paint like in step 6).
8. Repeat step 7.
9. After letting primer dry, paint one coat of polycrylic and let dry overnight.
10. Repeat step 9.
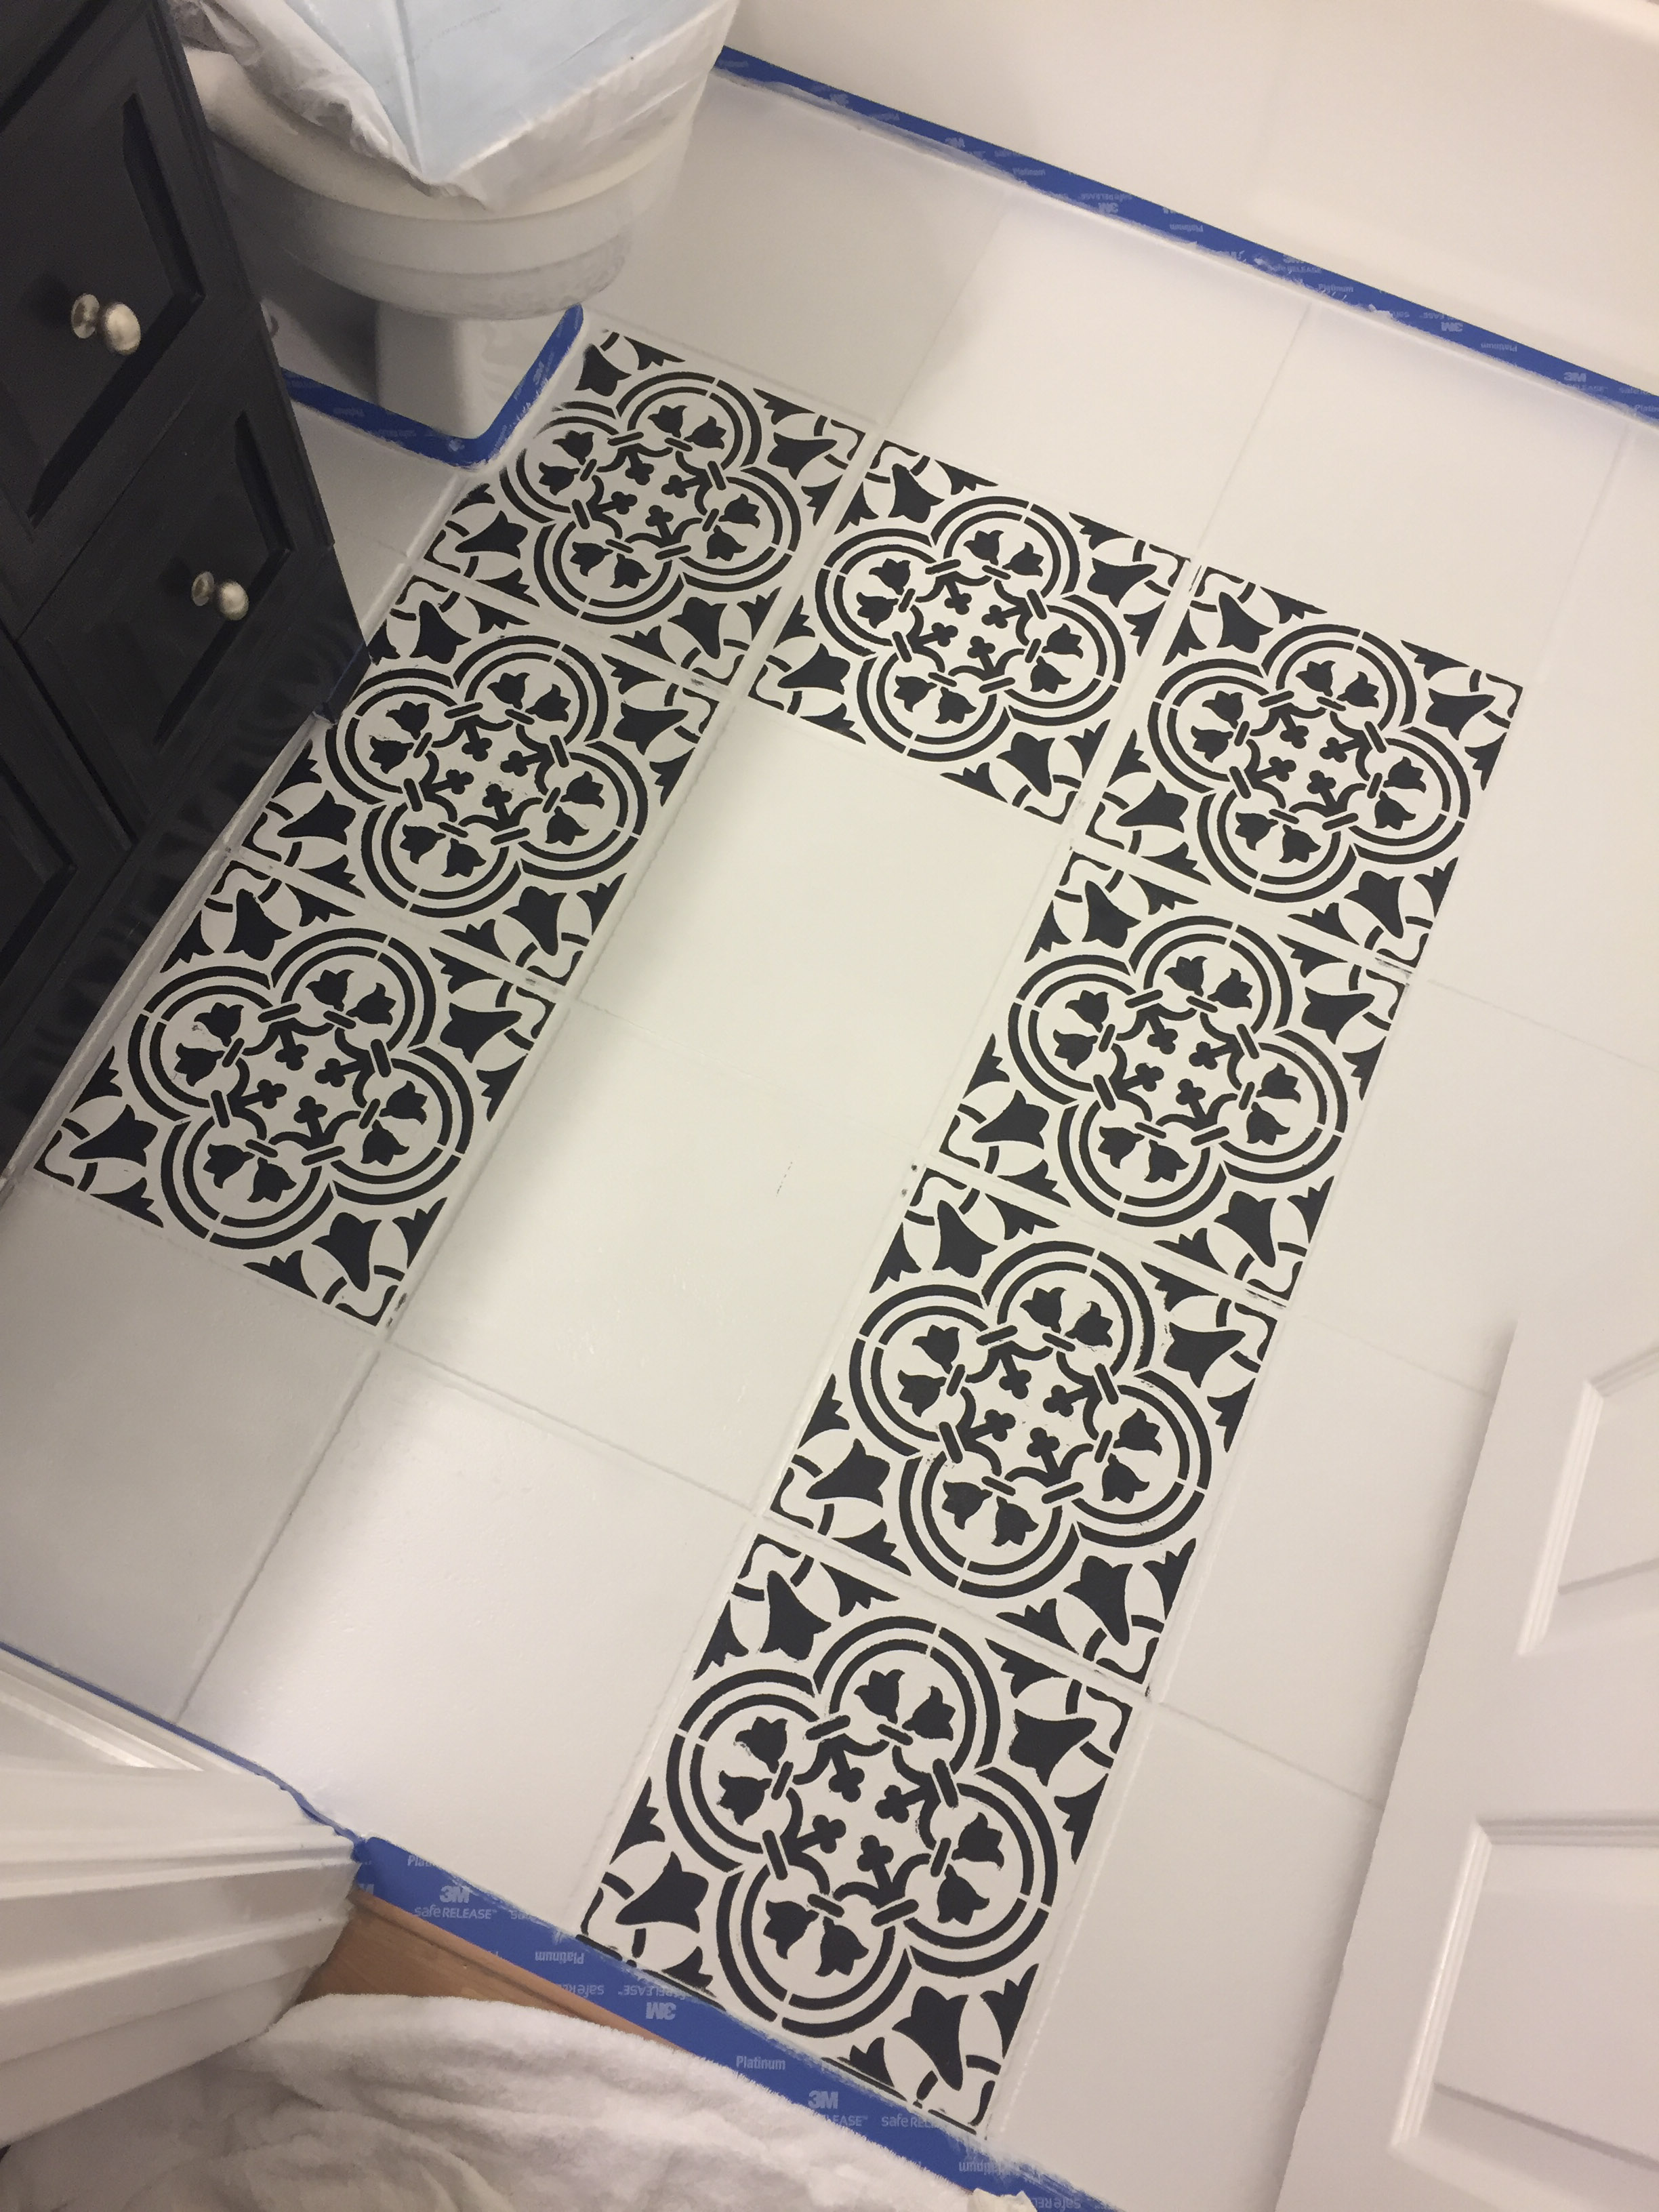
11. Stencil full size tiles first with black chalk paint. Use two small pieces of painters tape to keep the stencil in place. Our bathroom was small, so I was only able to stencil about 3 at a time because you can't let the stencil overlap wet tiles.
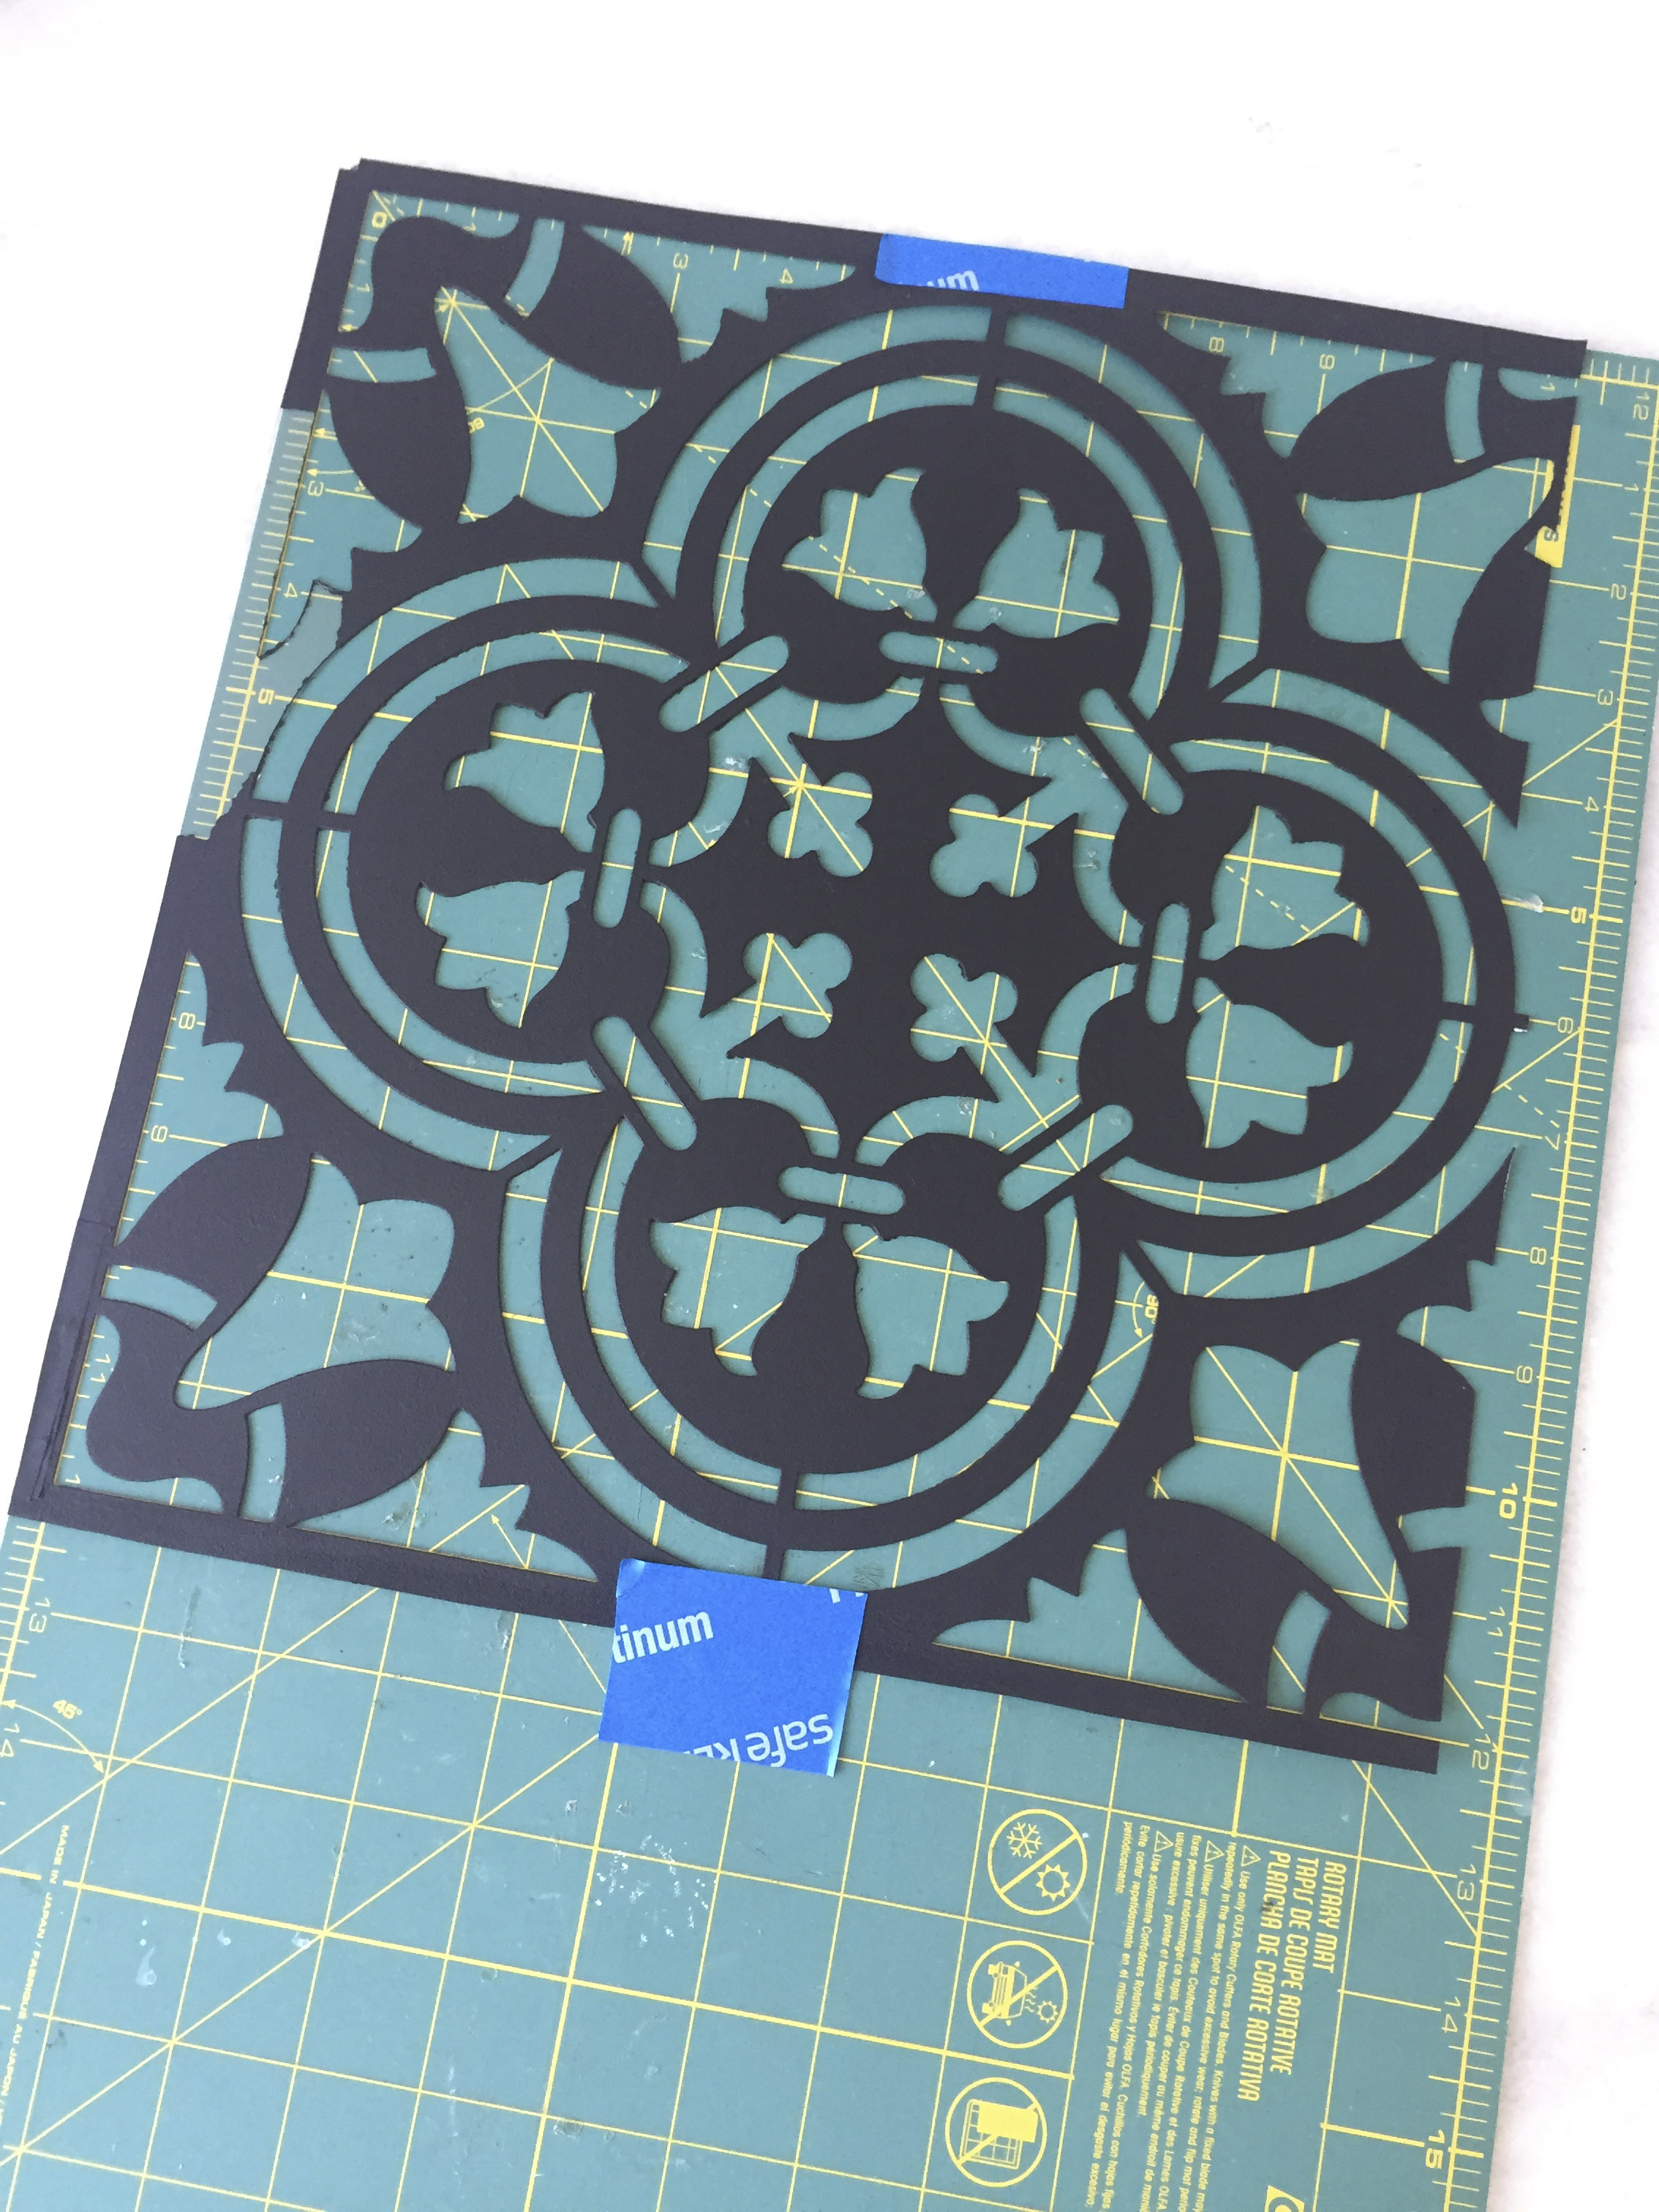
12. After stenciling full size tiles, measure tiles to find the second largest tile. Measure that tile and cut the stencil appropriately using cutting mat and rotary cutter.
13. Repeat step 12 until all tiles are complete.
14. For tiles that are close to the edge, use a foam brush to complete the stencil.
15. Once all tiles are stenciled, use the white chalk paint and a small paint brush to fix any spots where the black paint bled.
16. Now it's time to whitewash! If you want a more authentic look, whitewashing is key. Mix one part water with one part white chalk paint. Lightly dip the wide foam brush in the whitewash and brush one tile horizontally.
17. Repeat step 16 on the tile next to the one you already whitewashed.
18. Brush both tiles vertically (do not dip the brush again for this step).
19. Using a clean paper towel, dab the paint off of the first tile. DO THIS VERY QUICKLY! You don't want the paint to dry with bubbles in it because it will look weird. I dabbed the whitewash off of the first tile, moved to the second tile, and then back to the first, and finished with a second round on the second tile.
20. Now it's time to coat with polycrylic again- You're in the home stretch!
21. I used 3 coats of polycrylic and so far it seems to be enough. I read some tutorials where they used 4 but the tile was in a high traffic area. If I paint our master bathroom, you better believe it will get 5 coats!
22. Enjoy youre beautiful moroccan inspired tile that guests will never know isn't the real deal!

After 1 coat of primer (step 6).

Tape down stencil so that it doesn't move while you're painting it (step 11).
Step 11.

Step 14.

Top tile has been whitewashed, the bottom tile has not. The whitewash gives it a much more authentic moroccan tile look!
TIPS & TRICKS:
1. Putting on clean socks at the door before you enter the bathroom is crucial to keeping out dust, dirt, and hair! Especially if you have a dog that sheds. I kept clean socks on our dryer since it's right outside of the guest bathroom door so they were easily accessible. I probably used every single pair of thin socks I own during this process but it was worth it!
2. To piggy back on the above tip; Every time you shut the door to let paint dry, push a clean towel against the door jam to make sure dust, dirt, or hair don't blow into the bathroom.
3. When you start stenciling, be super careful when lifting the stencil off of each tile. Since the paint is wet, it can smudge!
4. If the stencil is wet, be super careful when you're placing it onto another tile! It will get black paint on places you don't want black paint to be if you aren't careful.
5. After using the stencil 5-6 times, paint starts to build up around the edges. Use an xacto knife or razor blade to scrape off the dried paint so that you don't get smudges when rolling paint over the stencil.
6. Whitewashing is hard. Start with one tile at a time until you get the technique down. I did almost half of the bathroom tile by tile before getting brave enough to do two at a time!

I hope you enjoyed seeing the before and after as much as I did! I'd love to see your painted tile projects, make sure to #MAMJdiy if you post a photo on Instagram and don't forget to tag me so I'll see it! Have a happy weekend, y'all!
Xo,
Haley