
Even before we found out the gender of baby Jones, I knew I wanted an all white nursery. That included the glider- crazy, I know! The only way that was possible was to find a slip covered glider small enough to fit into Jett’s room. We couldn’t find exactly what we wanted, so I decided to DIY a glider and have a custom slip cover made. It turned out to be the perfect chair, keep reading for details on the covers and how I put it all together!
Read moreDIY CHANGING TABLE WITH REFINISHED MARBLE TOP
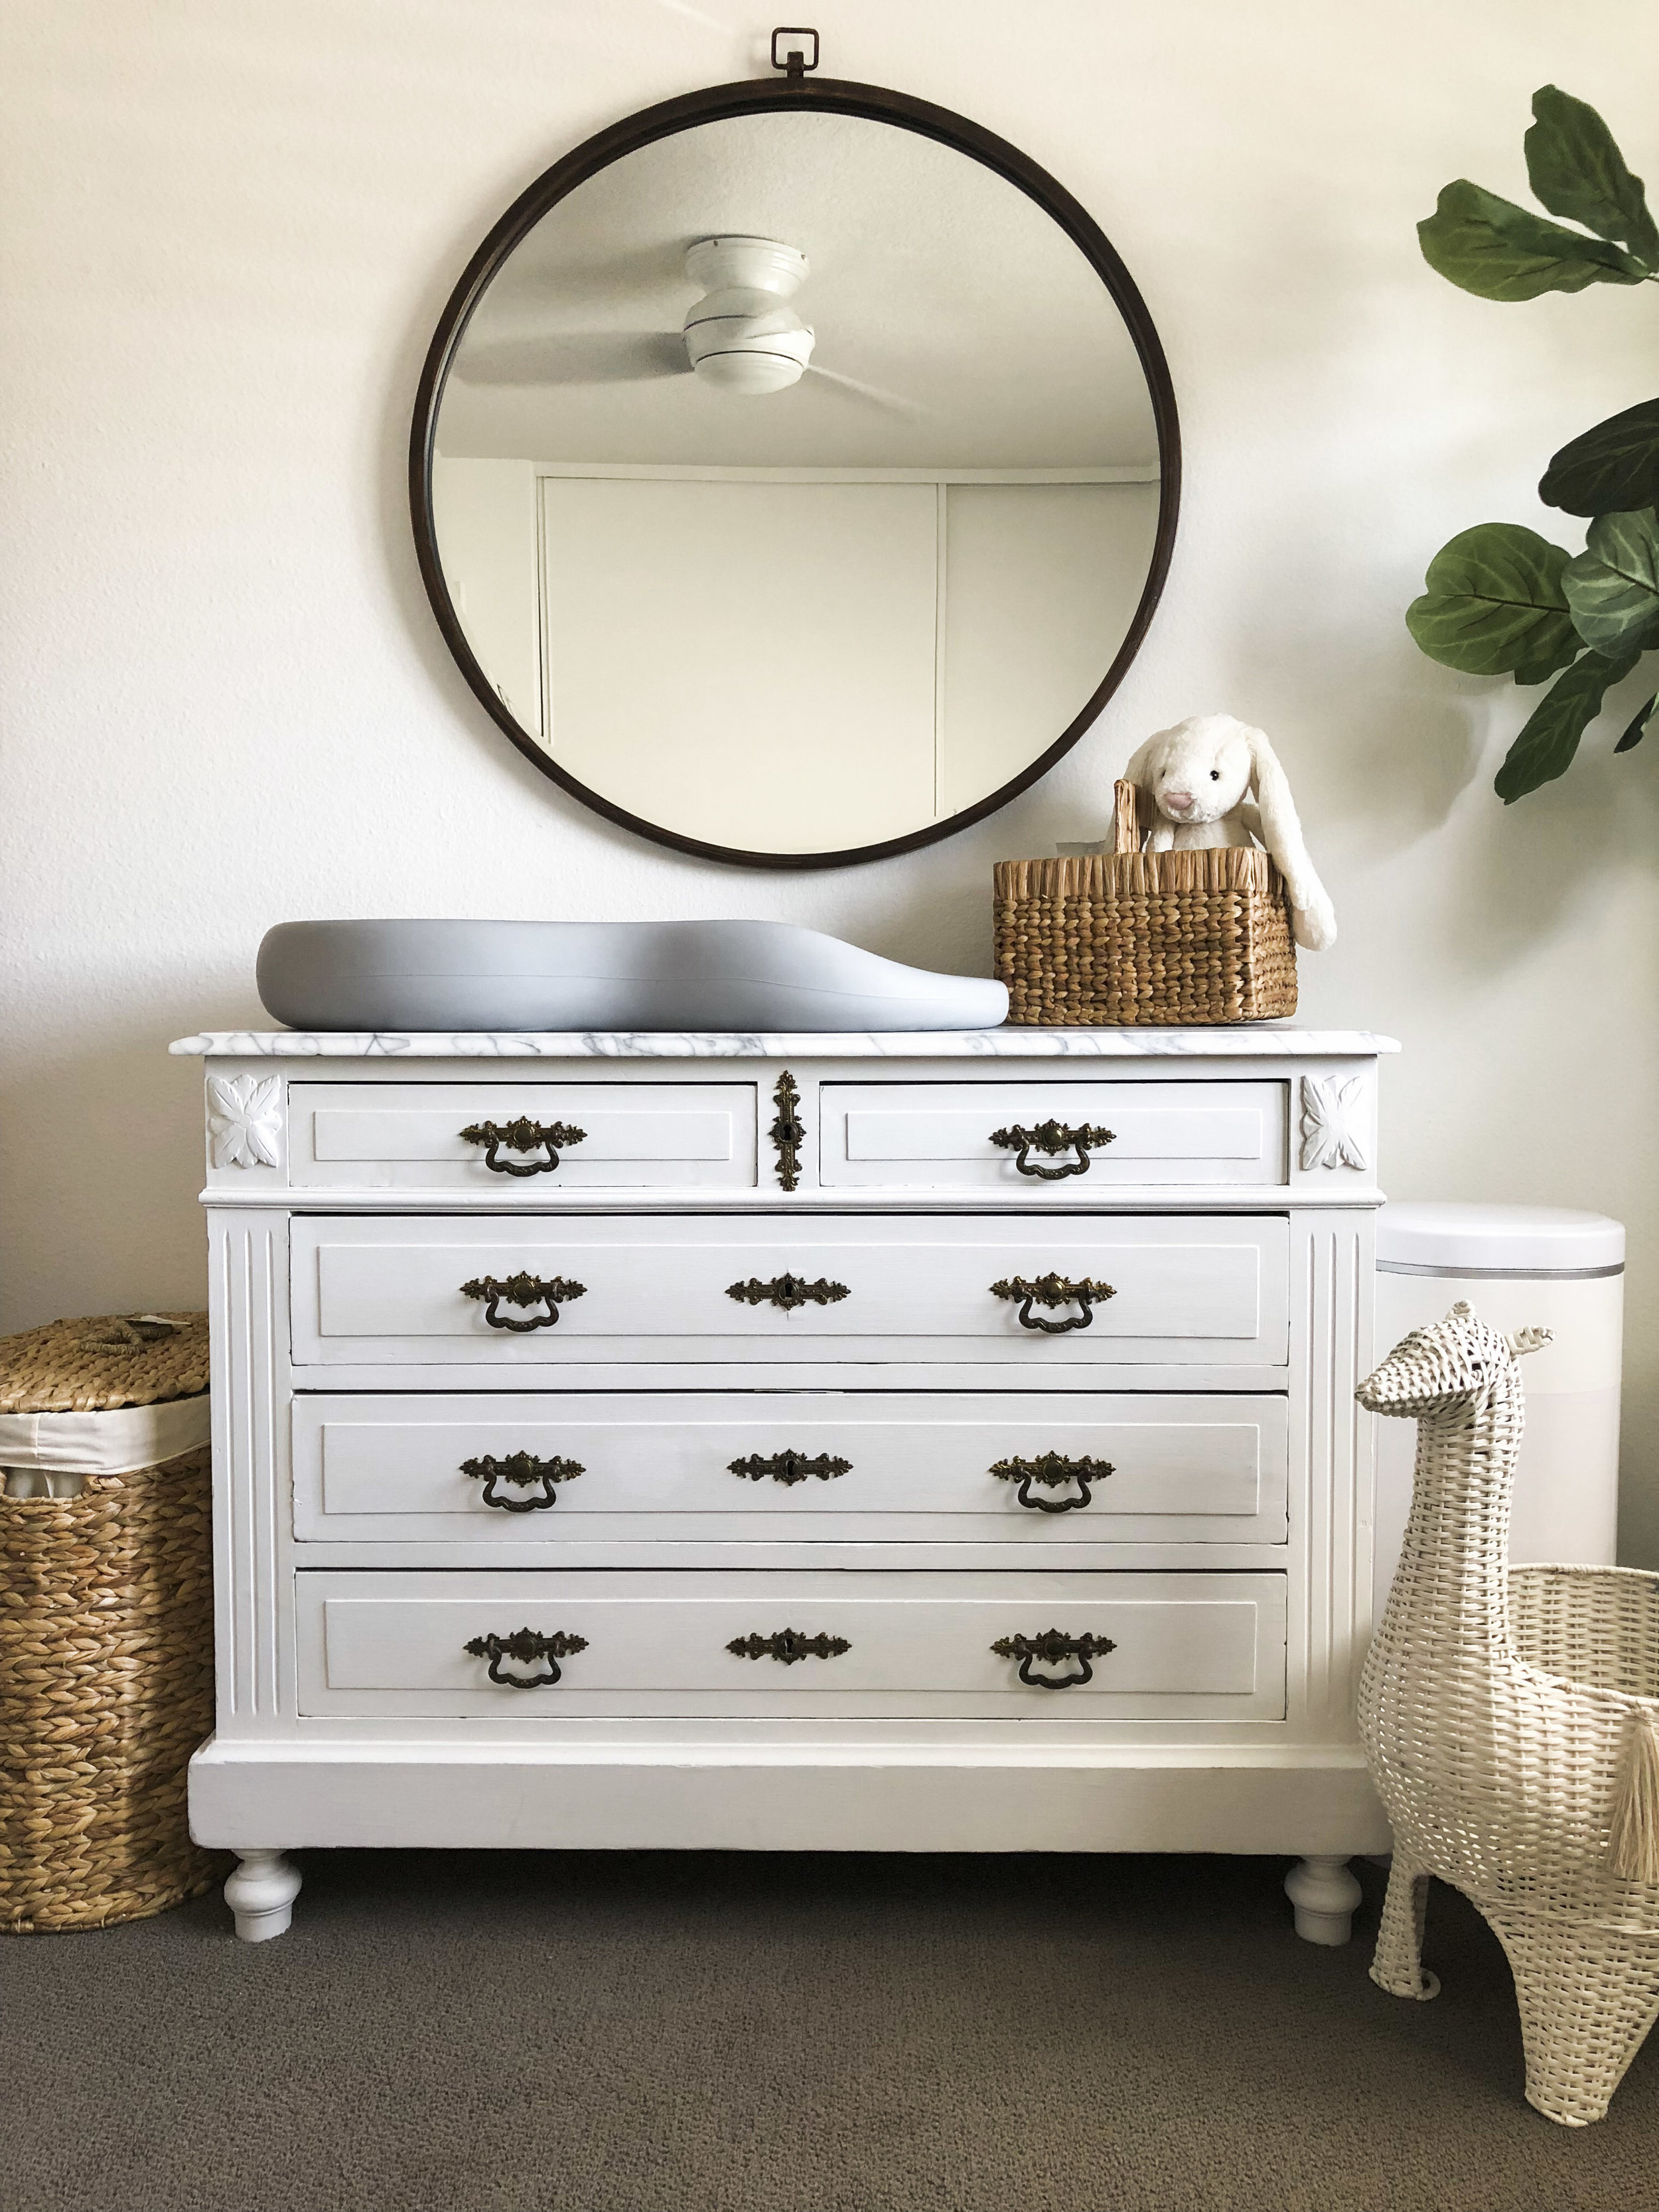
When it comes to baby J’s nursery, we knew we wanted everything to be neutral or white. We found a gorgeous white crib, but were struggling to find a changing table that we both liked and that fit into our budget. That’s when I decided to look on Facebook marketplace for a used or vintage piece that I could paint to go with our neutral theme nursery. Keep reading for how I refinished this antique dresser with a GORGEOUS marble top that makes the most amazing changing table!
Read moreHOW TO DIY CHALKBOARD SIGNS WITH PERFECT LETTERING

Chalkboard signs have so many uses whether you're planning a wedding, baby shower, or just wanting to make something for your home. The problem is that not everyone can create perfect hand lettered works of art! With the tips in today's post however, you'll be able to easily create a chalkboard masterpiece for your home or event and all of your friends will think you're a pro!
Read moreDIY FOR LESS: MOROCCAN INSPIRED PAINTED TILE

While Mr. Jones and I plan on replacing the floors in our condo at some point, right now we just don't have the budget. The tile floors in both of our bathrooms are SO FUGLY though, so I just couldn't look at it for one more day! That's when I decided to let Jesus take the wheel, bought a tile stencil and just went for it! Keep reading to see the before and after, step by step instructions and a video of the process!
Read more3 EASY SPACE SAVING HACKS FOR SMALL BEDROOMS

When Mr. Jones and I moved to our industrial loft in Seattle, we had to majorly downsize. Our bedroom is so small we couldn't even fit our bed- say what?! In today's post I'm going to show you 3 space saving hacks I used to fit everything (and even create more storage) in our teeny tiny master bedroom!
Read moreDIY FOR LESS: LACE-UP SLEEVE SWEATER
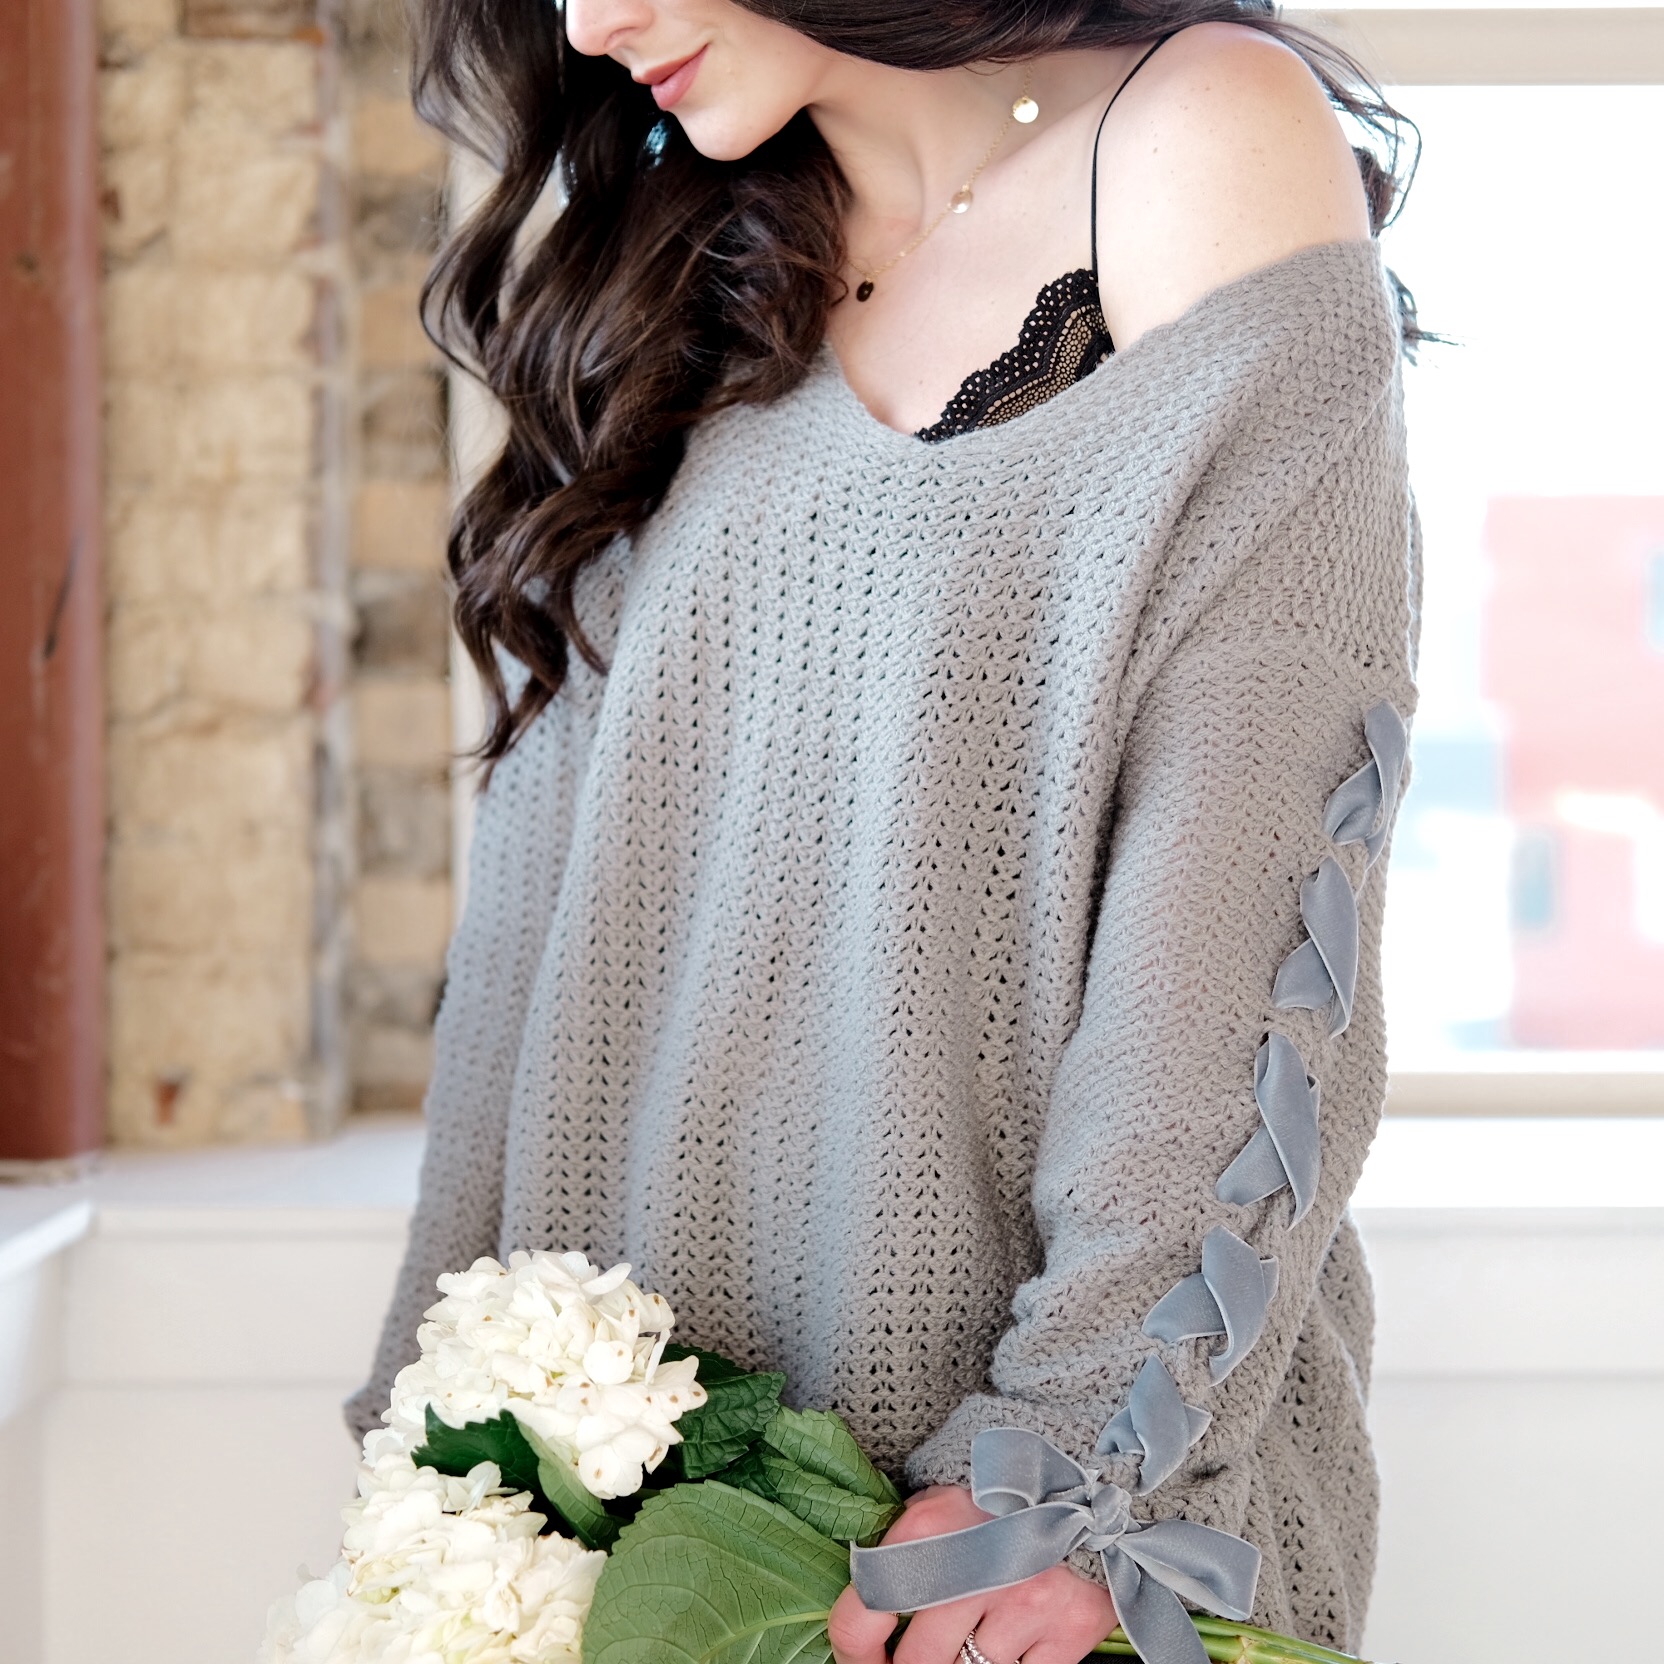
Last fall I found an amazing lace-up sleeve sweater and I just couldn't get enough! Since the sweater is now sold out, I decided to whip up a similar and inexpensive DIY version. In today's post, I'm showing you how to make one of your own to cozy up in this winter!
Read moreDIY FOR LESS: TASSEL STATEMENT EARRINGS

Statement earrings were huge for summer and it looks like they'll be sticking around for fall- whoohoo! I'm excited because they can instantly elevate any outfit, they're perfect for the holiday season, and can easily update your fall wardrobe! If you're still on the fence because of the price tag or concerned about them weighing your earlobes down, then this inexpensive DIY is for you! Keep reading to see how I created these Baublebar inspired tassel statement earrings for under $20!
Read moreAN EFFORTLESS SUMMER DATE NIGHT LOOK PLUS AN EASY DIY

DIY and date night might not seem like they go hand in hand, but they do this summer! Today, I'm exploring the chic side of this summer's DIY trend and giving you an easy 3 step outfit planning guide. This step-by-step approach to styling is guaranteed to create no-fuss date night ensembles. Plus, the #MAMJdiy will add a dose of glam to your look for $0! Let's get the styling party started, shall we?!
Read moreDIY FOR LESS: EUGENIA KIM 'BRIGITTE' BOATER HAT

Do you remember my Eugenia Kim inspired floppy hat DIY from February (and last summer)?! Well, today I'm sharing the latest (and greatest) boater hat version and I'm SO EXCITED! As you may have noticed, I'm hooked on boater hats this summer and what better way to adorn one than with a cute slogan? Climb on board and I'll show you step-by-step how I created this cute summer hat!
Read moreHIDE HOUSEHOLD EYESORES WITH THIS RENTER FRIENDLY DIY
Every time we move, we make small improvements to our space by learning from our mistakes in our previous home. Sometimes we finally come to a breaking point with these little problems and are forced to come up with a creative solution. This was the case when we moved in May- there was absolutely no way I was going to mount the TV without hiding the cords (seriously, why can't everything be wireless?)! Today I'm sharing the simple (and cute!) solution I came up with to hide these pesky cables and a DIY to cover your cable box because lets face it- those are really ugly too!
Read more