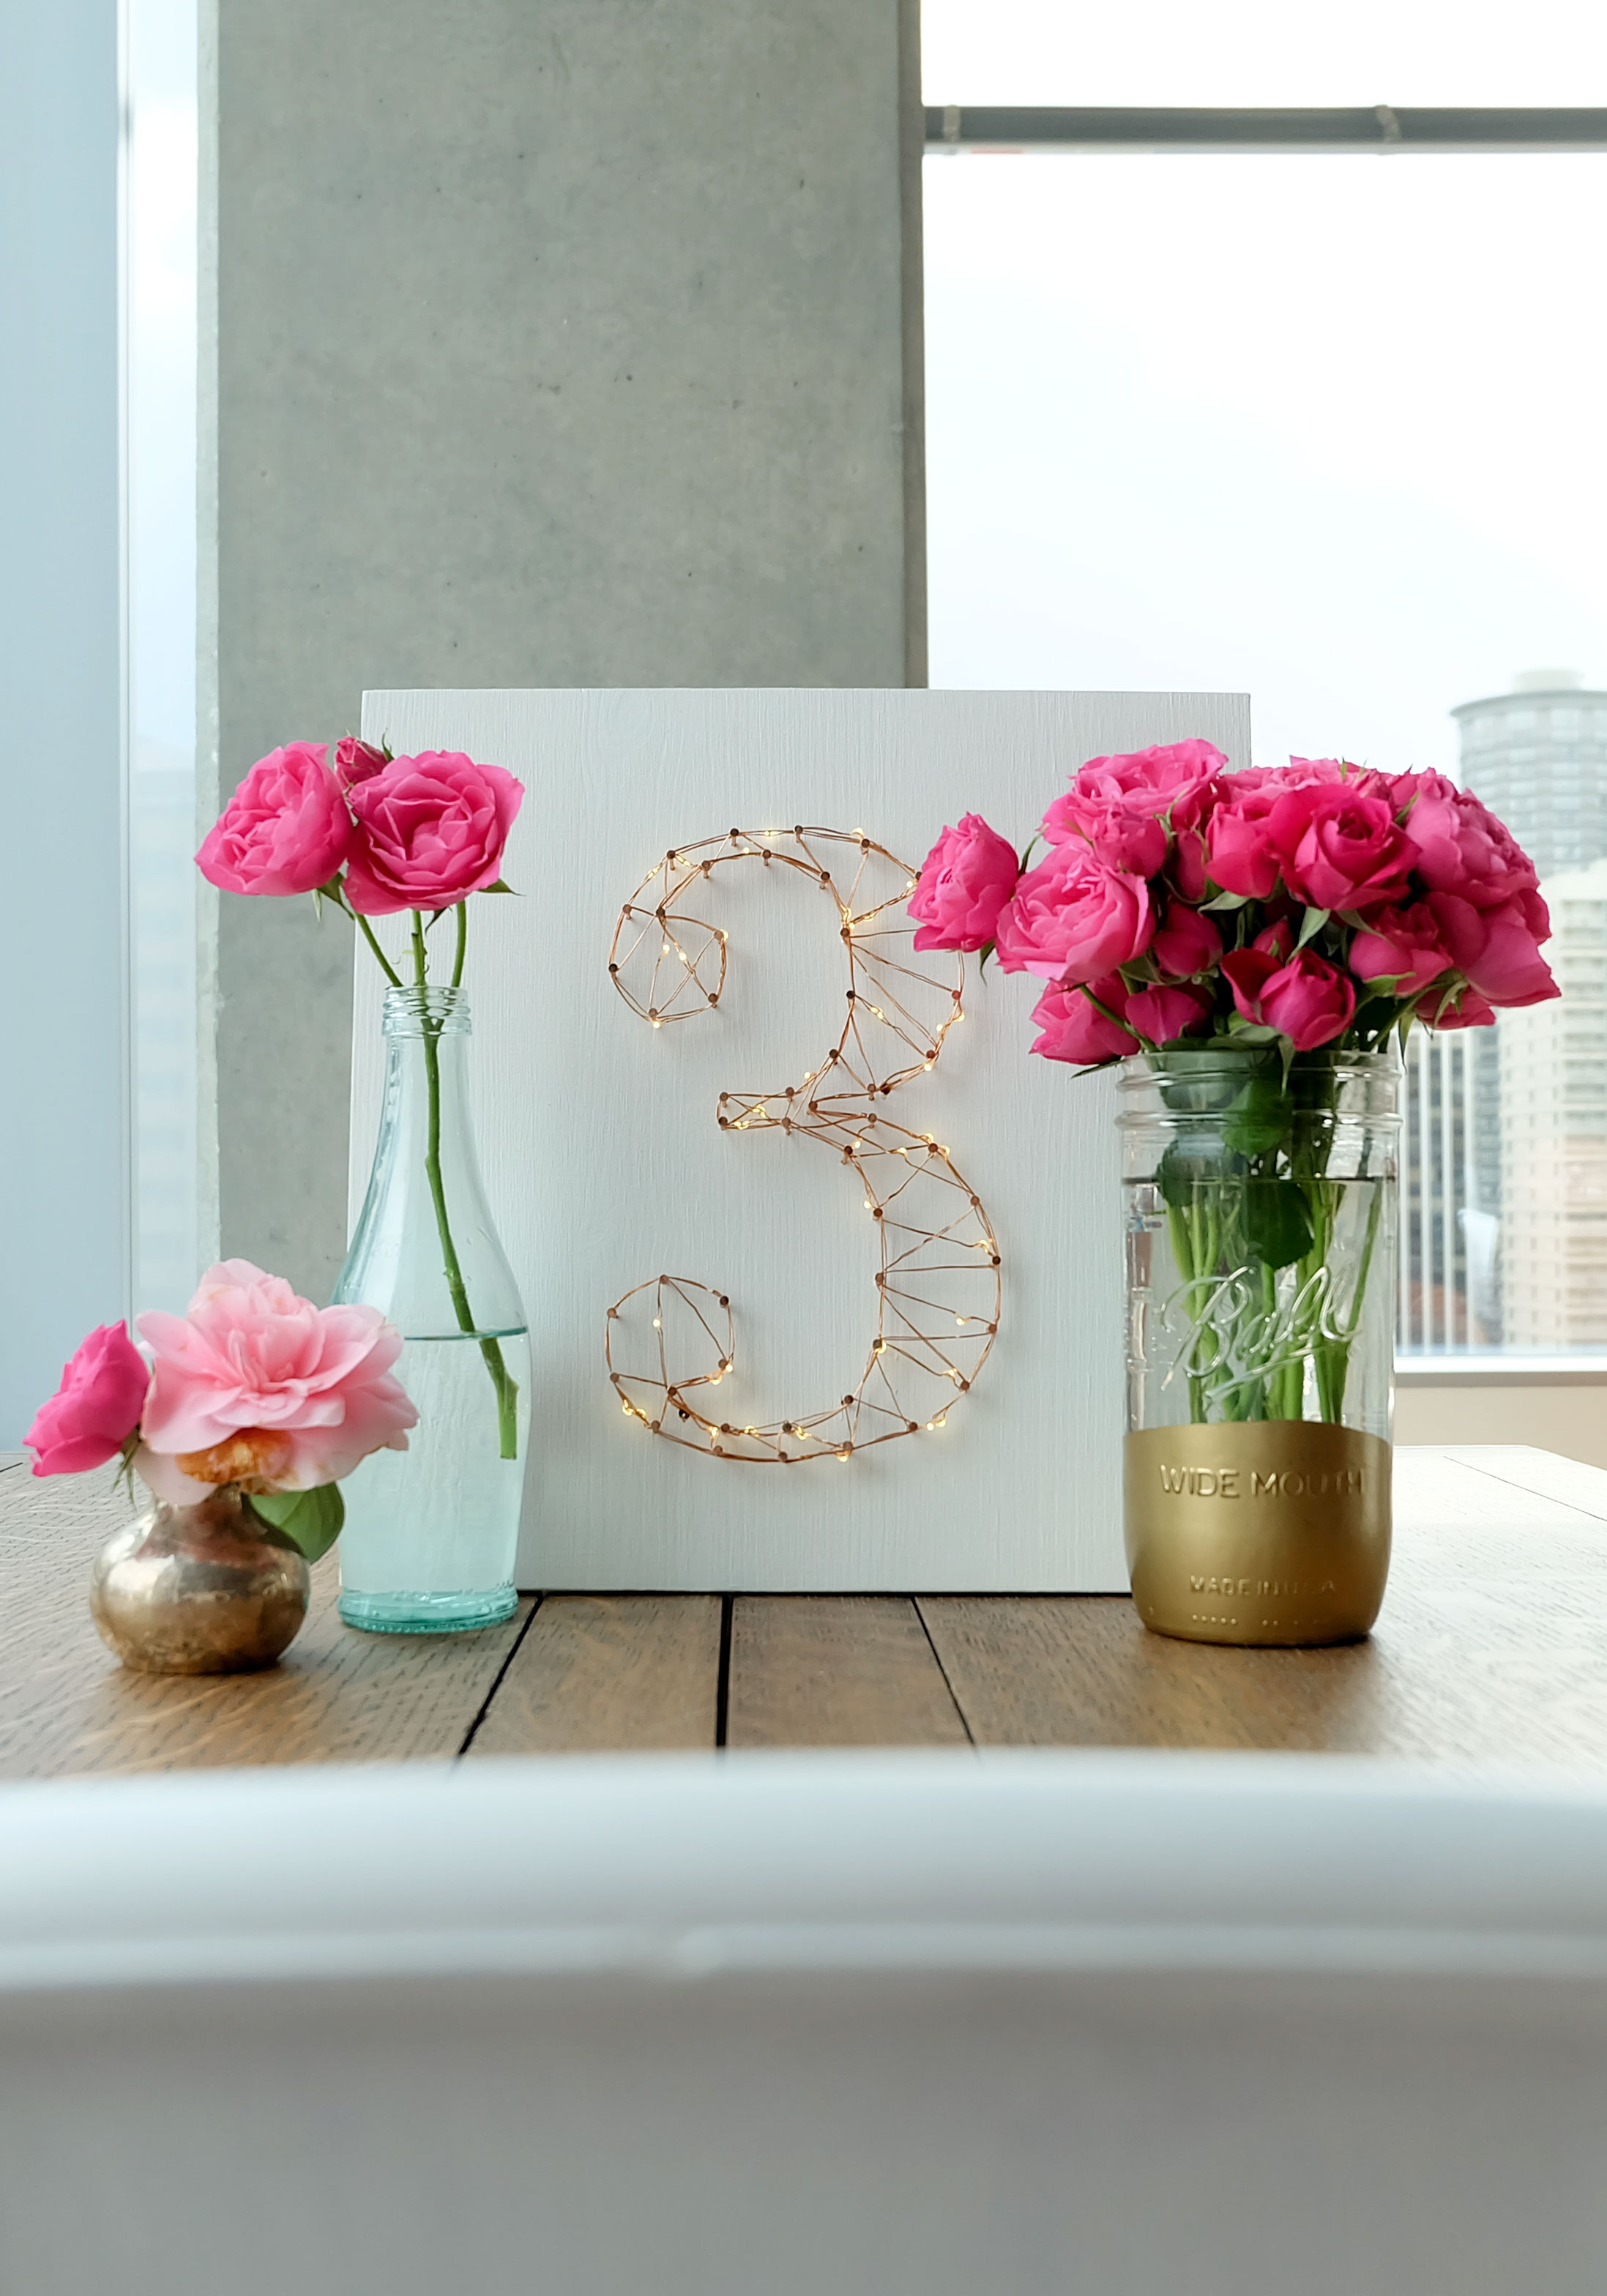
I'm so excited because this entire week on Me & Mr. Jones is all about weddings! I'll be sharing my sister's destination wedding photos at the end of this week, but I also wanted to give all of the lovely brides out there some ideas, inspiration, and style tips. Today I'm sharing a very special DIY project that you can use for table numbers at your wedding or just as wall art with the number of your special day (we got married October 3rd, hence the #3). This DIY is very easy to create and also inexpensive, keep reading for details to create your own!


HERE'S WHAT YOU'LL NEED:
1. Copper Wire Starry Lights (these were only $9 for three strands at Amazon)!
2. Copper plated weather stripping nails.
3. Wood cut into a square. I purchased a 12"x36" piece from Lowe's for $6 and had it cut into 3 squares.
4. White paint. You can also stain the wood or use chalk paint!
7. Hammer
8. Power Drill
9. Drill bit. I used the 9/64 bit from my Ryobi drill bit set!

DIRECTIONS:
1. After getting your wood cut into a square, sand down the edges and the side you will be painting.
2. Attach the sawtooth picture hanger to the back of the wood near the top.
3. Paint the top & sides white (or whatever color you chose)!
4. Print the outline of your number (or letter). I used Adobe Illustrator to evenly space the dashes on the number, but you can also use a piece of string cut at 3/4" and mark where each nail should go on the paper.
5. Cut a slit in the paper over each dot before putting nails into the outline. This will help the paper come up easily without getting caught underneath the nails!
6. Center the piece of paper on the wood (tape it down if it is moving around)!

7. Using a hammer, drive a nail into each dotted spot on the paper. Try to drive each nail into the wood half way so that they are level.
8. After completing the outline, pull the paper up and drill two holes close to one of the nails (I drilled one towards the bottom and one in the middle).
9. String the starry light strand through the hole from the bottom so that the charger is hidden in the back.
10. Outline the number with the starry lights, and then create triangles to fill in the letter.
11. I used two strands for this letter so that I could also outline the letter at the end too!

12. Using the command strips, adhere the switches to the back close to the bottom edge so that they are easy to turn on/off.
13. Enjoy your pretty little light letters!