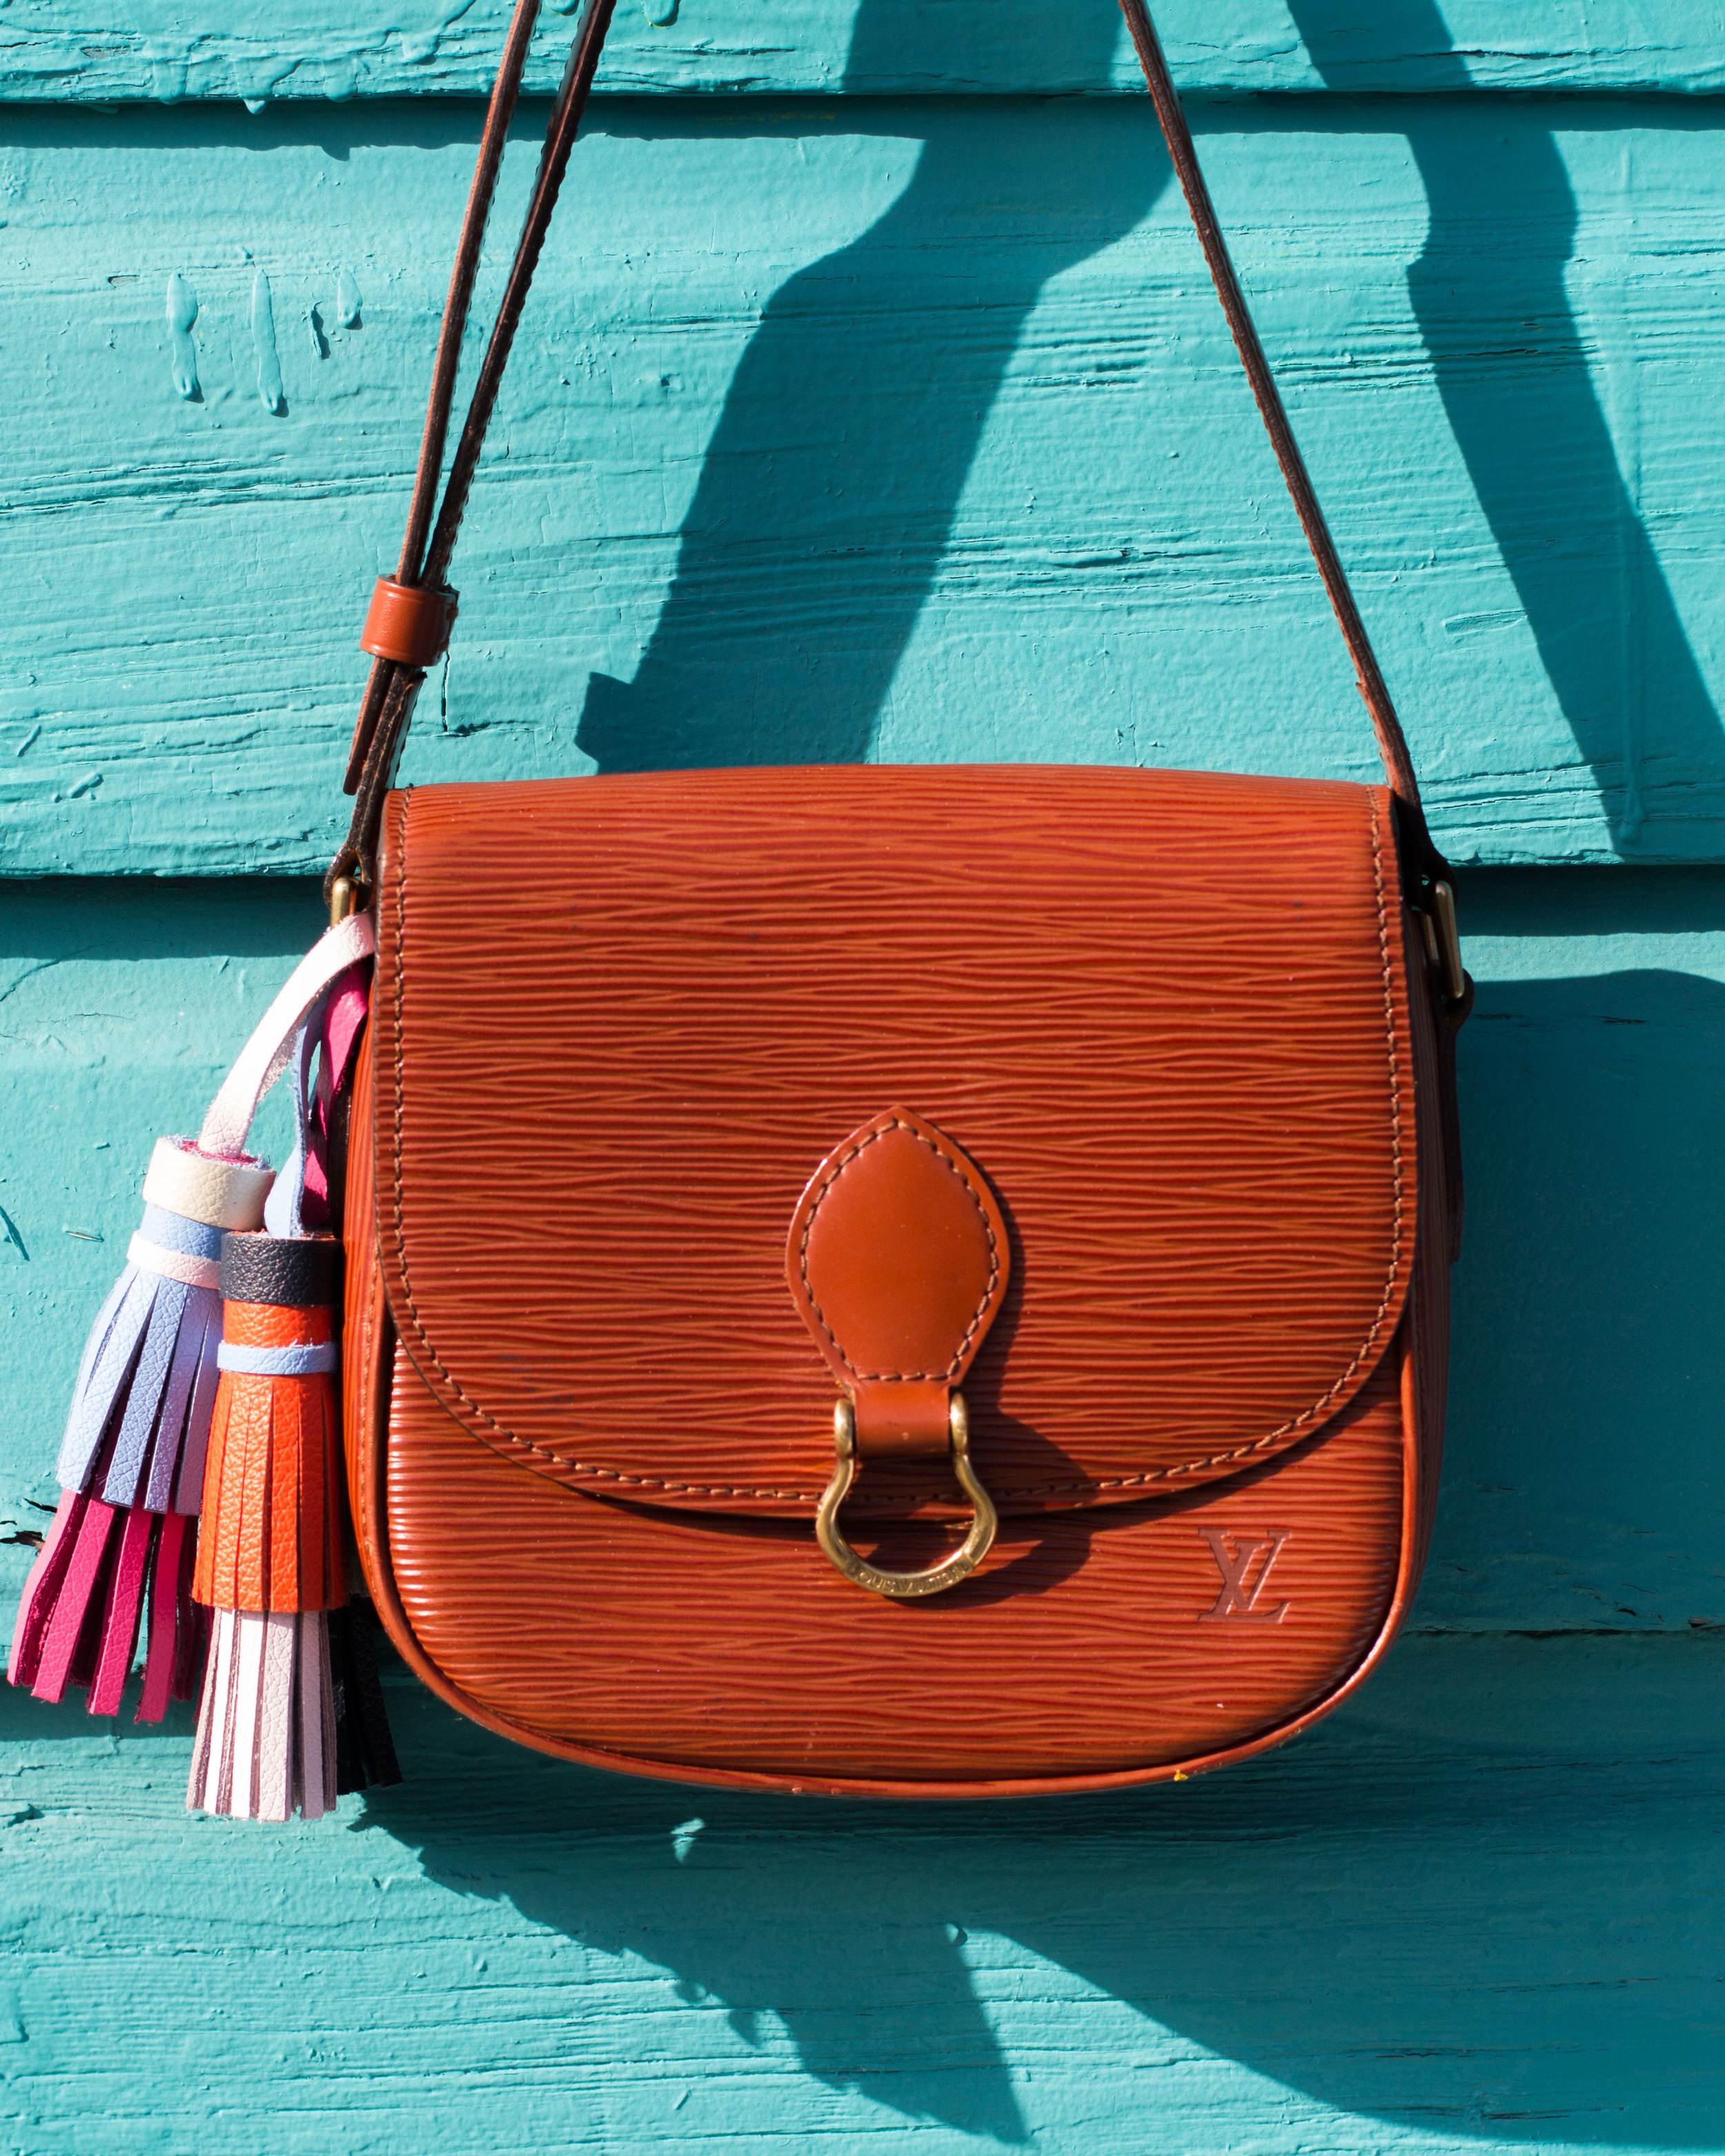
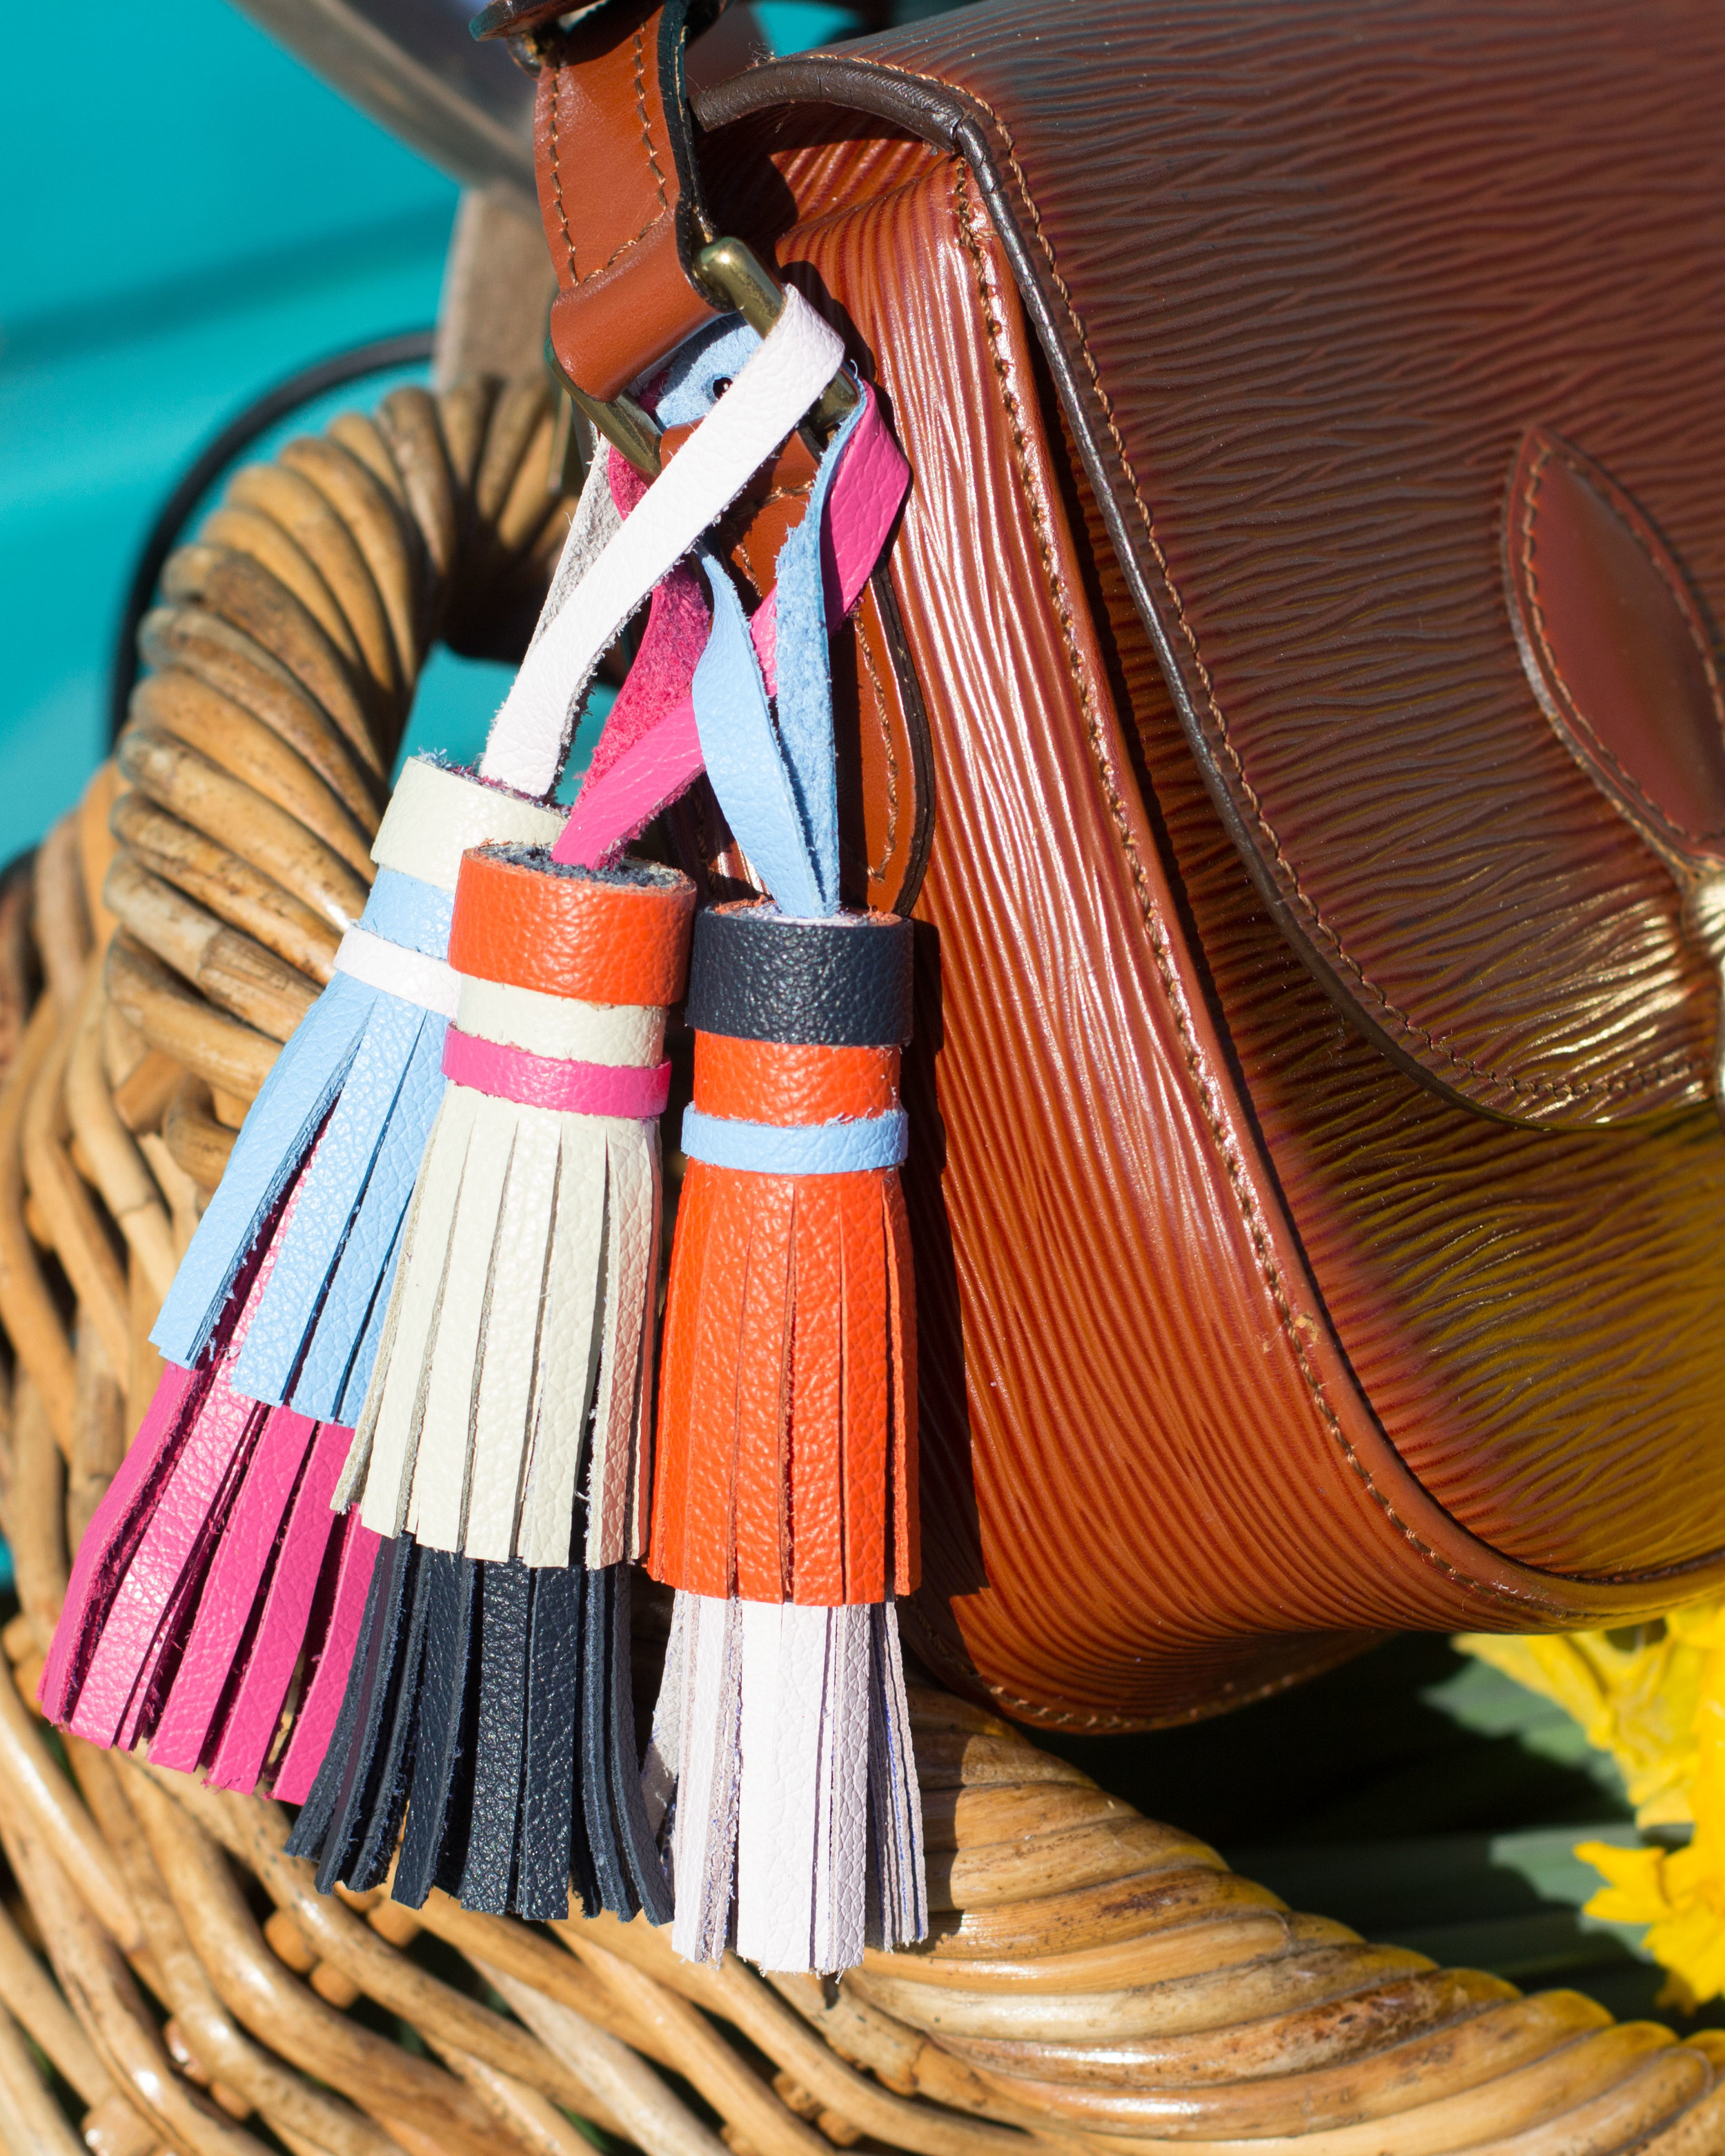
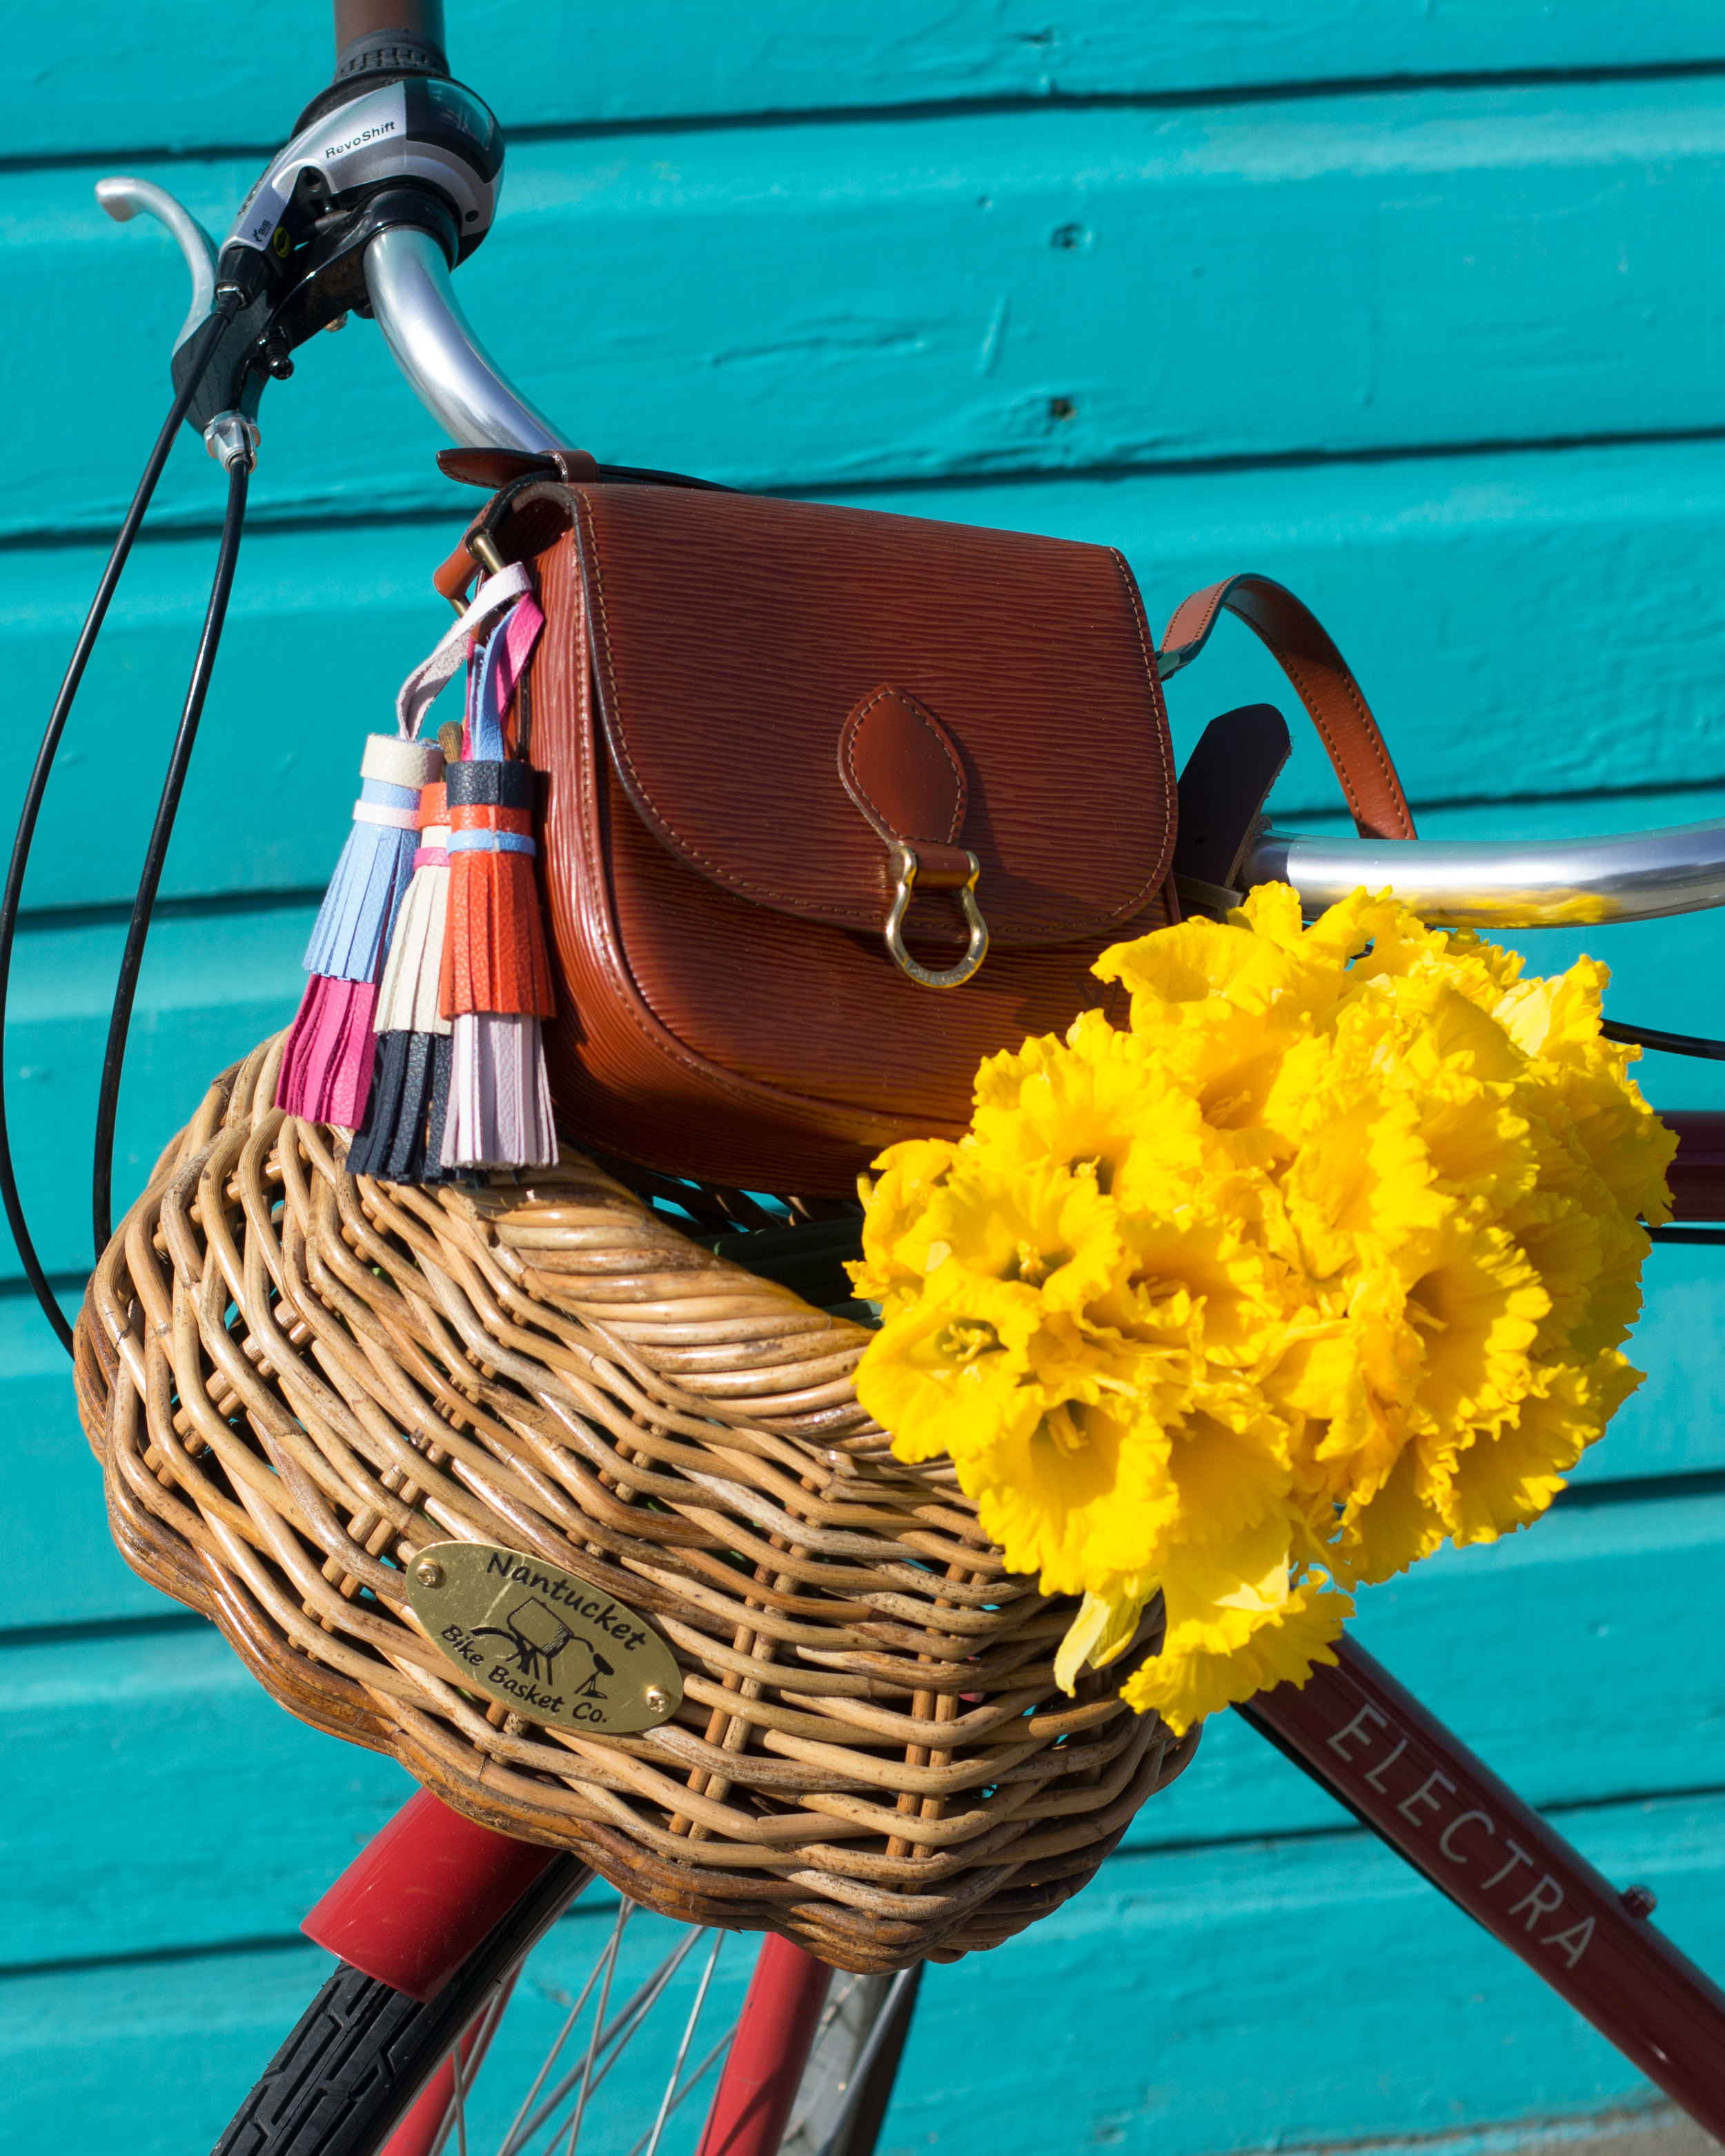
A few weeks ago while browsing the handbag selection at Nordstrom, I fell in love with Tory Burch's tassel key fob but was shocked when I saw the price tag. Even though I already did a DIY Rebecca Minkoff Sofia tassel bag I just couldn't get enough, so today I'm sharing my newest tassel DIY with you! This one is similar to the Rebecca Minkoff Sofia Bag tutorial, but the best part is that you can decorate any handbag you want with these cuties (and it's so inexpensive!)! The tassels truly brought new life to my vintage Louis Vuitton crossbody and I've fallen in love with it all over again!

WHAT YOU'LL NEED:
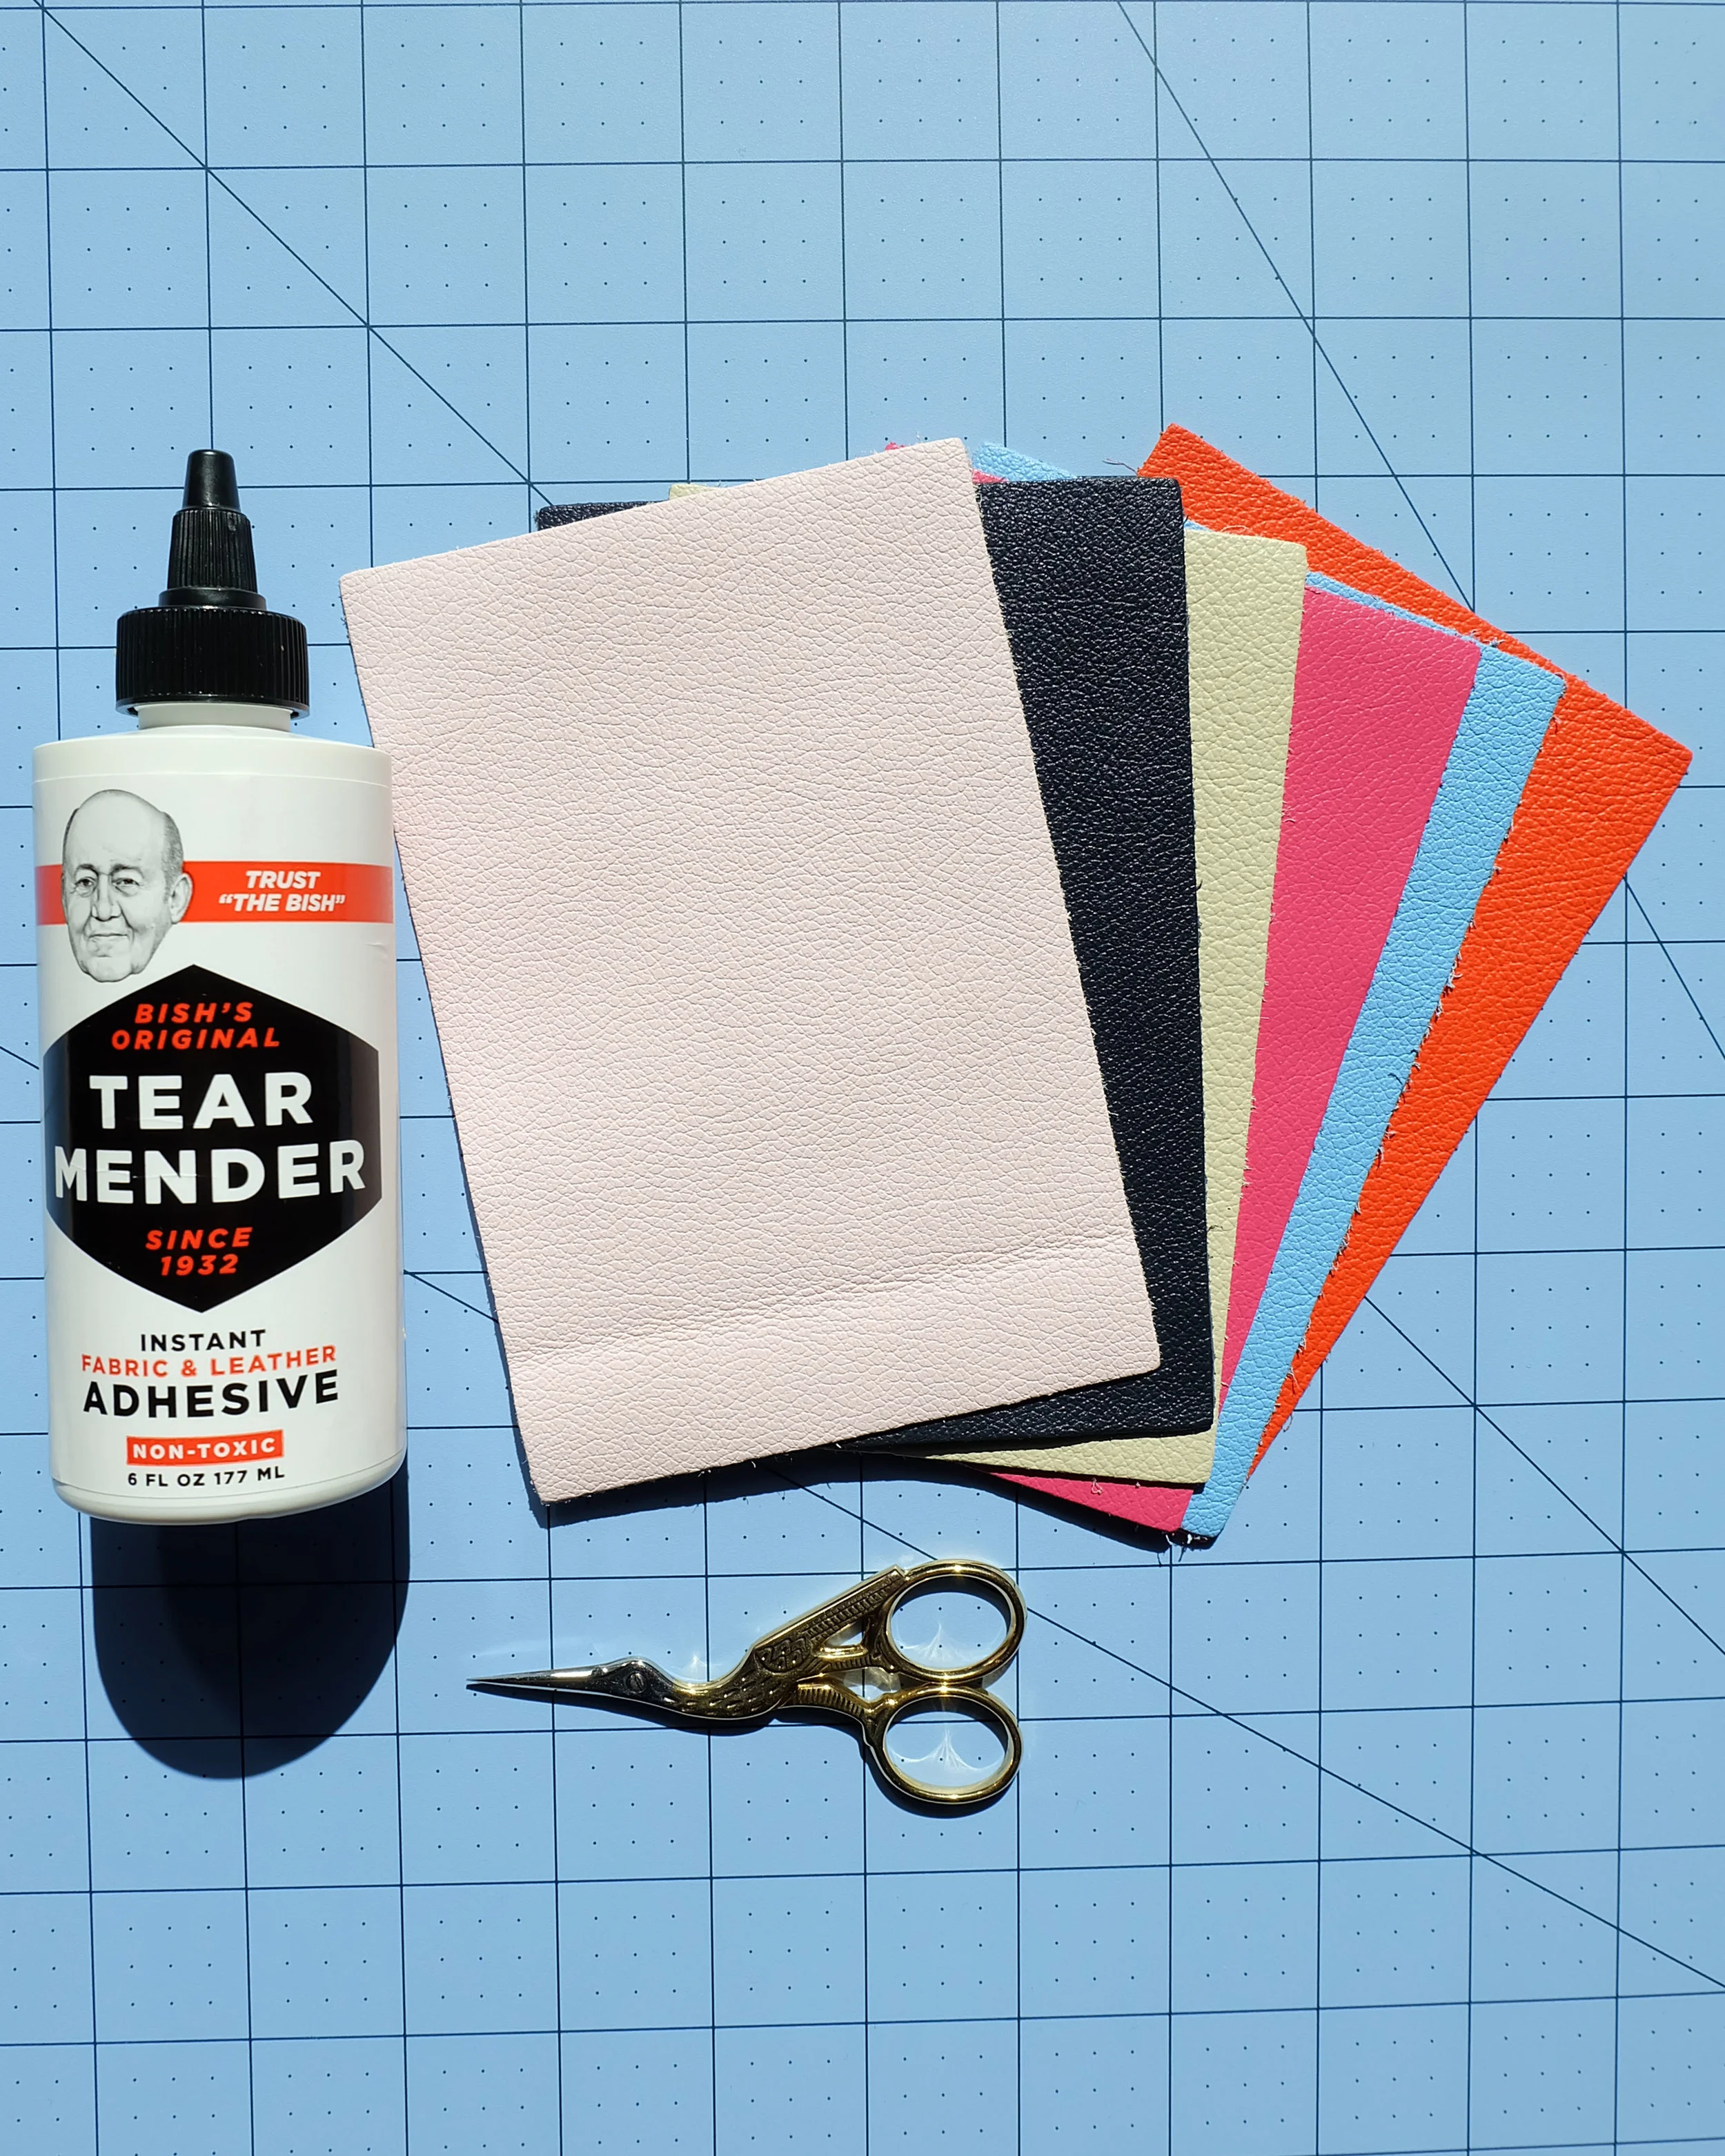
1. 6 leather pieces. The colors I chose were Baby Pink, Navy Blue, Egg Shell, Hot Pink, Aero Blue, and Orange.
2. Leather glue.
3. Sharp scissors.
5. Pen or pencil.
6. (optional) key fob to attach all three tassels together.
DIRECTIONS:
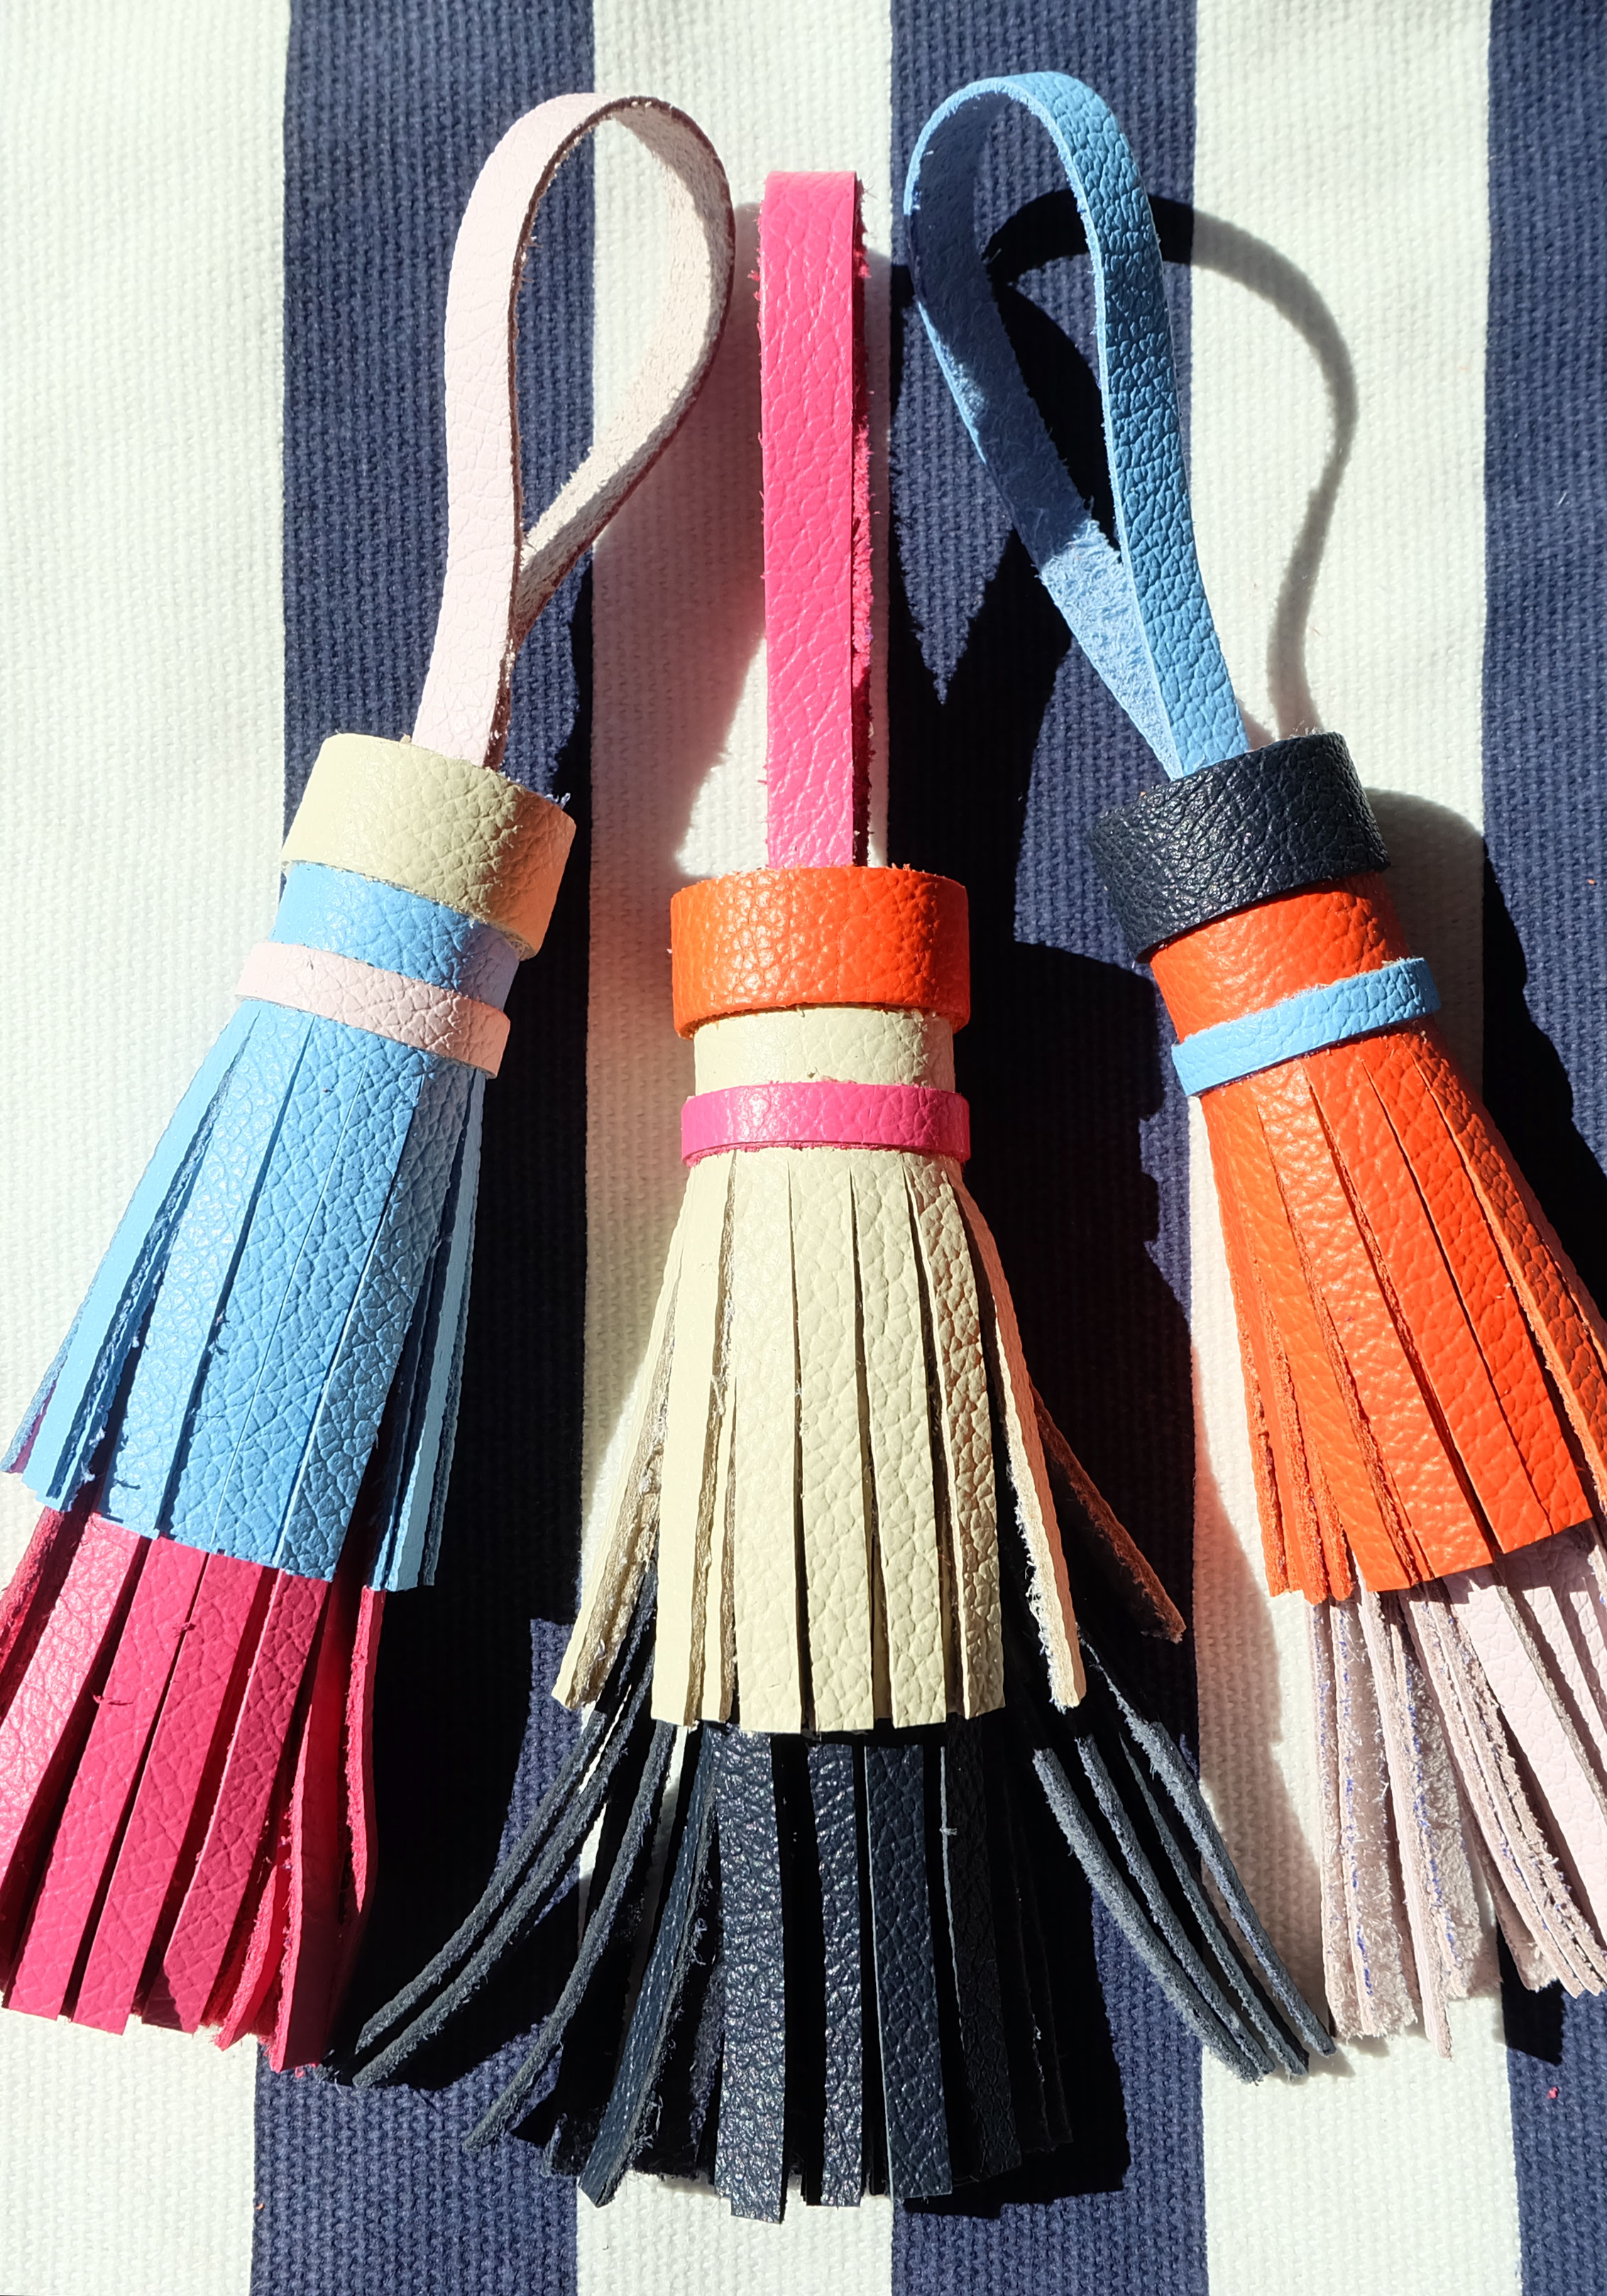
1. Pick your color scheme for each tassel. I used my fine point sharpie markers to do this and just scribbled out how I wanted each tassel to look. I highly recommend doing this because there are so many color combinations you can do, it can get a little bit confusing!
2. Once you've picked out the color scheme for each tassel, you can start cutting pieces for each one. Start with the longest piece, the loop for each tassel. This will be 1/4" x 6". Place the transparent ruler 1/4" from the edge and mark the line with a pen. Cut with scissors.
3. Next, you will need to cut the stripe for each tassel. The thin stripe will be 1/8" thick. The thick stripe is 1/2". Cut these pieces from the side of the leather that is 4" long.
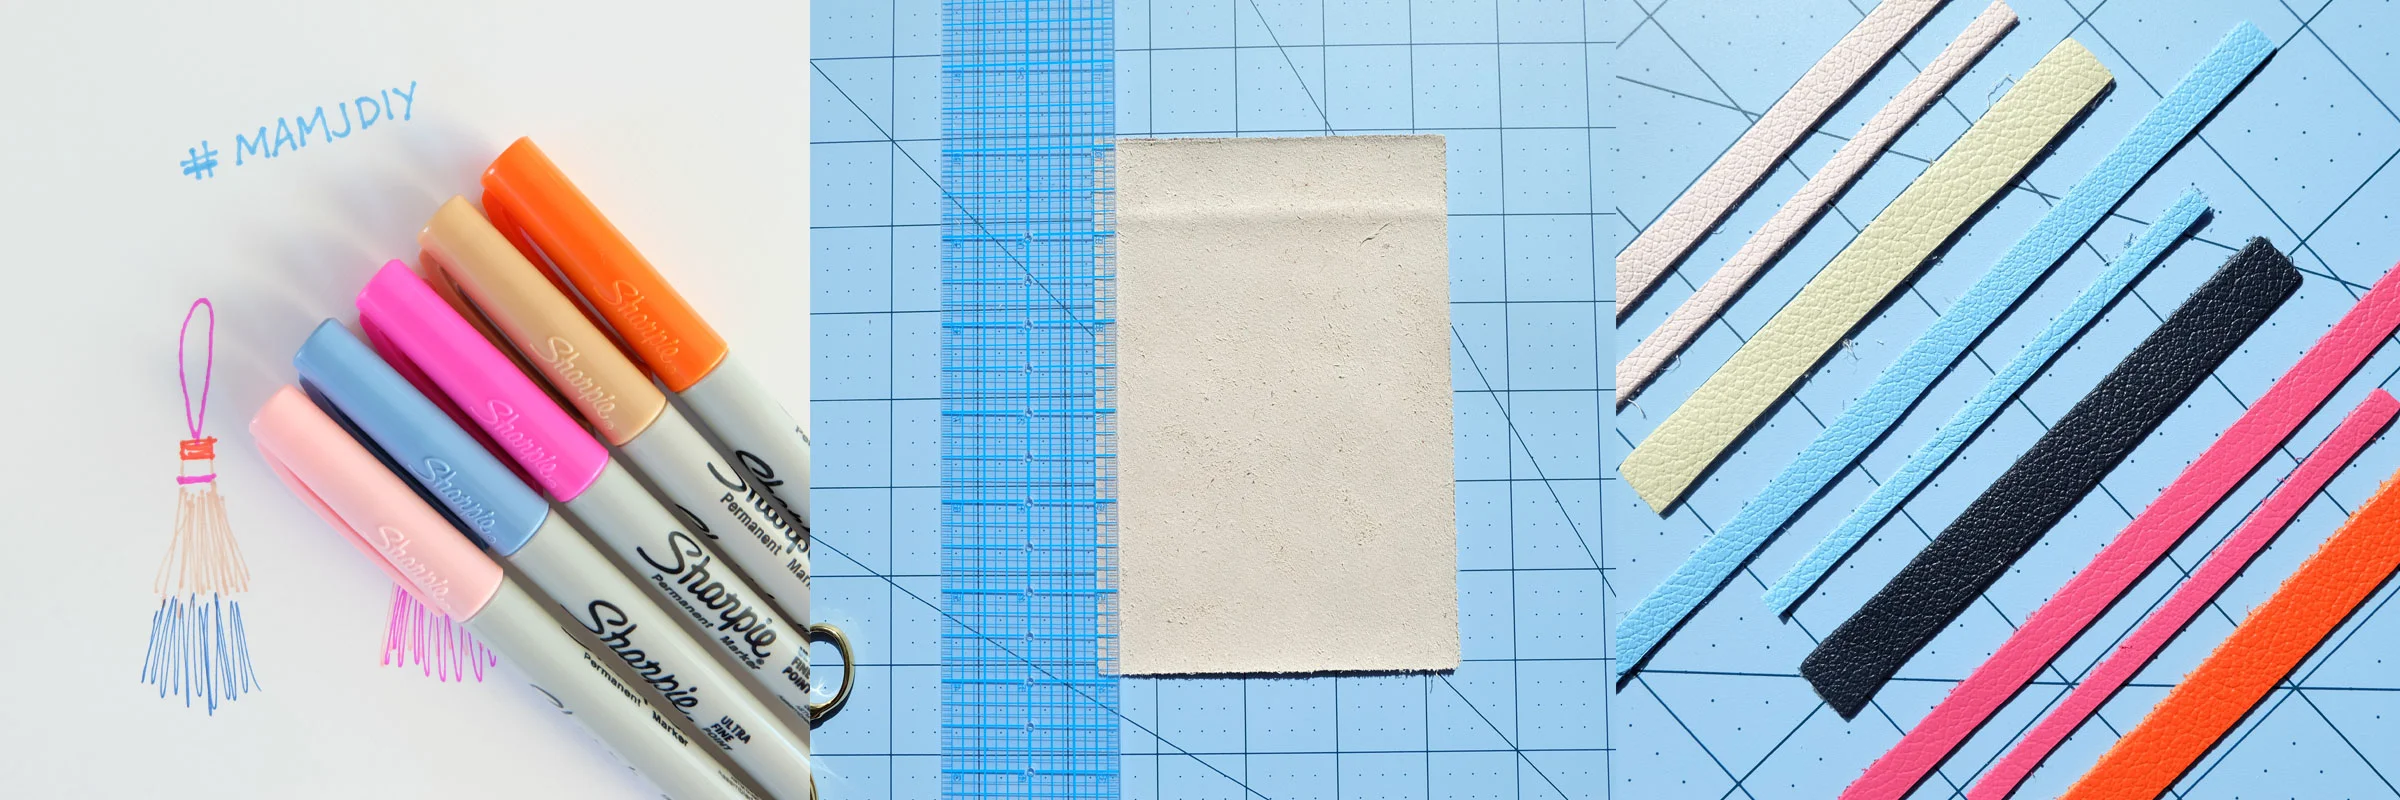
4. Next, trim your large leather pieces down to 5.5" x 3.75".
5. Trim the small leather pieces down to 5.5" x 2.25"
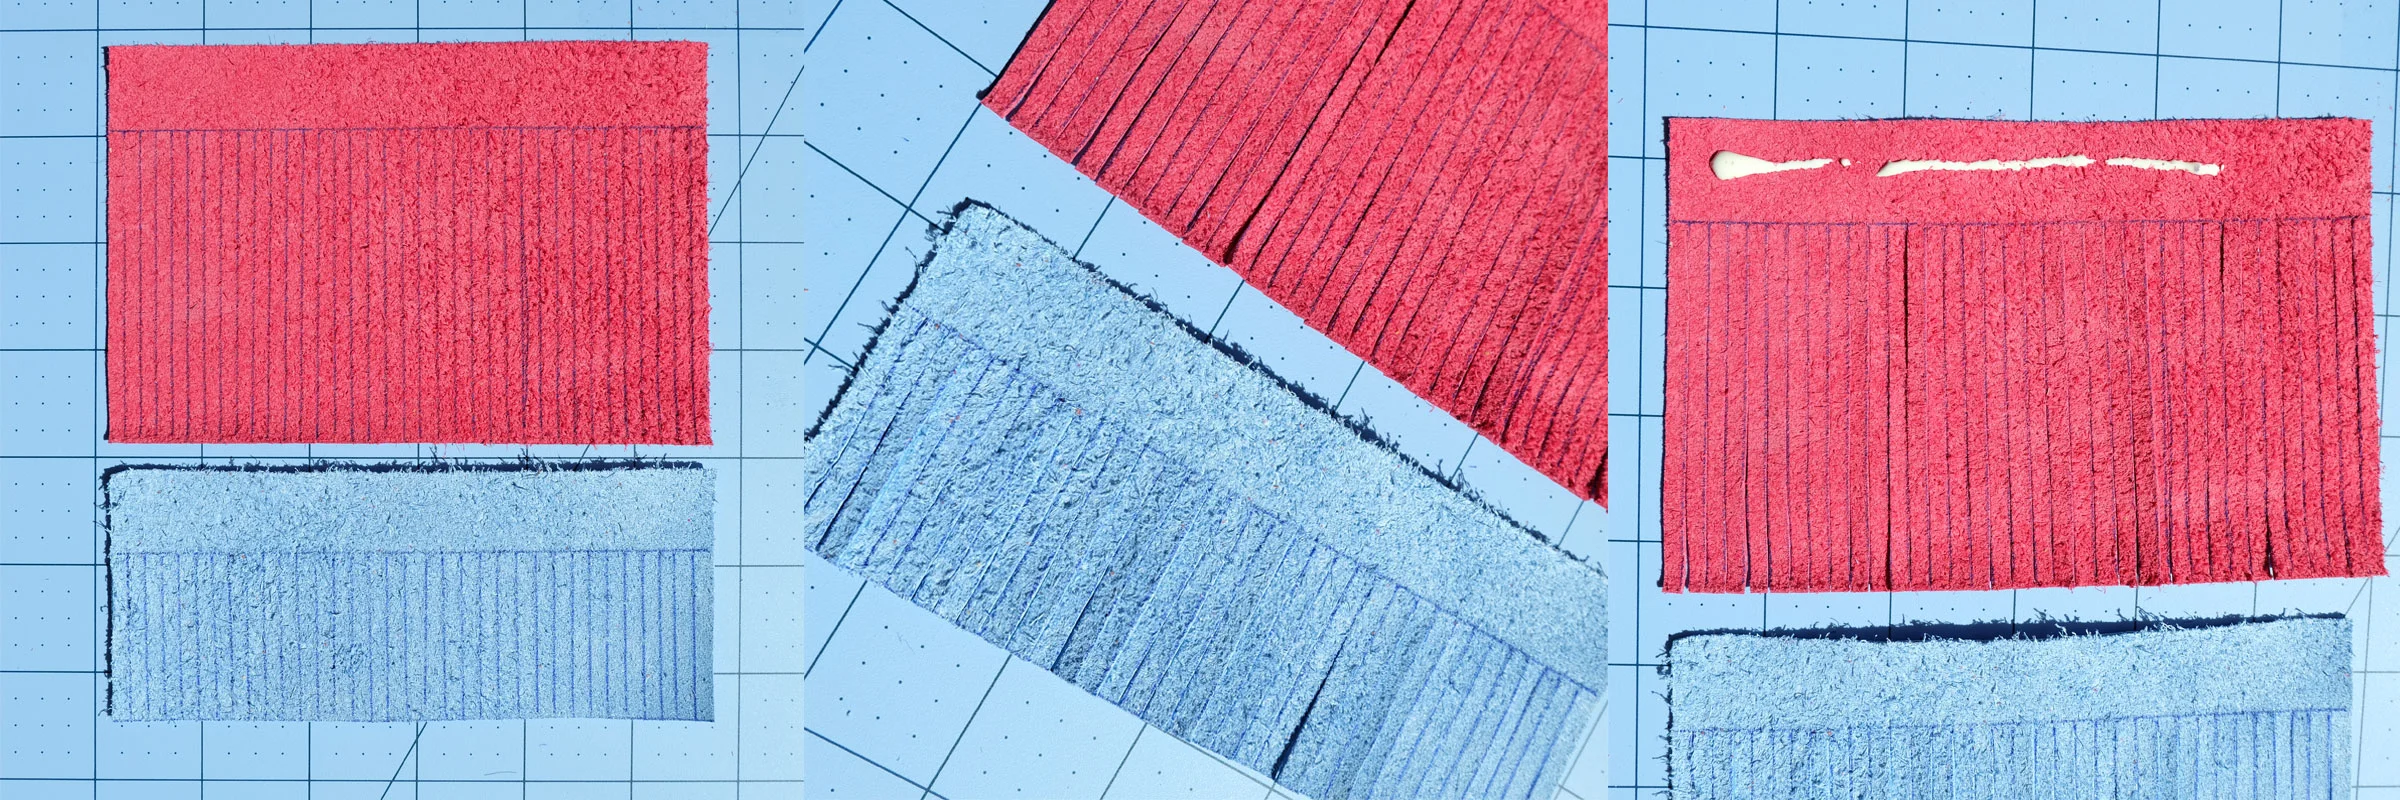
6. Now, mark a line 3/4"from the edge of the longest side on all 6 pieces.
7. Mark lines 1/8" apart on all pieces and cut the fringe up to the 3/4" mark.
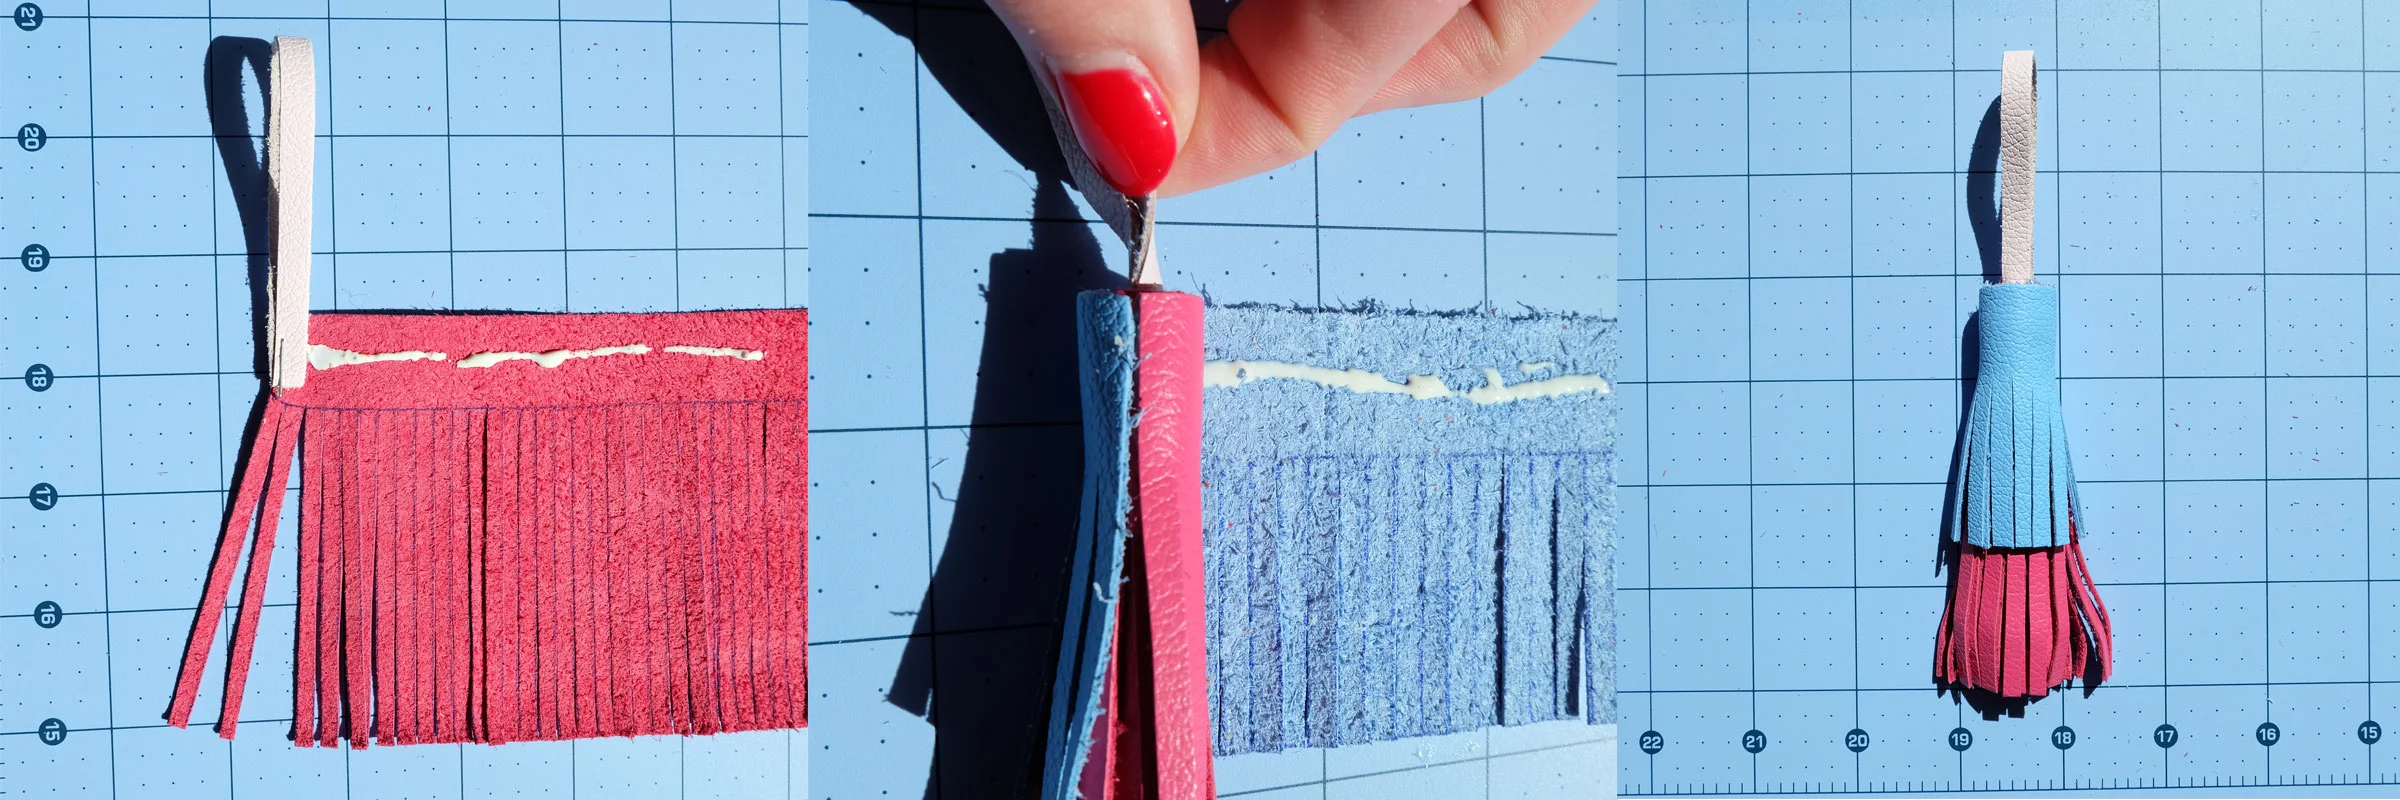
8. Put a small glue dot on the end of each tassel and press the ends together. You can also use a staple to keep it in place.
9. Draw a line of glue a little over half way across the top of the large leather piece. Roll the tassel as tightly as possible and hold it together for about a minute so it doesn't come unglued at the end.
10. Draw a line of glue a little over half way across the top of the small leather piece. Start gluing it where the other leather piece ended.
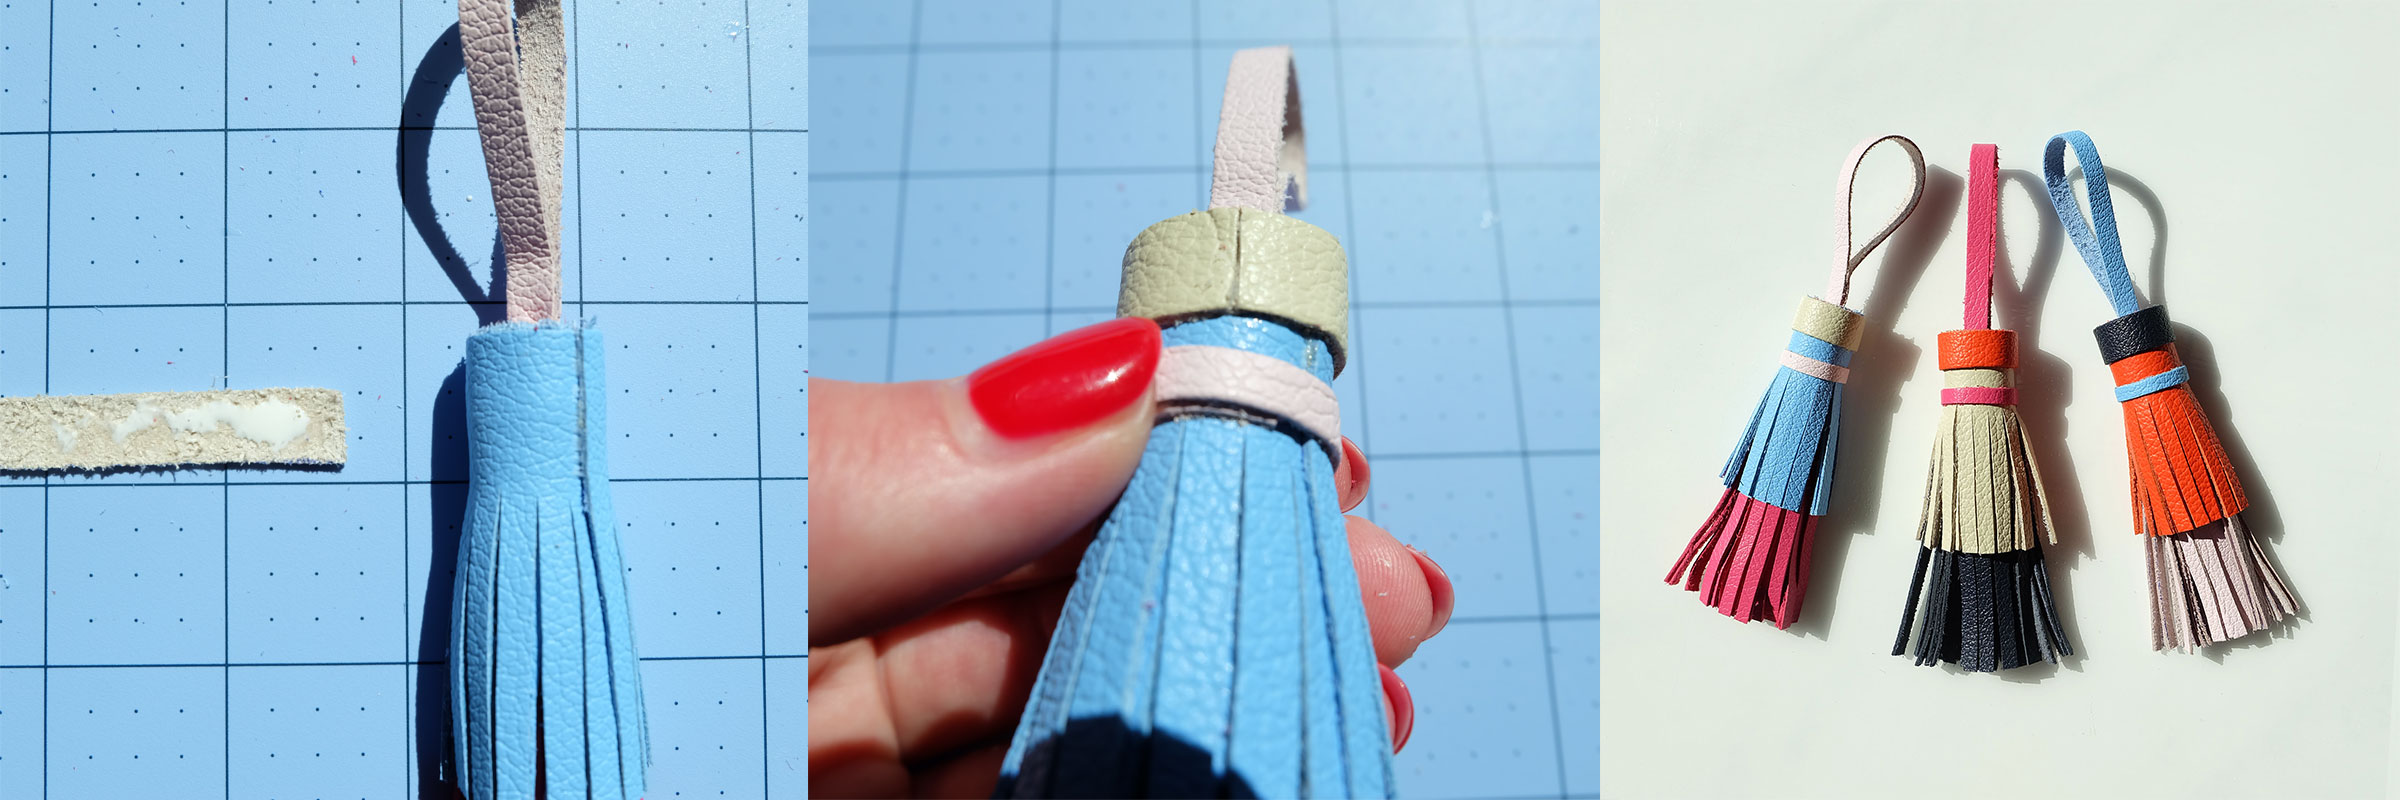
11. Next, you will need to trim the 1/8" and 3/8" stripe pieces so that they fit perfectly around the tassel.
12. Put a small amount of glue on the 3/8" stripe (you can blot the glue with a paper towel so that there isn't too much on the small piece) and attach it to the tassel so that the seam is in the back.
13. Repeat step 12 for the 1/8" stripe. If any glue squeezes out, use a paper towel to wipe it off while it's still wet.
14. Attach tassels to your favorite bag!
What did you think of today's DIY?! If you ever have any DIY recommendations for me, I would love to hear them! Thank you so much for stopping by today!
