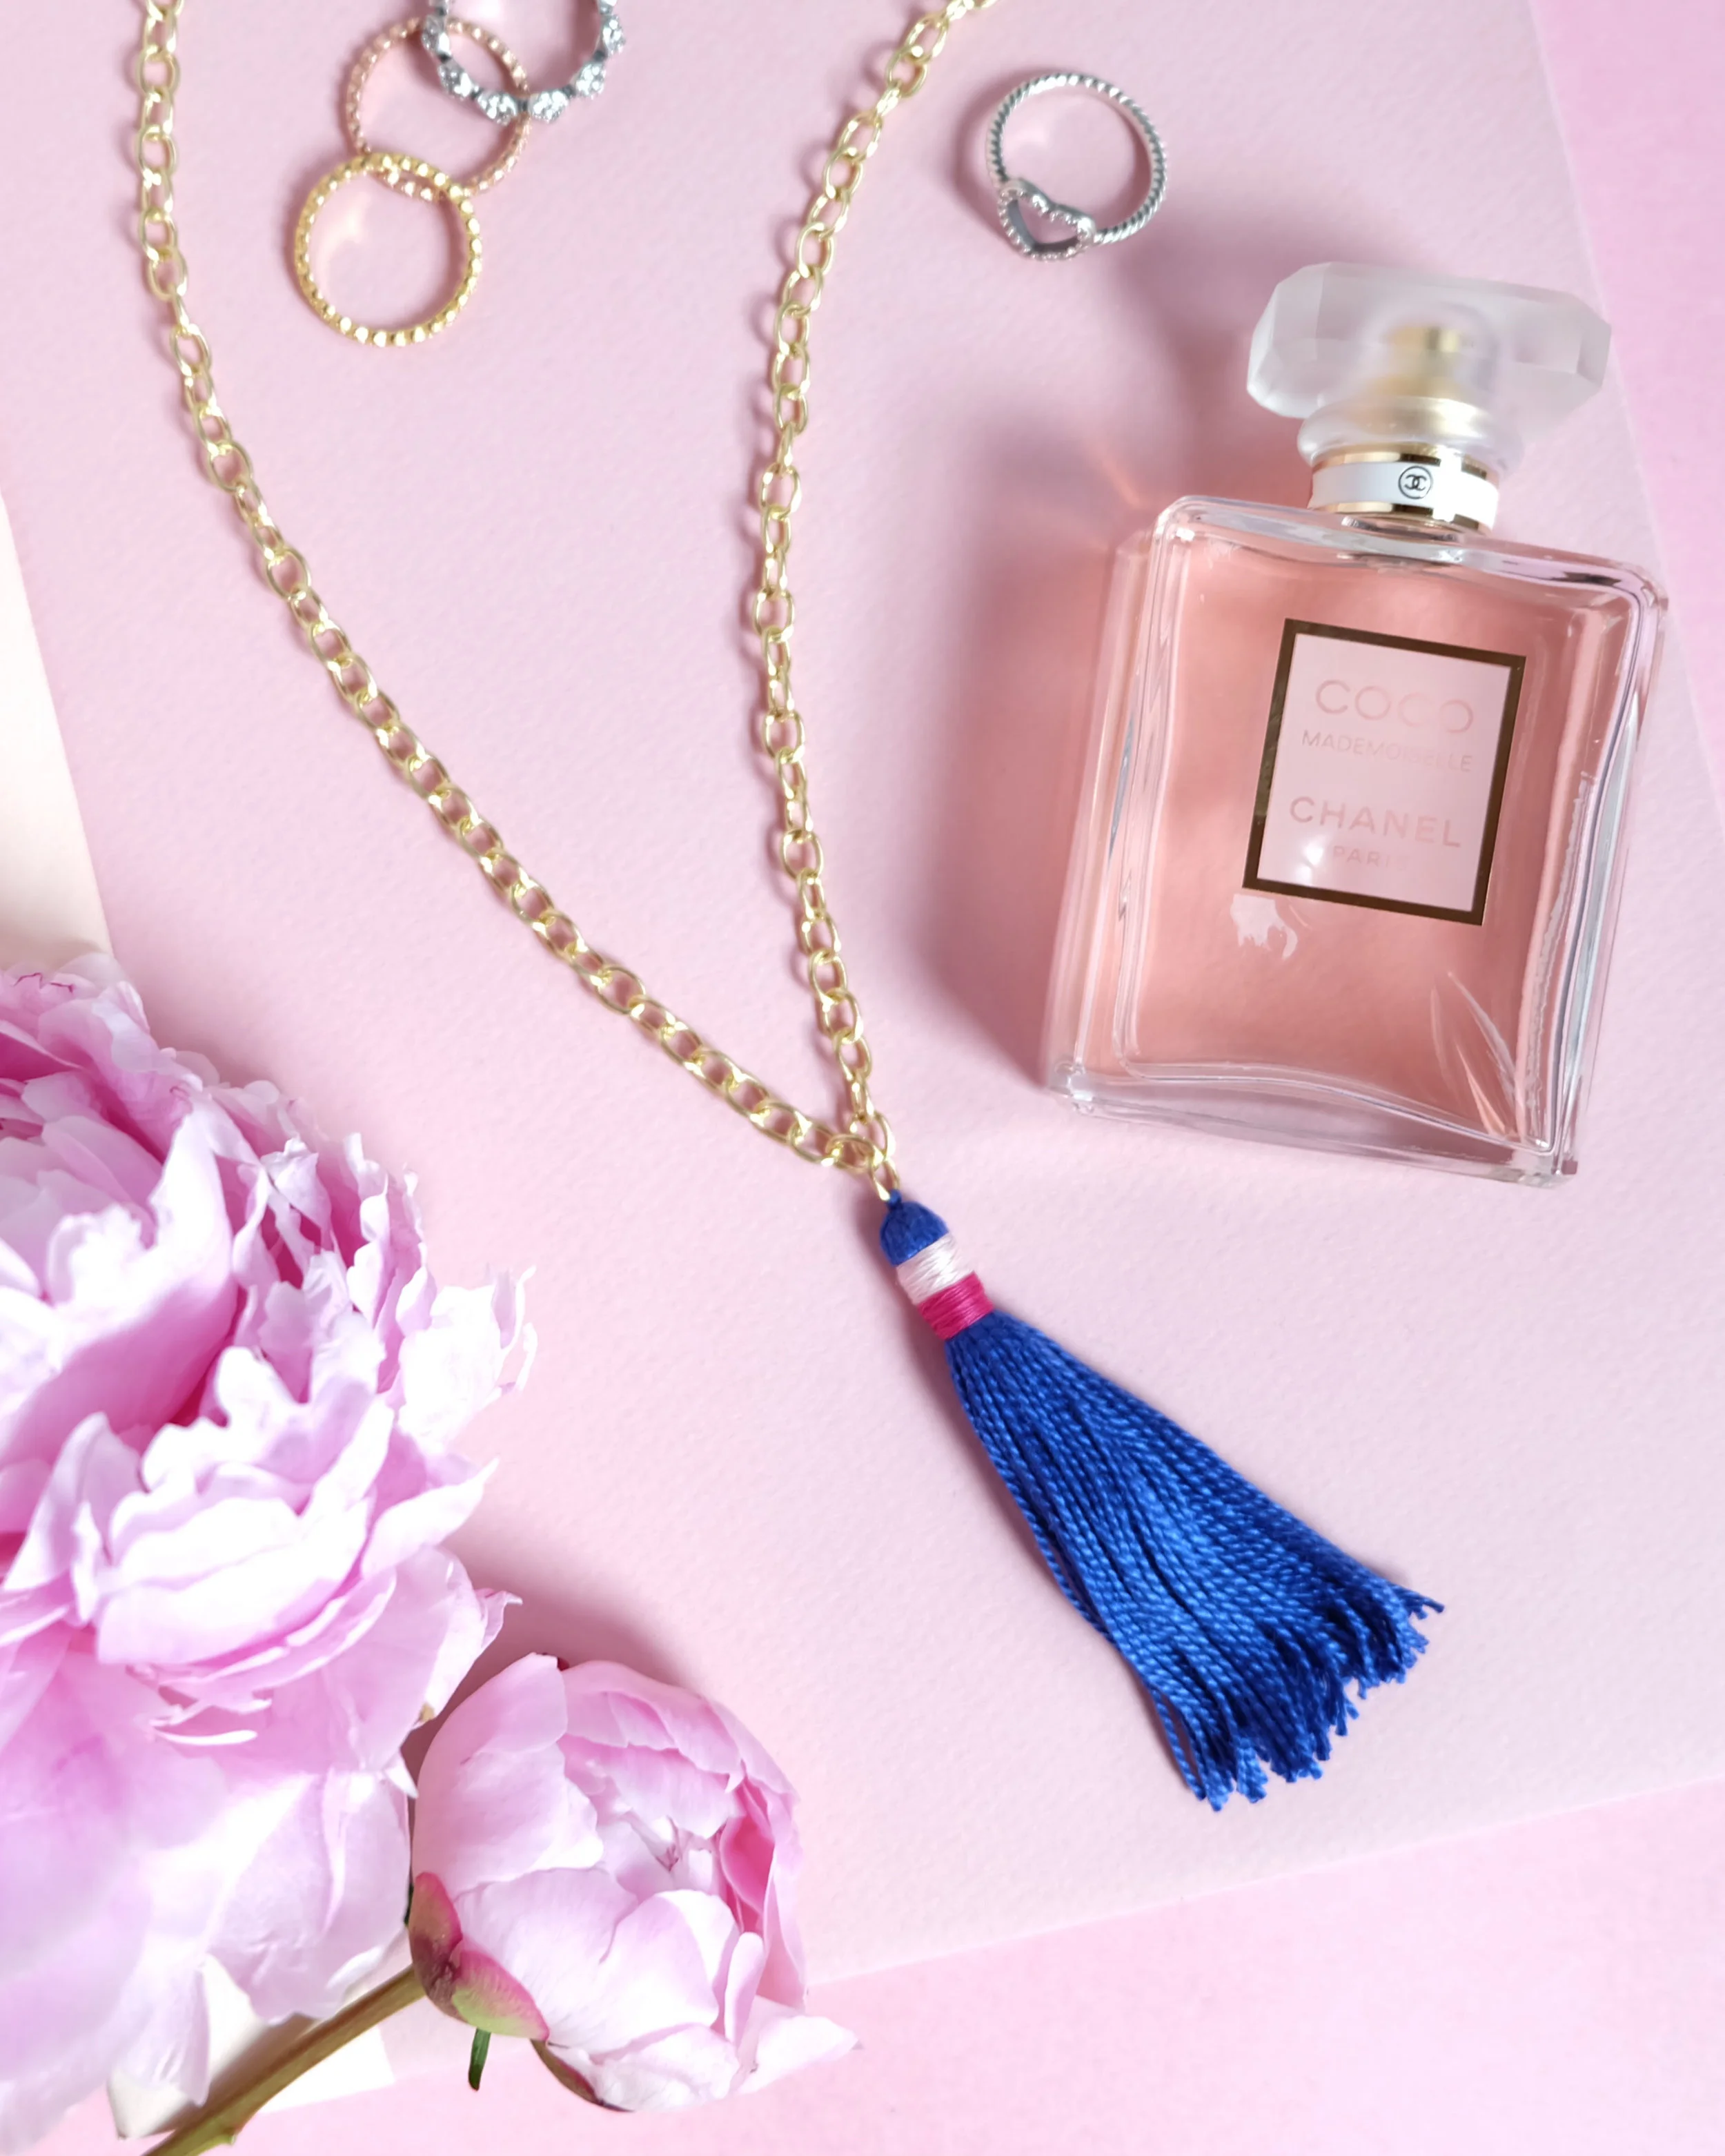
If you're a frequent reader of Me & Mr. Jones, then you know I'm sort of addicted to tassels (also, thank you so much for reading!). I've done a couple of DIY tassel projects before (see them here & here), but this one is SUPER easy! This DIY is not only simple, but it will add the perfect pop of color to any summer outfit. Are you ready to get started?!

WHAT YOU WILL NEED:
1. Gold chain. I re-purposed an inexpensive chain I already had and removed the pendant it had on it. Make sure to look through your costume jewelry and see if you have a chain you could use there before buying one!
2. Embroidery floss. I used cobalt blue because I already had it at home, but choose any color that you think you'll wear the most.
3. 2 different color sewing threads. I used light pink and dark pink, but feel free to choose whatever color accents the embroidery floss you choose the best!
4. Embroidery scissors. These aren't absolutely necessary, but certainly make cutting the strings easier and more accurate. Plus, they're so cute!
5. Regular Scissors. I love these gold ones from Target!
DIRECTIONS:
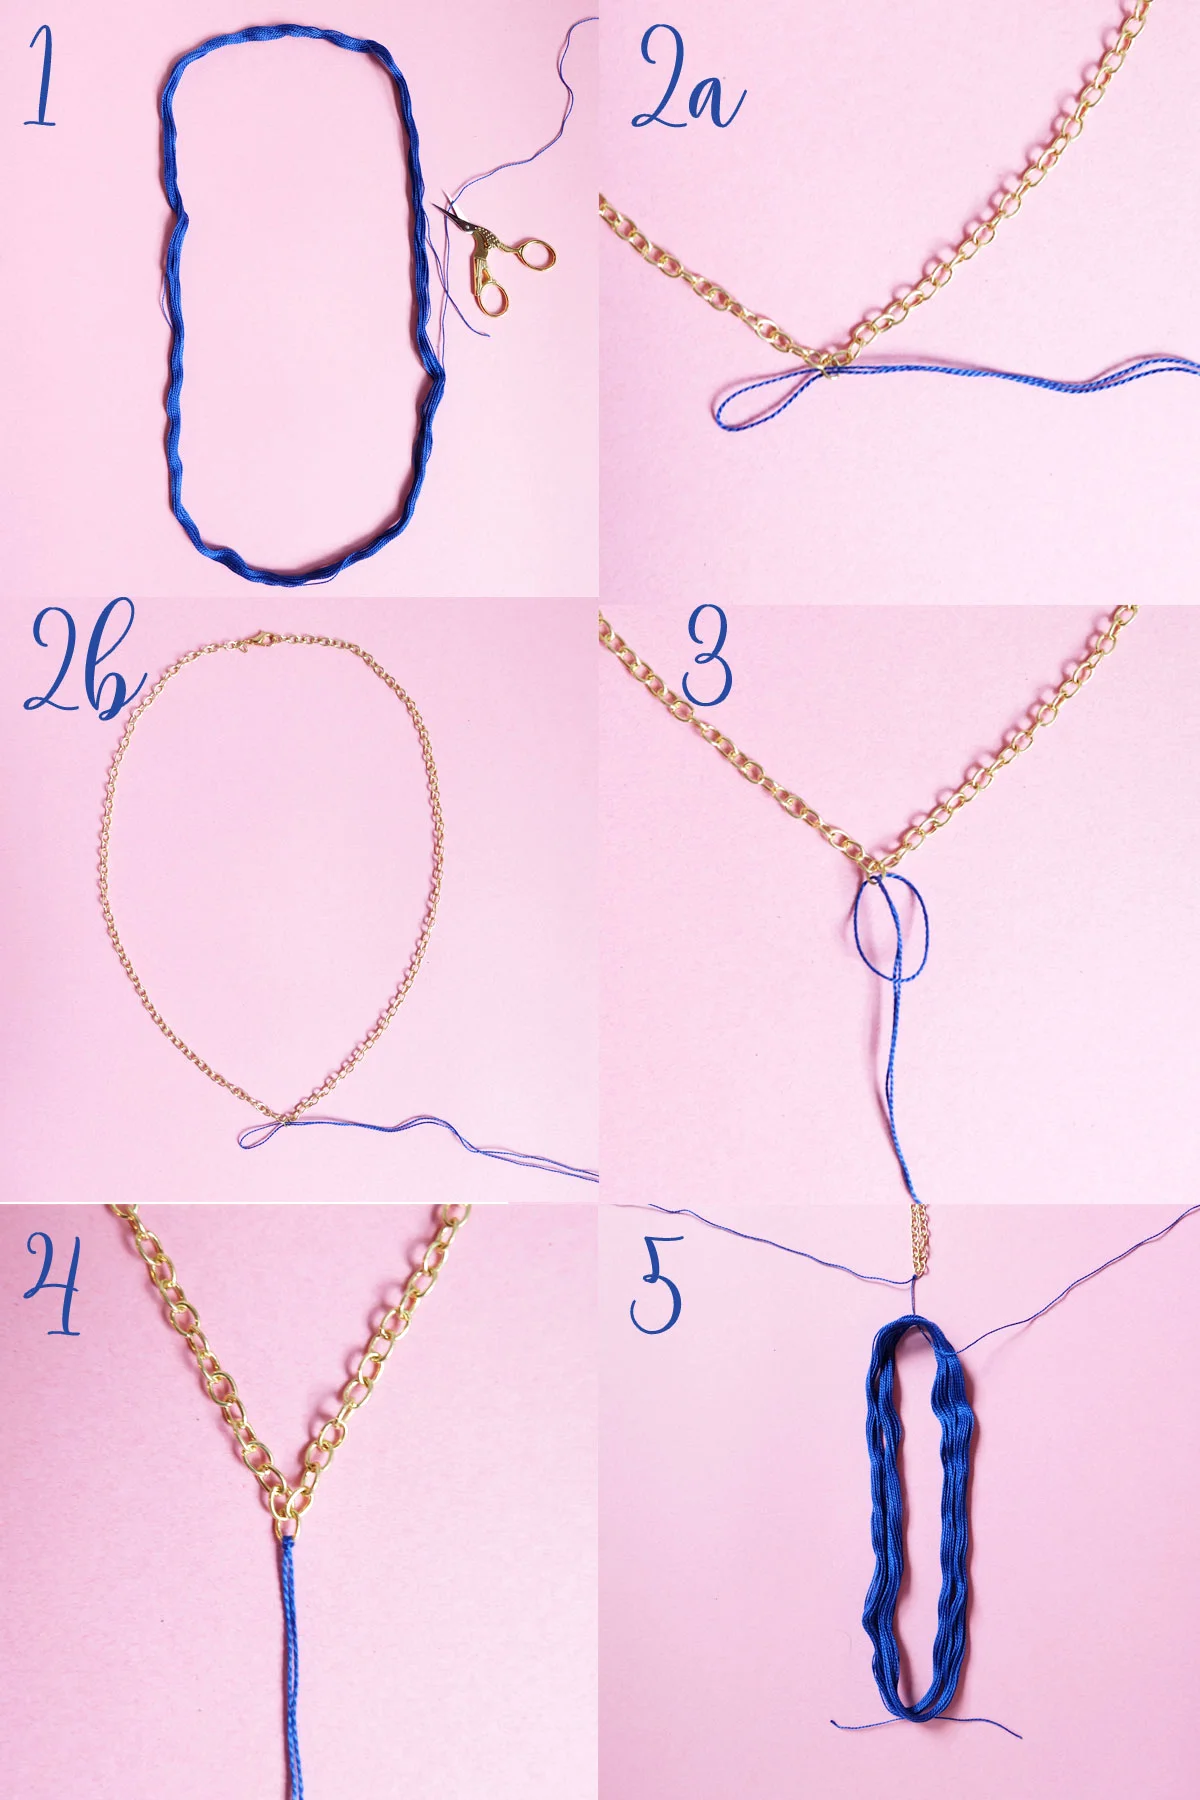
1. Cut a 6" piece of embroidery floss.
2. Fold the 6" piece of embroidery floss in half and thread the top of the loop through the center of the gold chain. 2a and 2b are the same step, I just wanted you to see what part of the necklace I was threading the floss through!
3. Loop the "tail" of the embroidery floss through the loop, creating a "lark's head" knot.
4. Tighten the knot.
5. Double the embroidery floss.

6. Use the tail ends of your lark's head knot to secure the embroidery floss. I tied two knots and made sure they were very tight.
7. Using the same two tail ends, bring the embroidery floss around and tie two more knots (one on top of the other). This will form the top of your tassel.
8. Cut a very long piece of sewing thread and tie the first color of sewing thread on top of the two knots you just made.
9. Tightly wrap the sewing thread until it completely covers the embroidery floss and is about 1/4" wide.
10. knot the sewing thread and trim the end. Using the end of your embroidery scissors, tuck the excess thread underneath the tightly woven pieces. Repeat step 8 for your second color.
11. Repeat steps 9-10 until you have about 1/4" of your second sewing thread color. Make sure to knot it 2-3 times and tuck the excess thread. Using larger scissors, trim the tassel to your desired length. Mine is approximately 2" long.
I hope you will enjoy your new DIY tassel necklace all summer long! If you post any photos to Instagram, use the hashtag #MAMJdiy so I can see your beautiful work!
Thank you for stopping by Me & Mr. Jones today!

